Customer Data Sharing
Overview
For the customer to share data with you they need to open an account on the platform associated with your lender account. This is a process followed by the customer.
Accepting an invitation
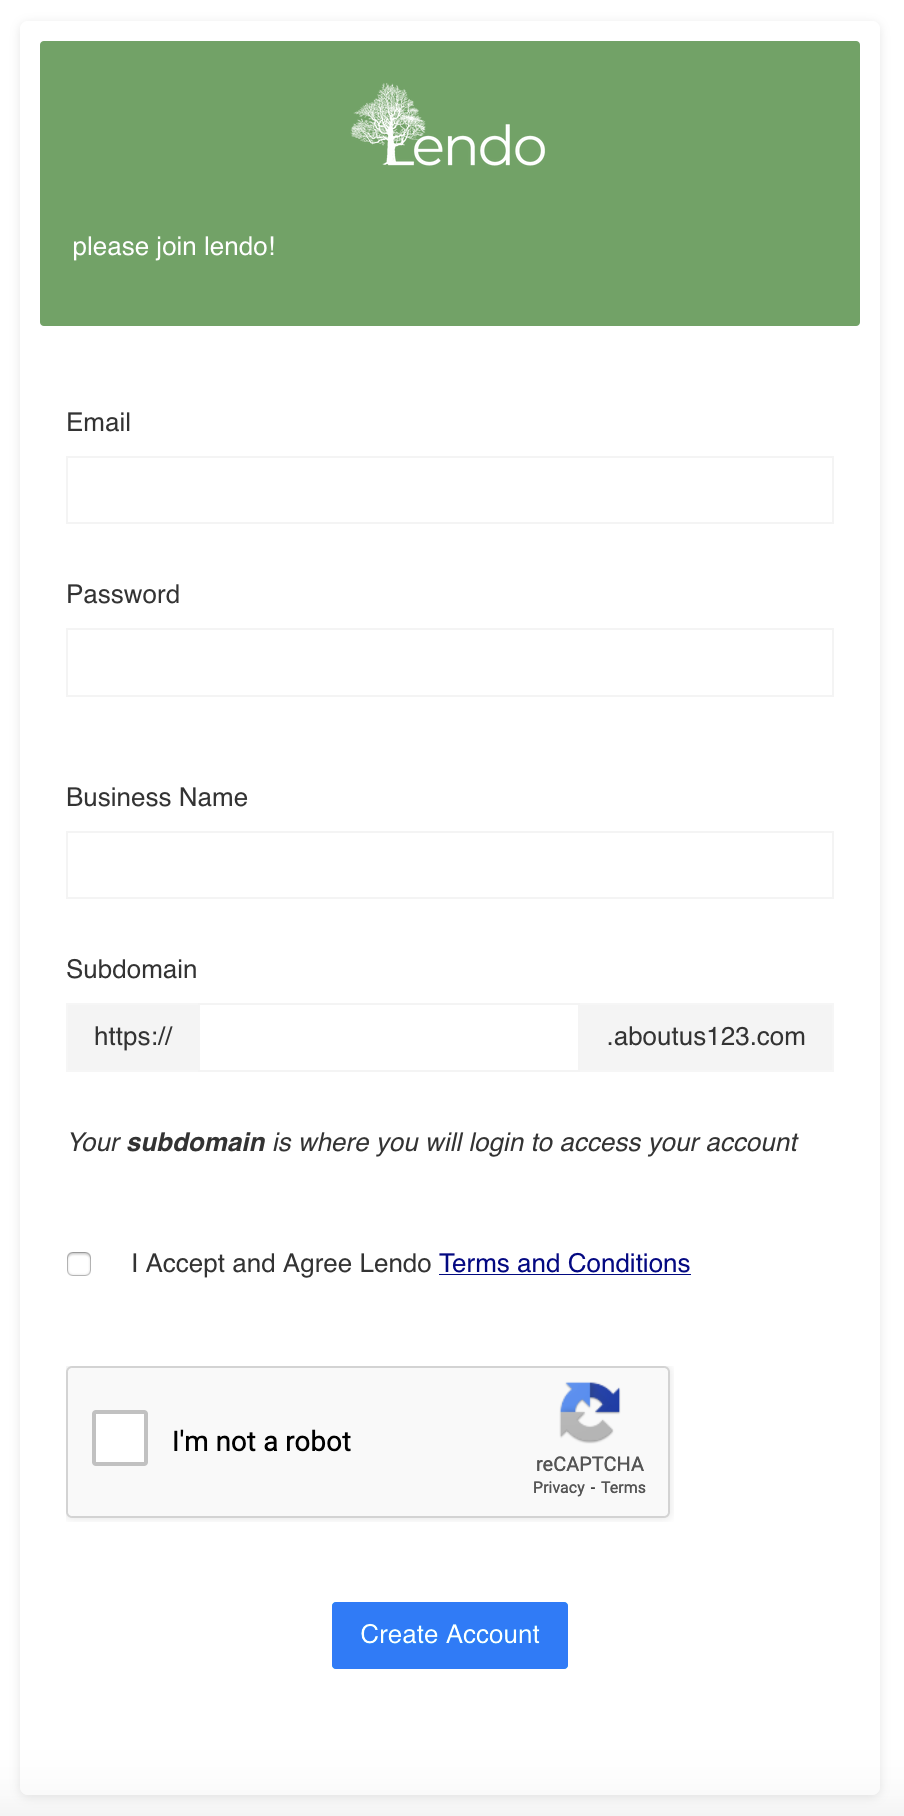
The customer should be sent an email to go to your Join page and create an account.
They fill in their business email address and choose a password to access the account. They will also need to choose an account subdomain to access the platform, this is a unique URL and it is recommended that they bookmark it (it will also be sent in their account confirmation email). They will need to accept the platform terms and conditions before being granted access. After clicking `Create Account` they will be shown a confirmation page which summarizes the information entered and provides a link to login to the platform after they confirm their email address.
Sharing information
When the customer signs in to the platform they will be shown your welcome page content and see their workflow in the side navigation
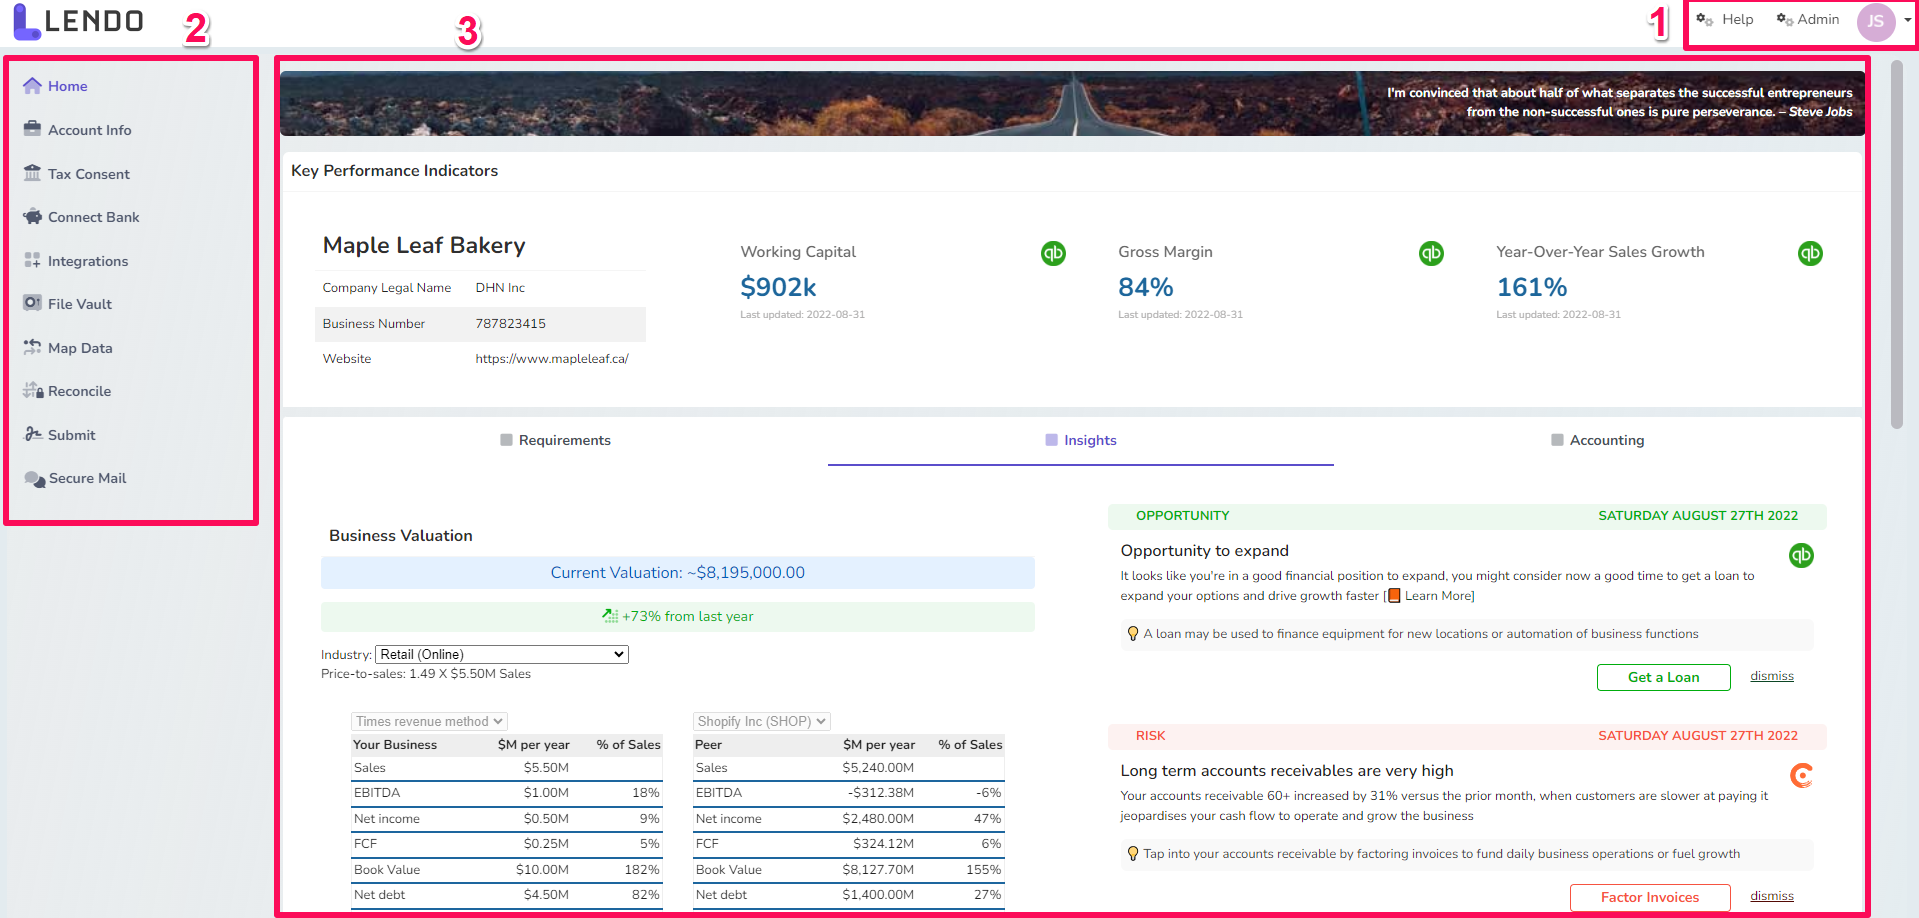
The main areas are:
Top navigation - options include from left to right: “Help”, “Admin” that leads to the admin portal login, and “Profile” which is the avatar. Customers can logout from clicking the avatar and then clicking “Sign Out”.
Side navigation - displays the workflow to follow and different pages that can be accessed.
Page content - changes to selected workflow tab: show forms, dashboards and other information.
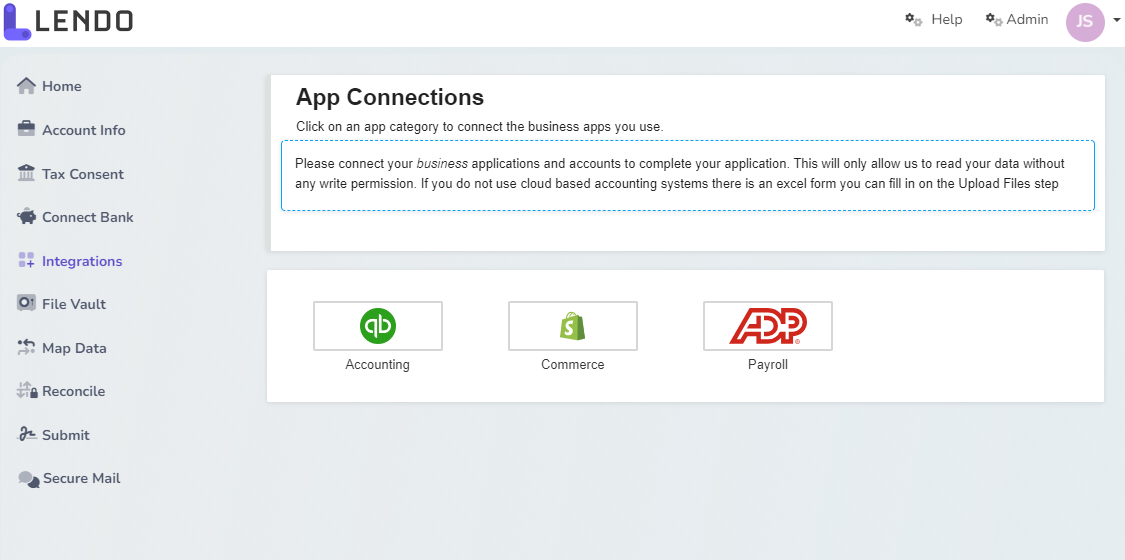
To share information via cloud connection
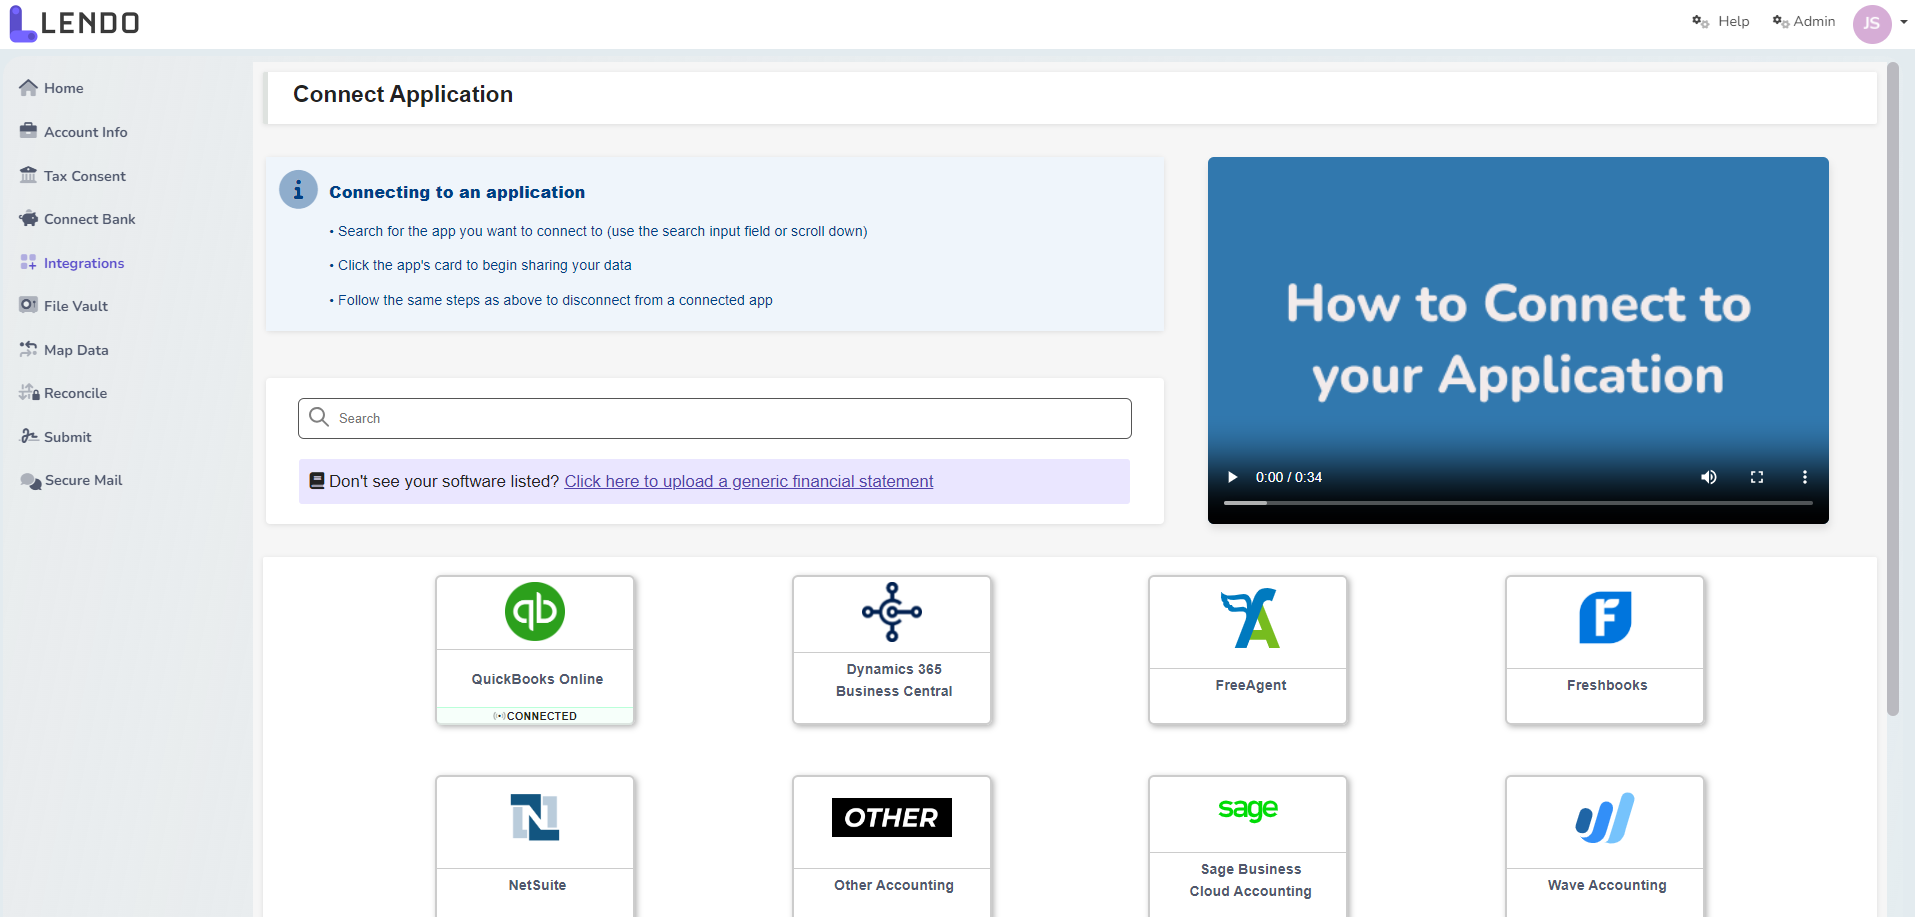
The workflow tab for this might differ but it will typically be called something like “Integrations” or “Connect Applications”. Once the tab is clicked, you will be able to choose from Accounting, Commerce, Banking, or Payroll, depending on what was configured. In the example below, Accounting, Commerce, and Payroll connections are displayed under “Integrations”. This business customer is connected to QuickBooks, Shopify, and ADP.
To connect to a different integration, you may click on any of the boxes to select a different option.
You must have this step configured as part of your workflow.
Three connections are established.
If one of the boxes are clicked it will lead to that respective connection page. Here, there are written and video instructions (if configured) on connecting to a new application as well as some options.
Understanding your data
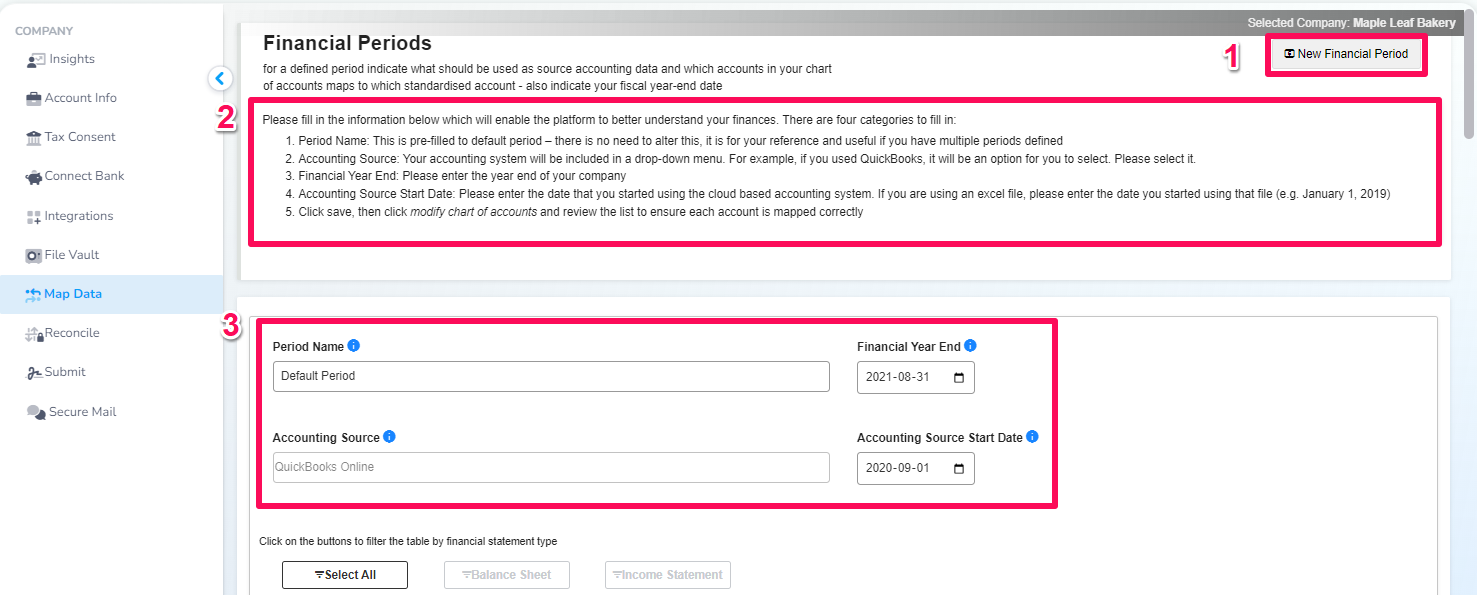
To ensure we understand the financial data provided (either via Cloud or Files) we ask the customer to create a mapping of their chart of accounts to yours. We define these mappings within “Financial Periods”, these represent lengths of time for which they consistently used a given accounting source (i.e. Accounting software like QuickBooks).
After selecting a company by either searching on the company search bar or clicking “Portfolio” and clicking the company name, you must select the “Map Data” option from the workflow. This section might be labelled differently such as “Financial Periods”.
This step must be configured as part of your workflow
On the Financial Periods page, there will be:
New Financial Period button - You may click this button to start a new financial period.
Instructions - These are instructions for filling out the form.
Form data - This where you will fill out information for the financial period such as:
Period Name
Financial Year End
Accounting Source. This will be the name of the accounting software if a cloud connection is used.
Accounting Source Start Date. This is the date from which they started using this method of accounting
Chart of Accounts Filters - You can filter by financial statement type or account type.
Chart of Accounts - Mapping - This where you can map data.
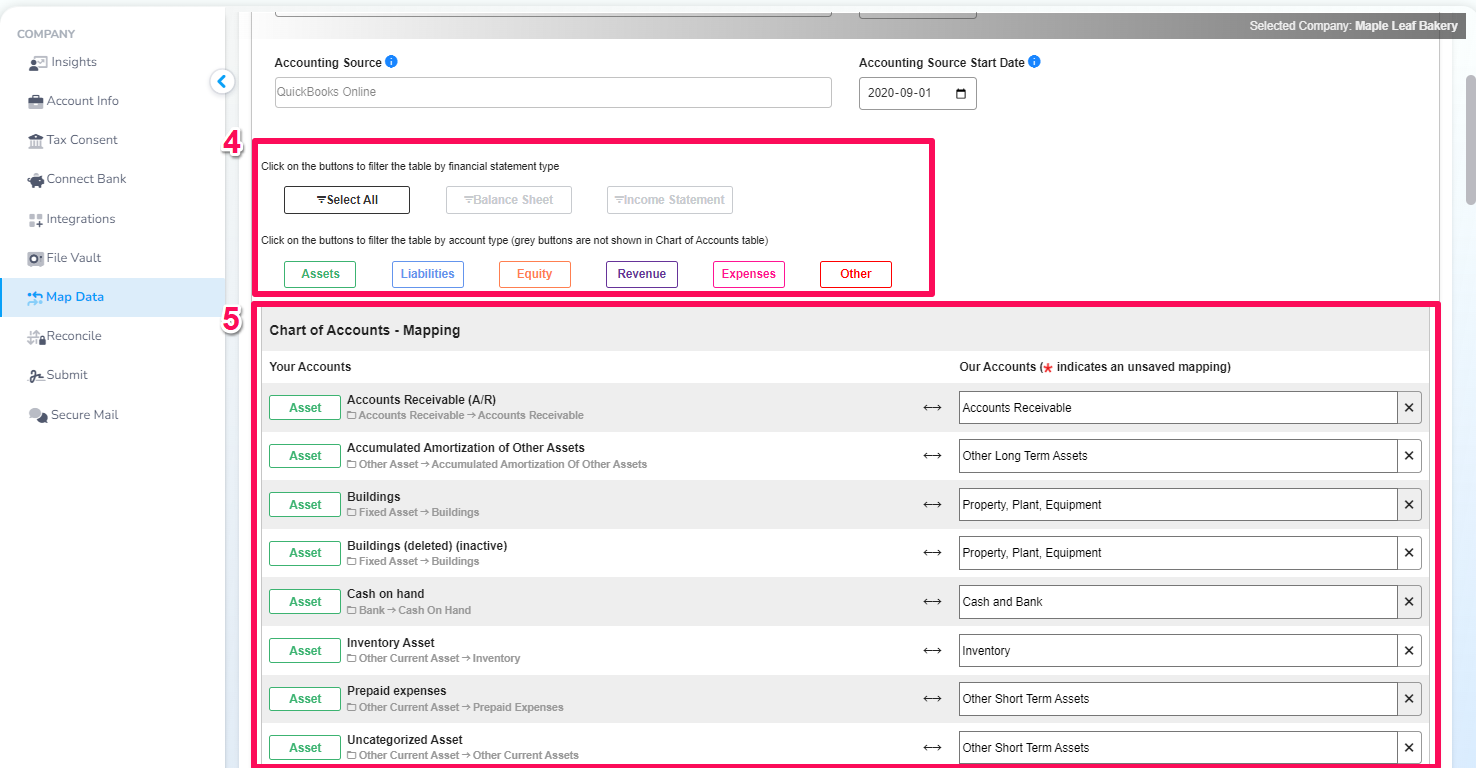
Below is a zoomed in view of the Chart of Account - Mapping. A list of their accounts is displayed along with an option to categorize each. Many of these may already be automatically matched, some may require to select an appropriate category. As an example if you have an account in your Chart of Accounts for your bank chequing account you would categorize this as “Assets - Cash and Bank”.
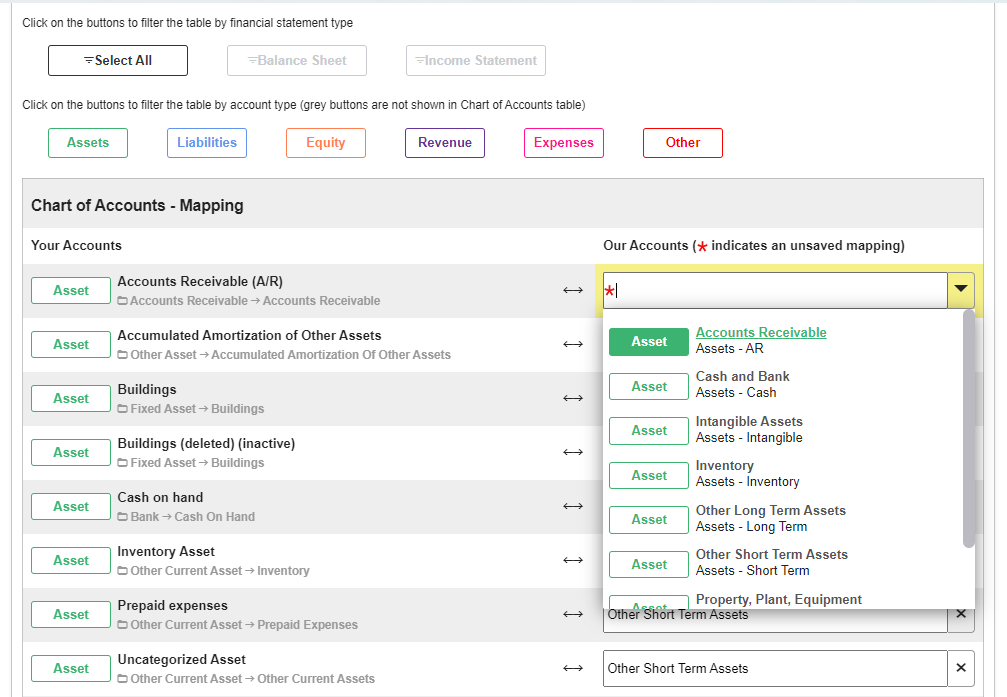
Please note this is a one time process until you change your chart of accounts. Be sure to click the “Save” button in the bottom left of the page.
Keeping current (optional)
Each month business customers will be required to provide current financial information.
If they provided data via cloud connection then they should just need to provide an updated reconciliation date, while if they provide data via files then they will need to upload and import these as before.
When new information is required or if there is a problem connecting to the cloud apps we will also send a notification email. They should also login to the platform monthly in case our notification emails get filtered into SPAM.