Branding

Overview
The branding feature contains the majority of content and styling that your customers will see as they use your platform. The key areas of content and styling that can be configured are:
Logo and browser favorite icon
Default package for new customers
Theme and primary highlight color
Onboarding content
Joining the platform landing page
Legal agreement
Registration emails
Welcome page
Notification emails
Getting started
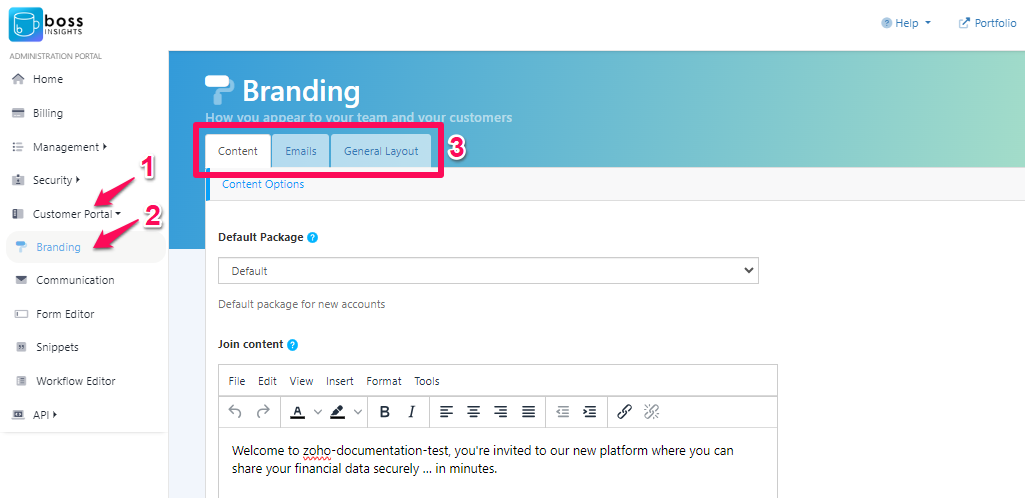
To get started, please log in to your admin portal and then select “Customer Portal” and then “Branding” from the side navigation. A page will display with three main tabs labelled “Content”, “Emails”, and “General Layout” that contain many branding options.
After modifying any of these values click ‘Save Changes’ to have the changes take immediate effect.
Inserting Links
Note that you can insert links within the editor and several links are predefined, for example to get the link needed to join your portal choose Insert > Link from the editor, the Link List option will then provide the Join Platform link for you.
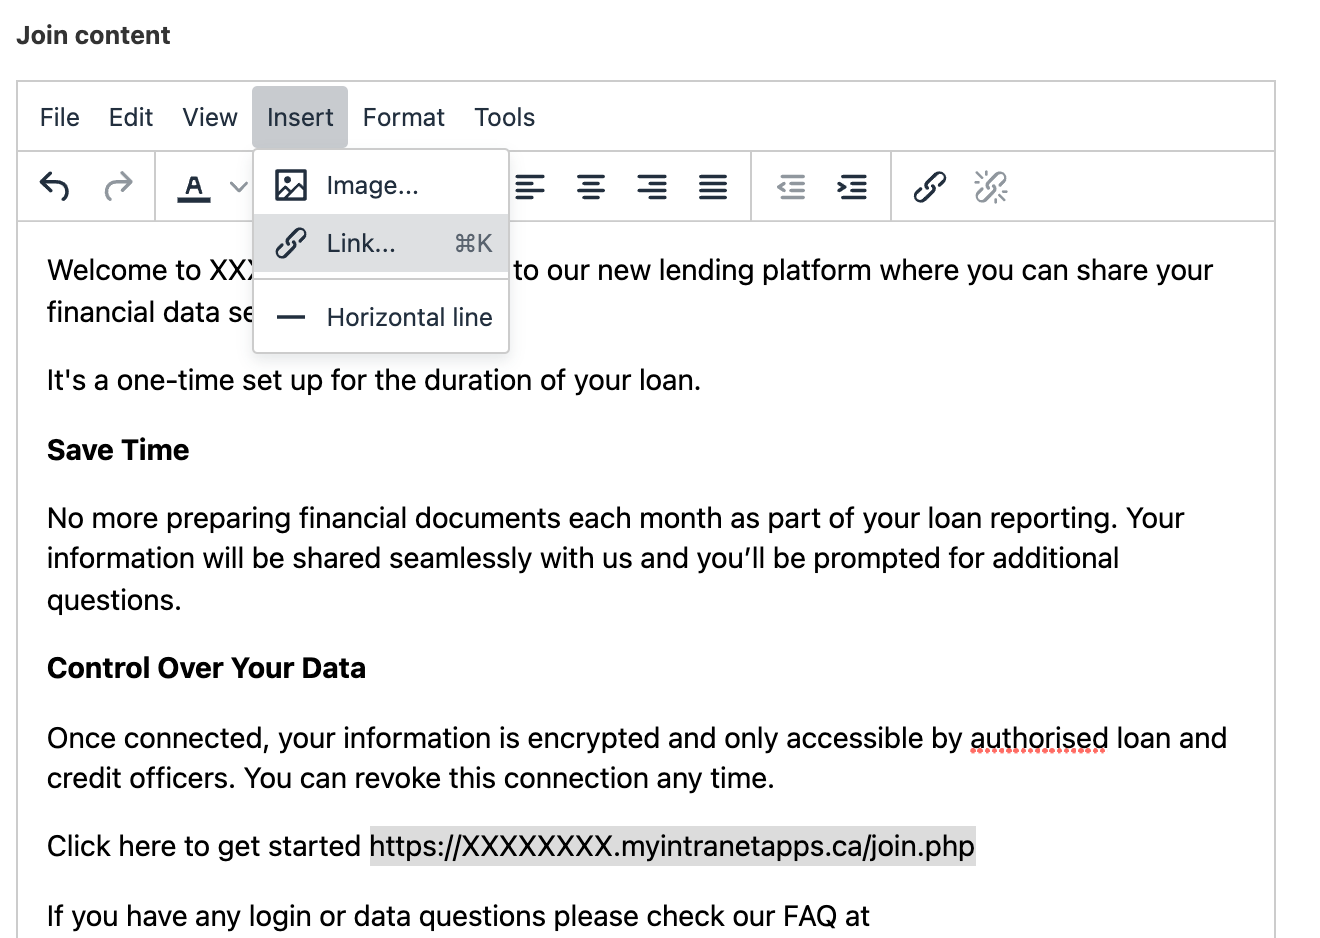
Inserting a Link
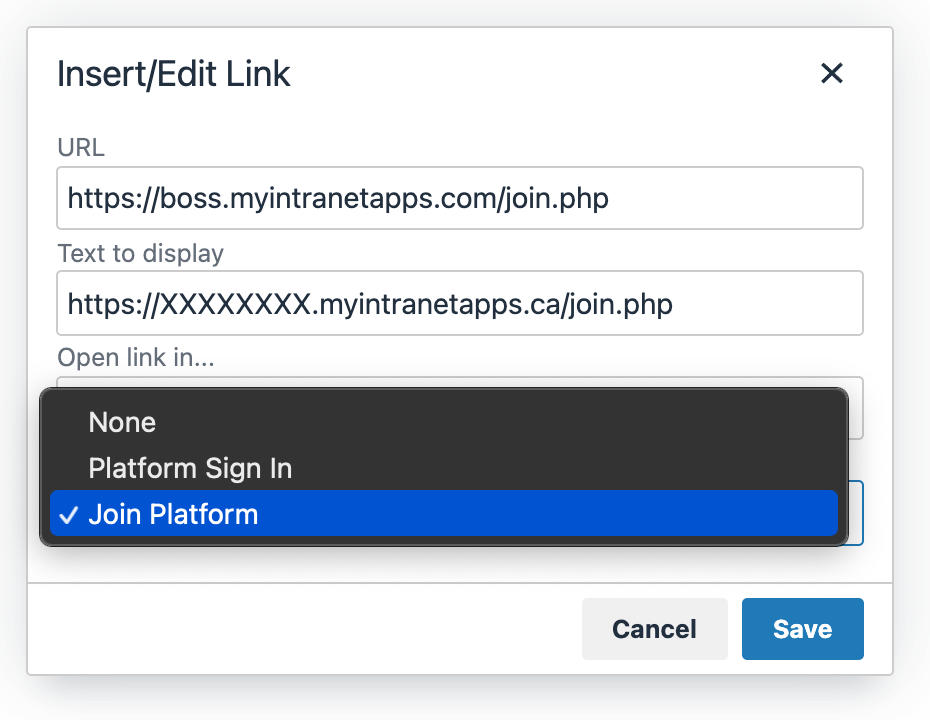
Selecting a predefined Link
Placeholders
In some of the templates above you might notice some links being presented between two curly brackets such as {{ accountUrl }}. These are placeholders that our system will automatically replace with the correct designated link for each user. You may use these in your emails, available placeholders are listed alongside their sections below.
Content Tab
Under the “Content tab”, you will be able to customize content related options such as the default package, welcome content, and terms and conditions. Each customizable option is listed and explained below.
Default Package
The default package dropdown menu allows you to select a default package that each new customer. Please visit our Accounts and Packages page to learn more.

Join Content
Once your customer is invited to the Boss Insights platform, they will receive a “join” link. This link will lead them to a “join” page where they can enter in their information to create an account.
We’ve provided a template you may follow:
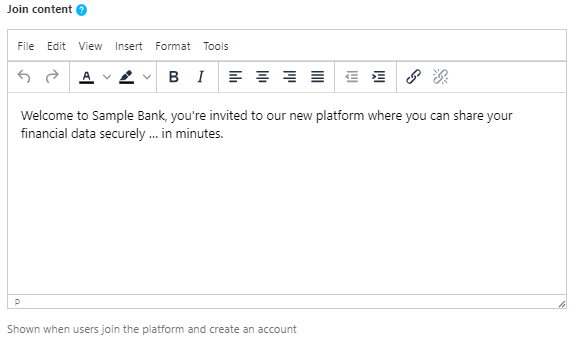
Example “join text”
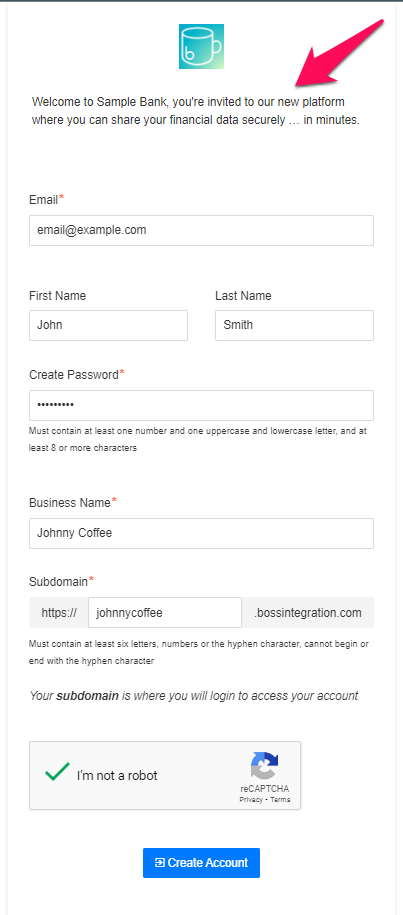
How the content will appear on the “join” page. Logo can be customized under the “General Layout” tab.
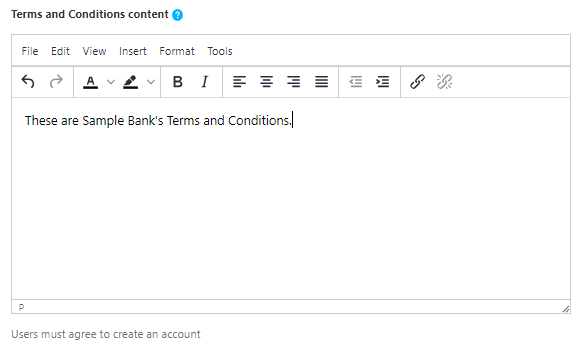
Terms and Conditions Content
Shown on the “join” page, These conditions need to be agreed to when a user joins your portfolio. See our example terms.
Editing content on the branding page
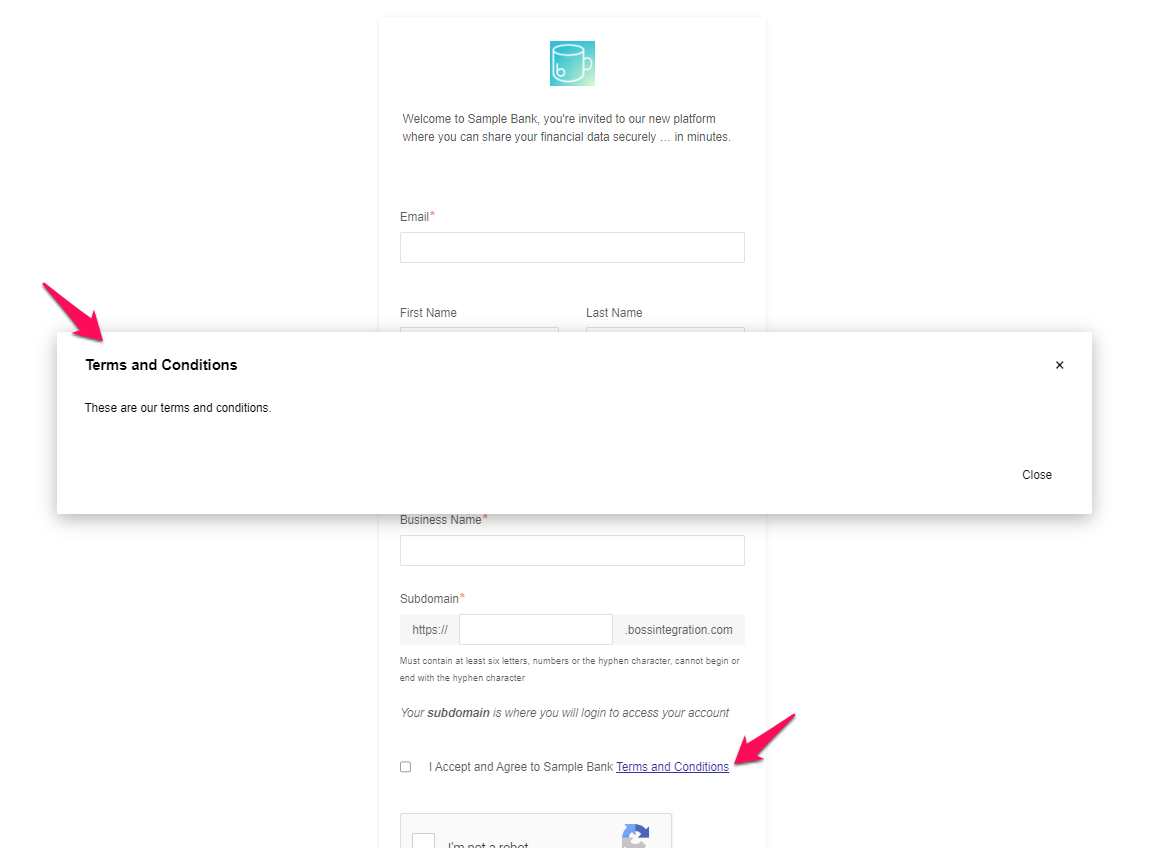
Terms and Conditions on “join” page
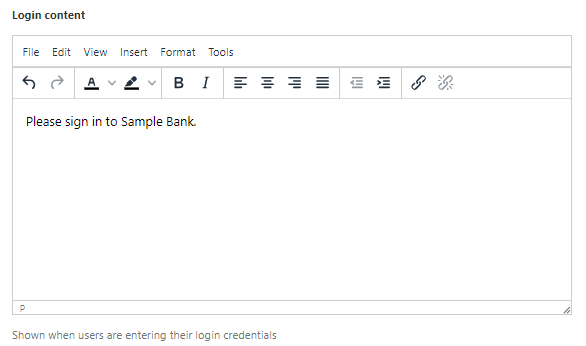
Login Content
This is what your customer will see when they enter their login credentials.
Editing login content on the branding page
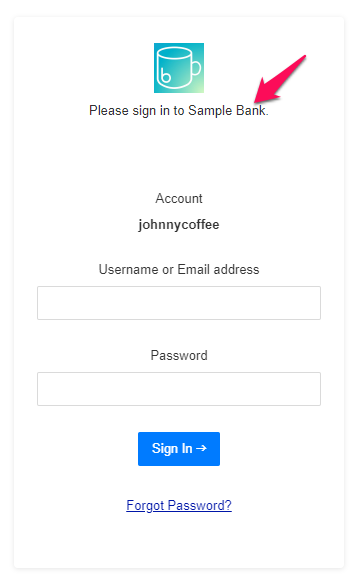
Log in page for customer. Logo can be customized under the “General Layout” tab.
Welcome Content
Each time the user signs in to the portal they will be shown this welcome content first. It is a good place to provide instructions, links and relevant updates.
We’ve provided a template you may follow:
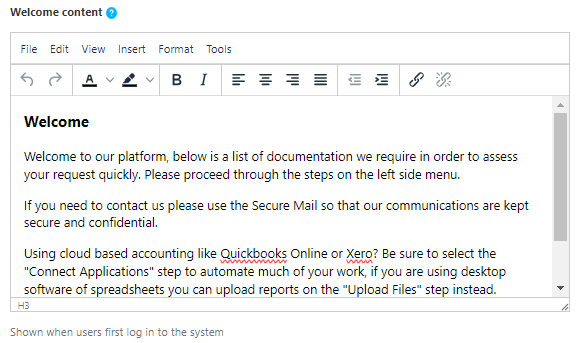
Editing welcome content on the branding page
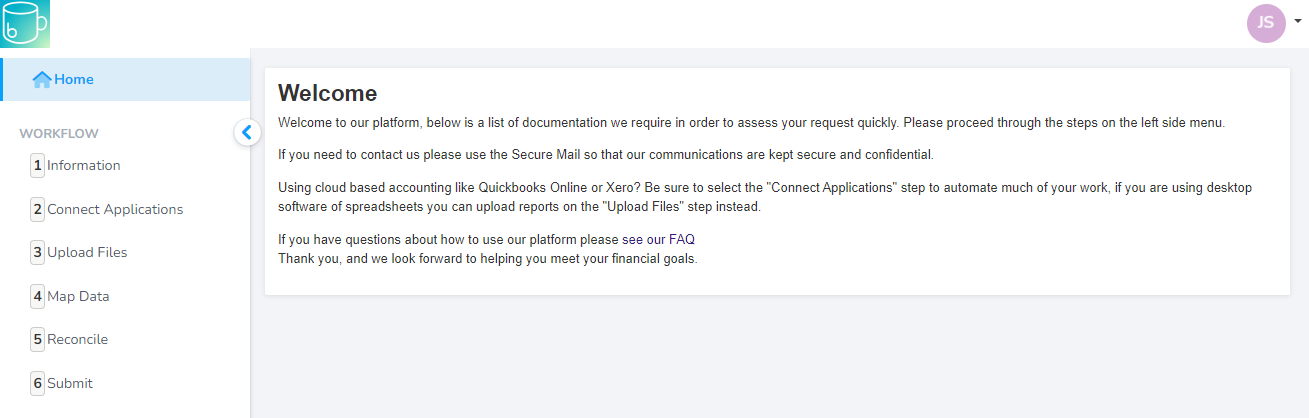
When a customer logs in to their portal, they will see the welcome content.
Emails Tab
Under the “Emails” tab, you will be able to customize emails such as invites and who you would like the emails to appear to come from. Each customizable option is listed and explained below.
Brand Name (System Name)
This is the name emails will appear to come from, typically this would be your organization or department name.
Brand Email Address (System Email Address)
The email address that notifications will appear to come from and replies will be sent to.
Banner File
Please choose a banner that you would like to appear at the top of all email communication. Below is an example of a banner and how it appears in an invite email.
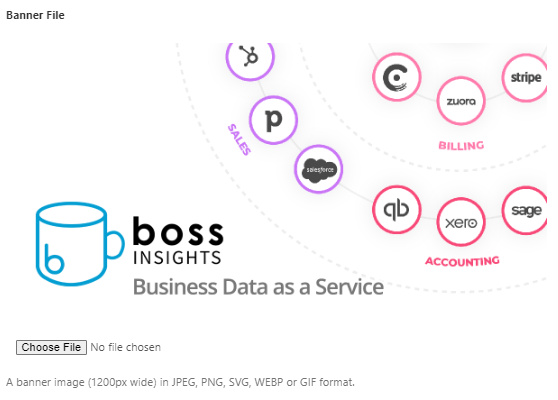
Uploaded banner file

Example email
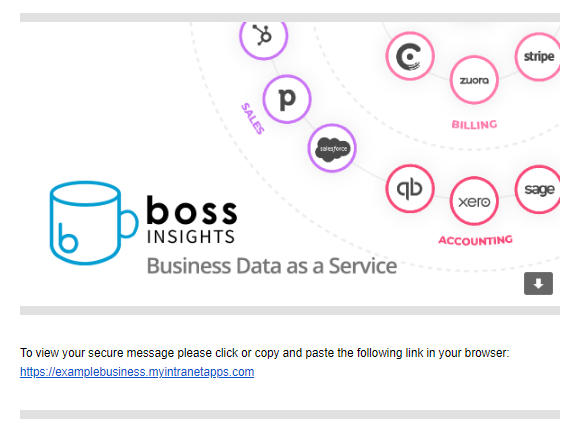
Invite Email
Sent when initially asking a customer to sign in and join your platform.
We’ve provided a template:
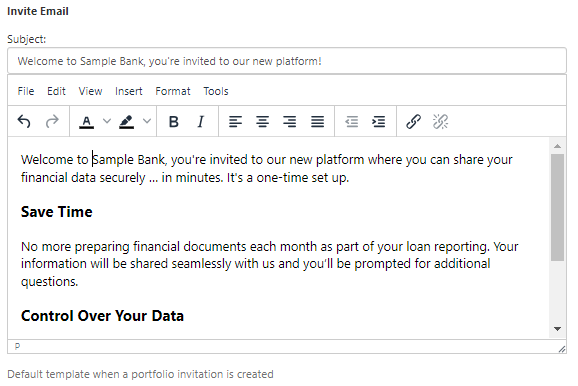
Email configuration
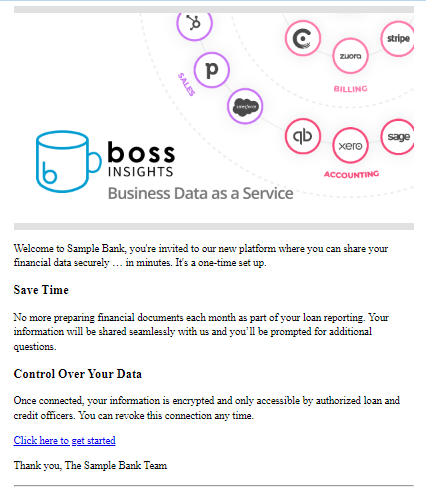
Example invite email. This email has a custom banner.
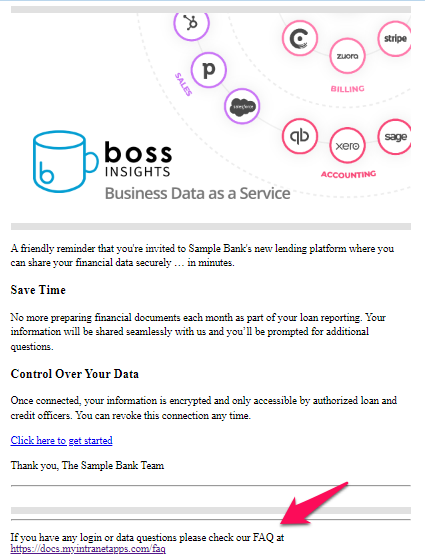
Invite Reminder Emails
This email is sent to remind a customer to sign up if they haven’t already done so. The frequency can be determined under “Invite Reminder Email Default Frequency” or customized with each individual email.
We’ve provided a template:
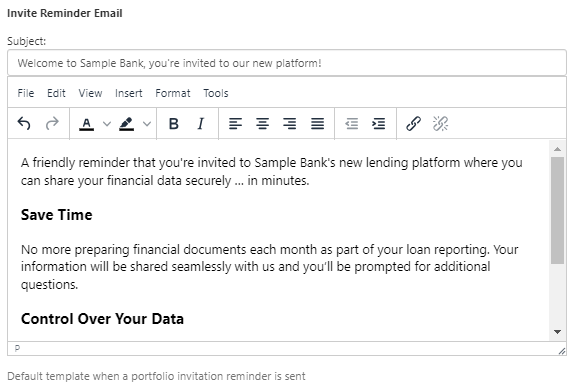
Email configuration
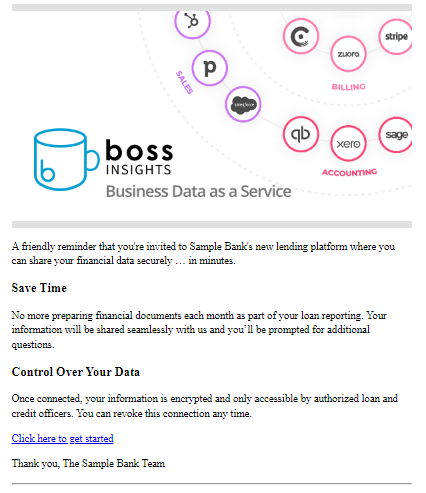
How the email will appear. This email has a custom banner.
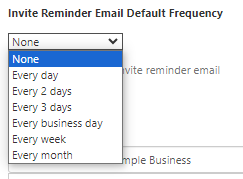
Invite Reminder Email Default Frequency
You can select the default frequency at which invite reminder emails are sent. These emails will only be sent if the customer has not yet signed up. You may also customize the frequency depending on the customer when individual invites are sent out through your invitations page.
Data Reminder Email
Sent when data is required or overdue.
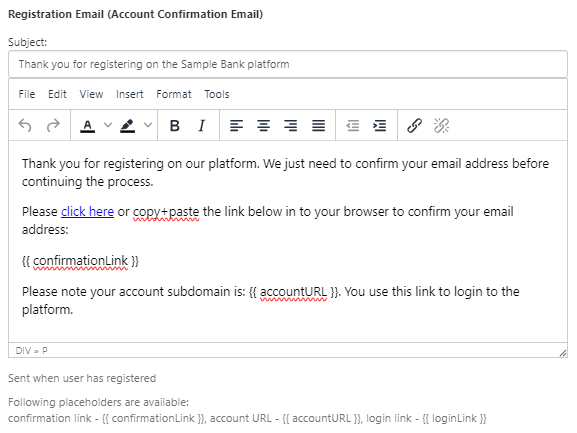
Registration Email (Account Confirmation Email)
Sent when the user completes the form on the “join” page, it contains a confirmation link to verify their email address.
We’ve provided an example email:
Email Configuration
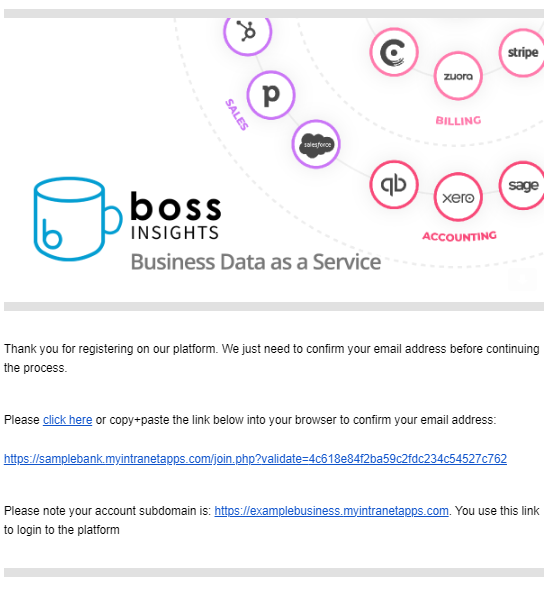
Example email
Available Placeholders:
confirmation link - {{ confirmationLink }}
account URL - {{ accountURL }}
login link - {{ loginLink }}
Registration Complete Email
Sent when the user completes verifying their email and can now sign in to the platform.
We’ve provided an example email:
Available Placeholders:
account URL - {{ accountURL }}
Application Received Email (Optional)
When an application process has been configured for your account this is the content that will be sent to the user when they submit an application.
Application Processed Email (Optional)
When an application process has been configured for your account this is the content that will be sent when you move their application to a processed status.
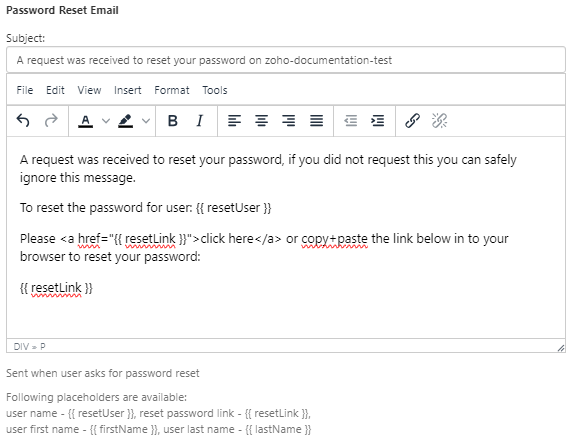
Password Reset Email
Sent when a user requests a new password. You may wish to also include support contact details.
We’ve provided an example email:
Email configuration
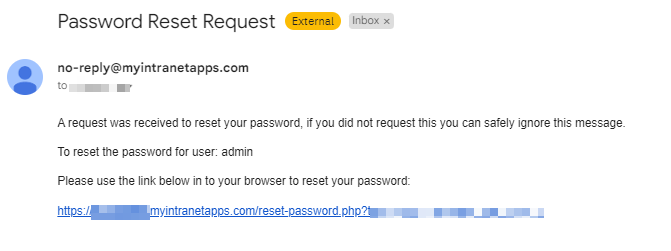
Example password reset email. Please note that this email does not have a banner.
Available Placeholders:
user name - {{ resetUser }}
reset password link - {{ resetLink }}
user first name - {{ firstName }}
user last name - {{ lastName }}
Chat Notification Email
Chat notification email - Sent when a user receives a message through the Secure Portal.
We’ve provided an example email:

Example configuration
Example email that the customer would receive, this email also includes a banner
Available Placeholders:
account URL - {{ accountURL }}
Reconnect Email
Sent when a integration connection encounters an error, such as being disconnected, and requires the user to reconnect.
We have provided an example email:
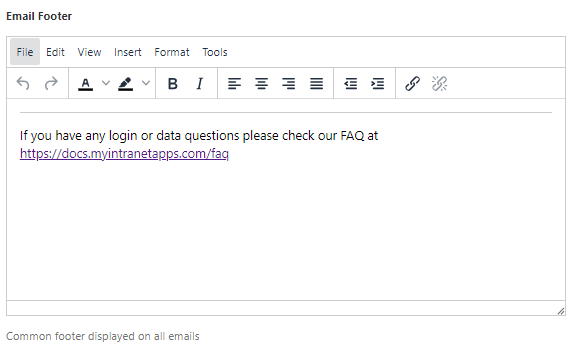
Email Footer
This is the common footer that will be displayed on all emails.
Email configuration
Footer at the bottom of an invite reminder email.
General Layout Tab
Under the “General Layout” tab, you will see the a portal customizer where you will be able to upload a logo and favicon file, choose theme colors, and insert custom CSS. Each customizable option is listed and explained below.
Any changes you make will be reflected in the preview highlighted below. This is a great way to get a sense of how your portal will appear to your business customers.
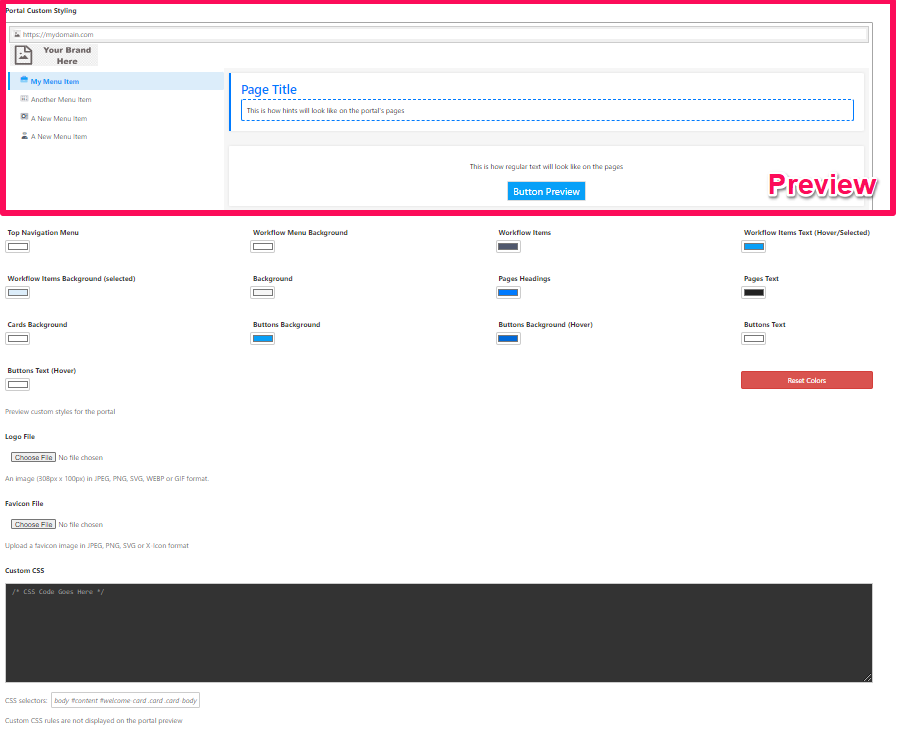
Colours
You are able to customize the color of 11 different components within the portal such as the top navigation menu or button backgrounds. Clicking on a color bar will reveal a picker where you can select a color that you like. Any changes you make will be revealed in the the preview. If you would like to reset the color selection, you can select the red “Reset Colors” button.
Logo File
Your company logo, note that the logo is a PNG format file and should be resized to 308px x 100px specifically. Your logo will appear in many places such as the “join” page, the login screen, the portal, and more.
Favicon File
The ICO/GIF/PNG format file to be used by the users browser for a bookmark and tab icon.
Custom CSS
This is an advanced option for web designers who are familiar with Cascading Style Sheets (CSS) that want to control the visual style more tightly and override fonts and colors
Advanced control over CSS/JS is available for developers via direct access to style sheet and script files, see Custom CSS/JS
After modifying any of these values click ‘Save Changes’ to have the changes take immediate effect.