Qualification Logic
Qualification logic is used to make a YES/NO decision in response to an Originate application being submitted. Based on this decision you can direct an applicant to one of two landing pages (e.g. Application Successful or Declined pages are typical)
How to create Qualification Logic
Qualification logic is configured in a “Form Submit Action”. Follow these steps to add qualification logic to a form:
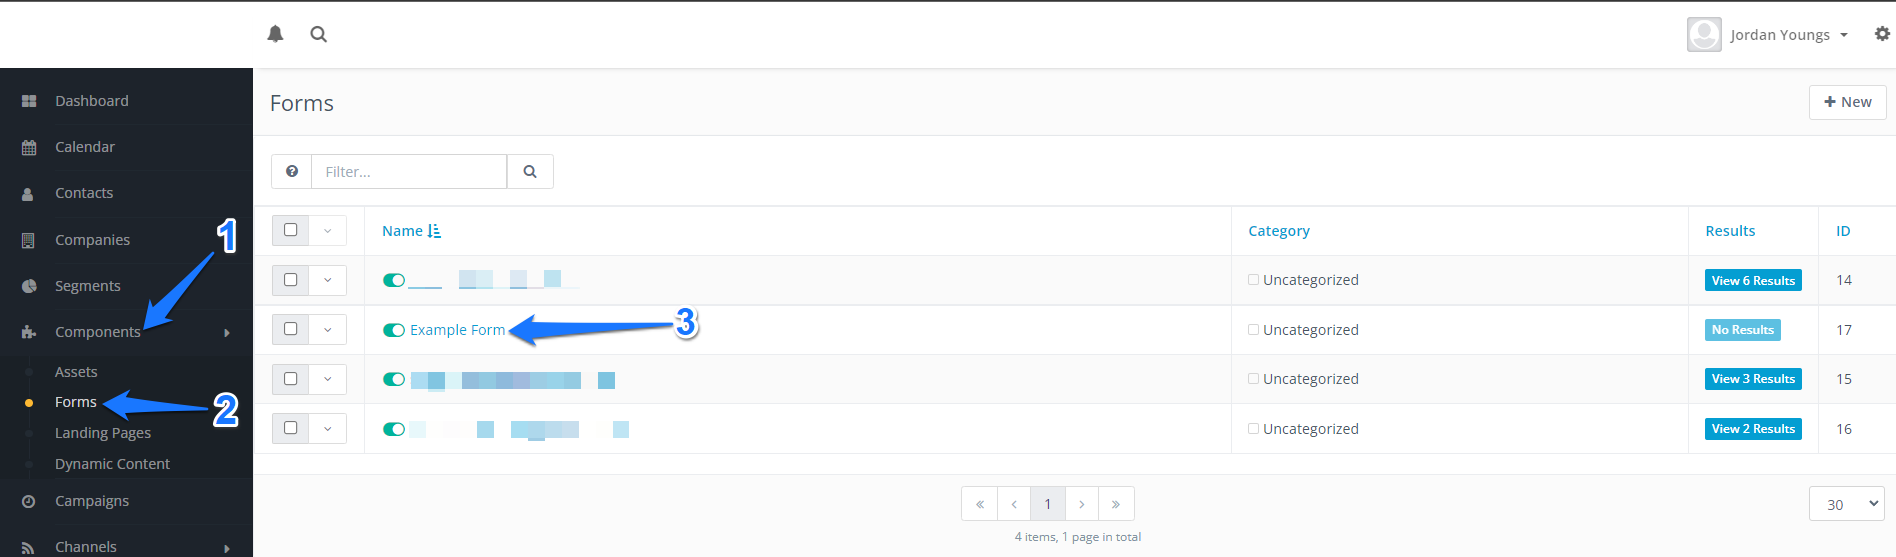
1. Login to the marketing app dashboard.
2. Click Components in the left sidebar menu, then click Forms. In the list of forms, click the name of the form you would like to add qualification logic to.
3. Click the Edit button at the top right of the screen.

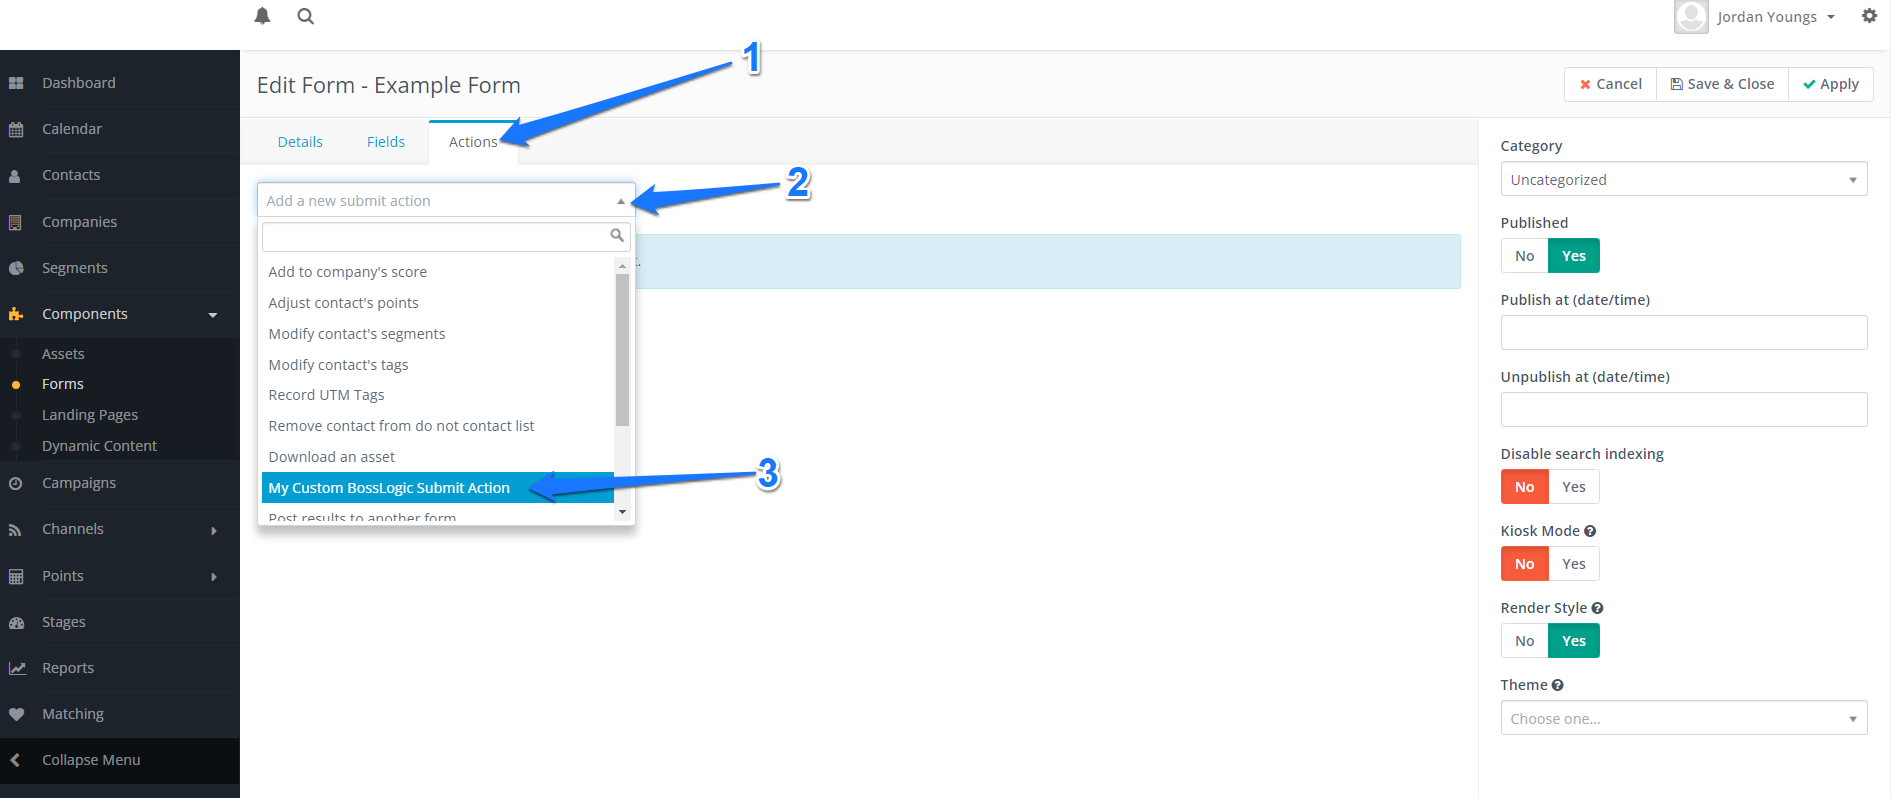
4. Click the Actions tab, click Add a new submit action to open the dropdown list of actions, then select My Custom BossLogic Submit Action from the list.
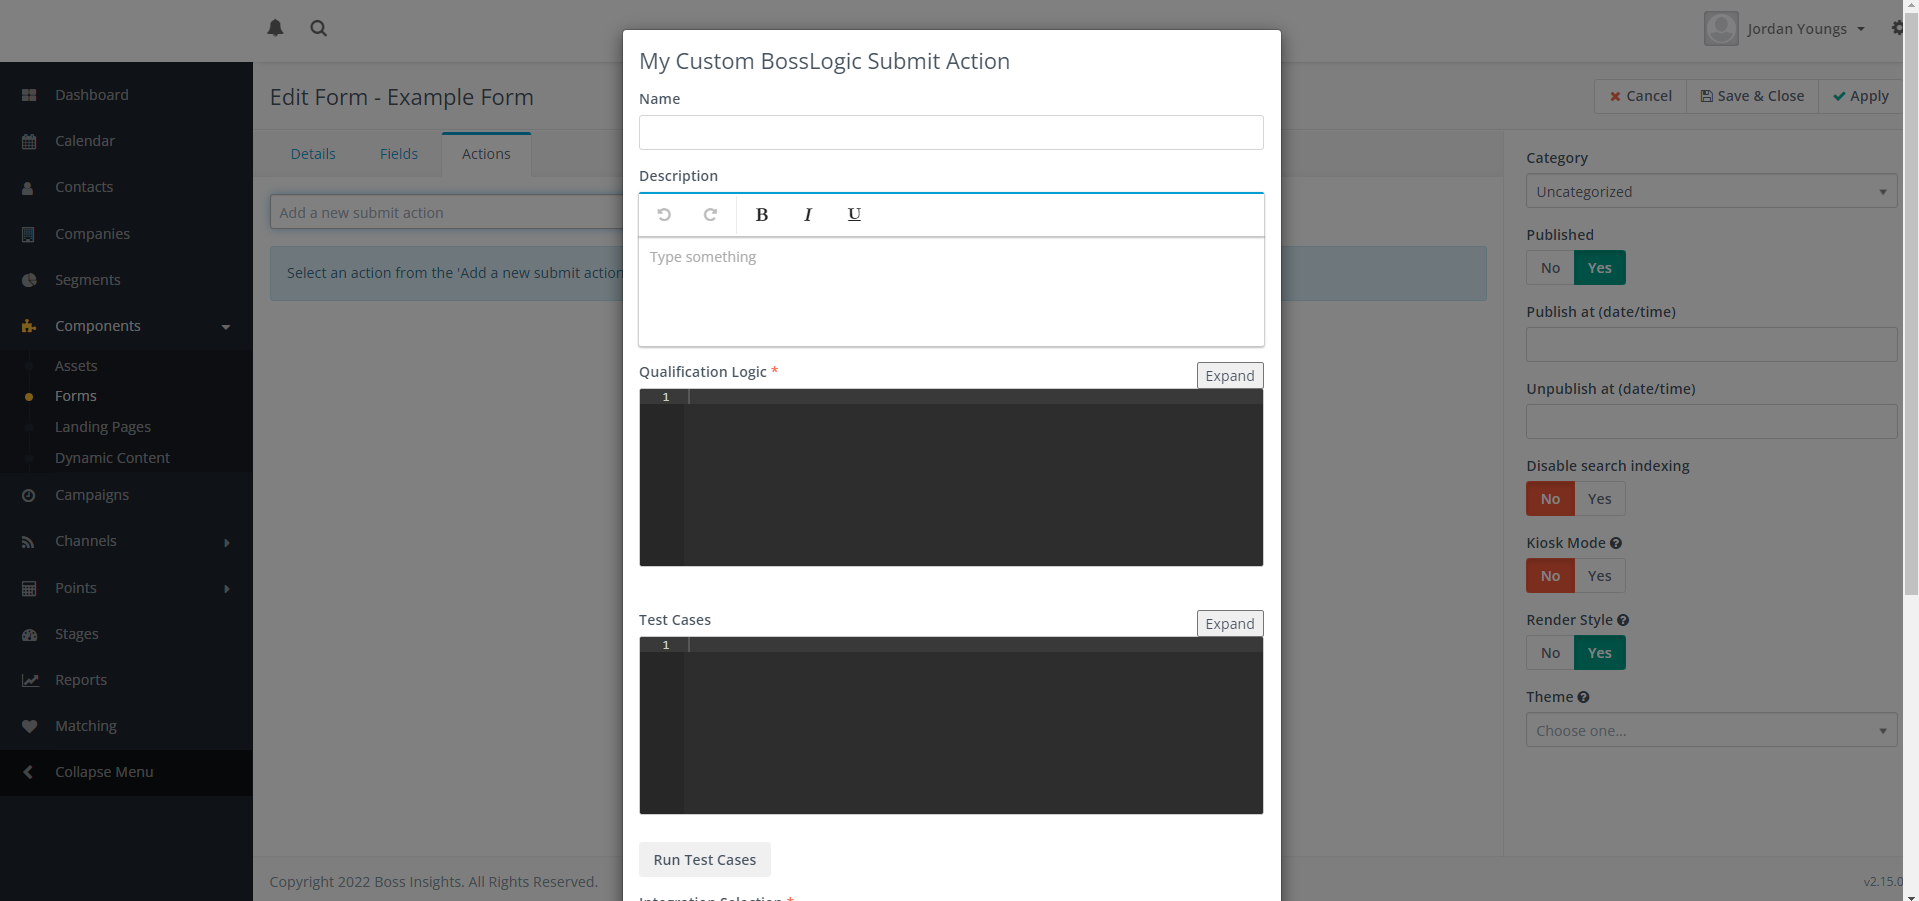
5. A pop-up will appear where you can enter a Name and Description for the submit action (these will not be seen by end-users). There are also code editors where you can enter snippets of PHP code for Qualification Logic, Test Cases, and Integration Mappings. These code editors can be expanded to full screen by clicking the Expand button at the top right of the editor, and can be reverted to their original size using the Collapse button at the top right of the full size editor.
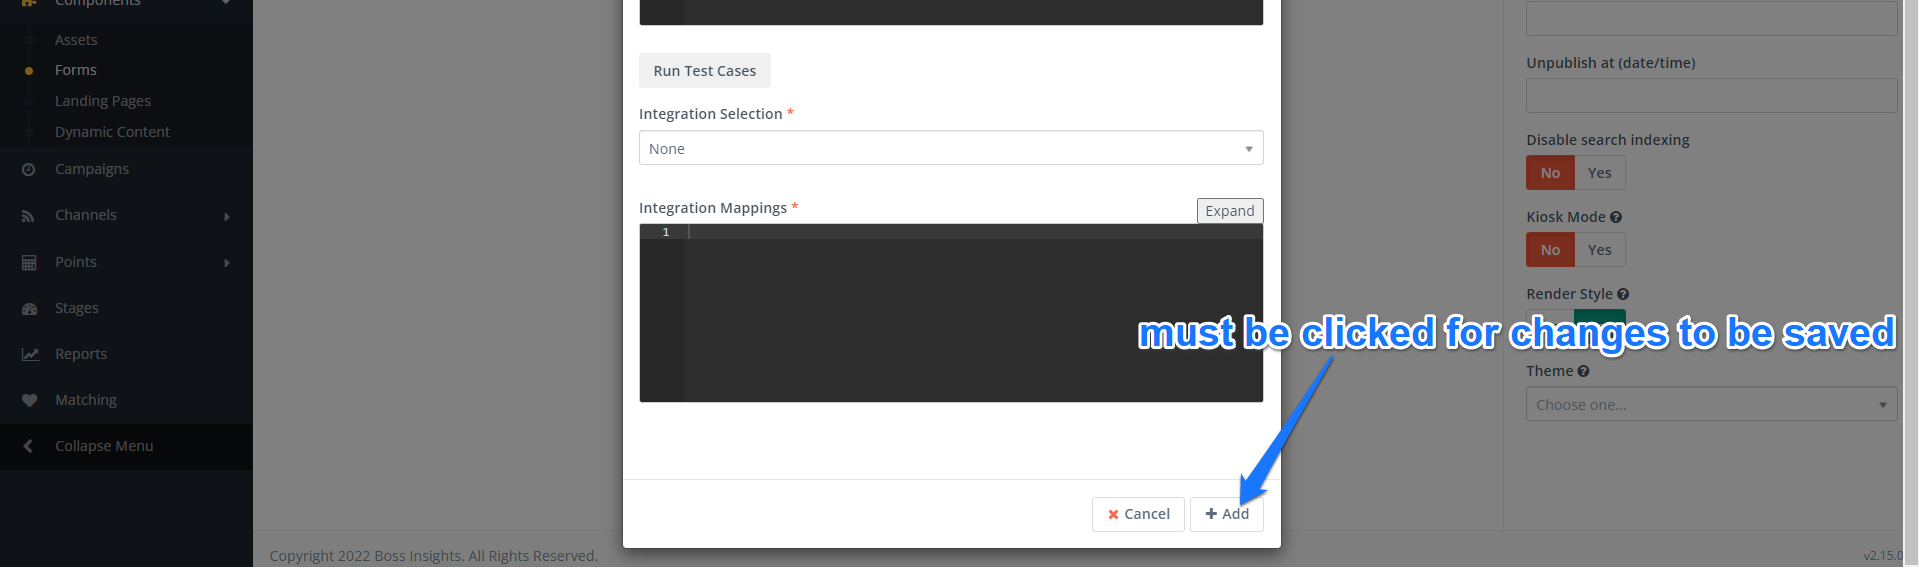
6. The subsequent sections of this guide give more detailed instruction on what should be entered in each field. Once each field is complete, click the +Add button to save your new submit action.
When adding or editing a form action, clicking anywhere outside of the pop-up window will close the pop-up, losing any changes you have made. When adding a new action, you must click +Add for your changes to be saved successfully. When editing an existing action, you must click Update for your changes to be saved successfully. Using the Expand button to make the code editors fullscreen can help prevent accidental clicks outside of the pop-up.

7. Once you have created or updated your Form Submit action, save the form by clicking Save & Close at the top right.

Qualification Logic
After a form is submitted, a Contact entity is created/updated in the system, and the fields of that Contact are set using the values from the form. (Contacts use email as a unique identifier. For new emails, a new contact is created. For existing emails, the existing Contact will get updated.) If you have a My Custom BossLogic Submit Action on your form, your Qualification Logic will be executed after the form is submitted, but before the Contact is created/updated. This gives you a chance to intercept the form data, analyze it, and modify some Contact fields before proceeding to create/update the Contact. Typically, we use the Qualification Logic to set a value on the decision Contact field, marking the Contact as qualified or unqualified.
The Qualification Logic code editor in the My Custom BossLogic Submit Action pop-up accepts PHP code. The code must start with the PHP opening tag <?php. The code has access to a class instance under the variable name $x. The $x object contains the values of the recently completed form. The goal of your Qualification Logic code is to set an array on the $x->output property to modify Contact fields.
Example 1: Simple Logic to Qualify a Contact
Consider the following example form:
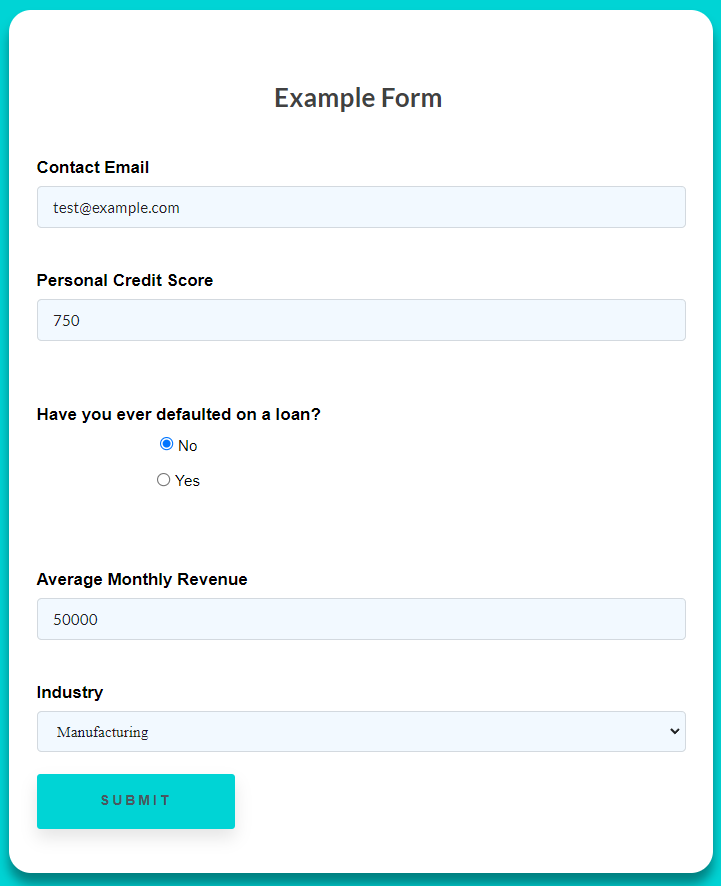
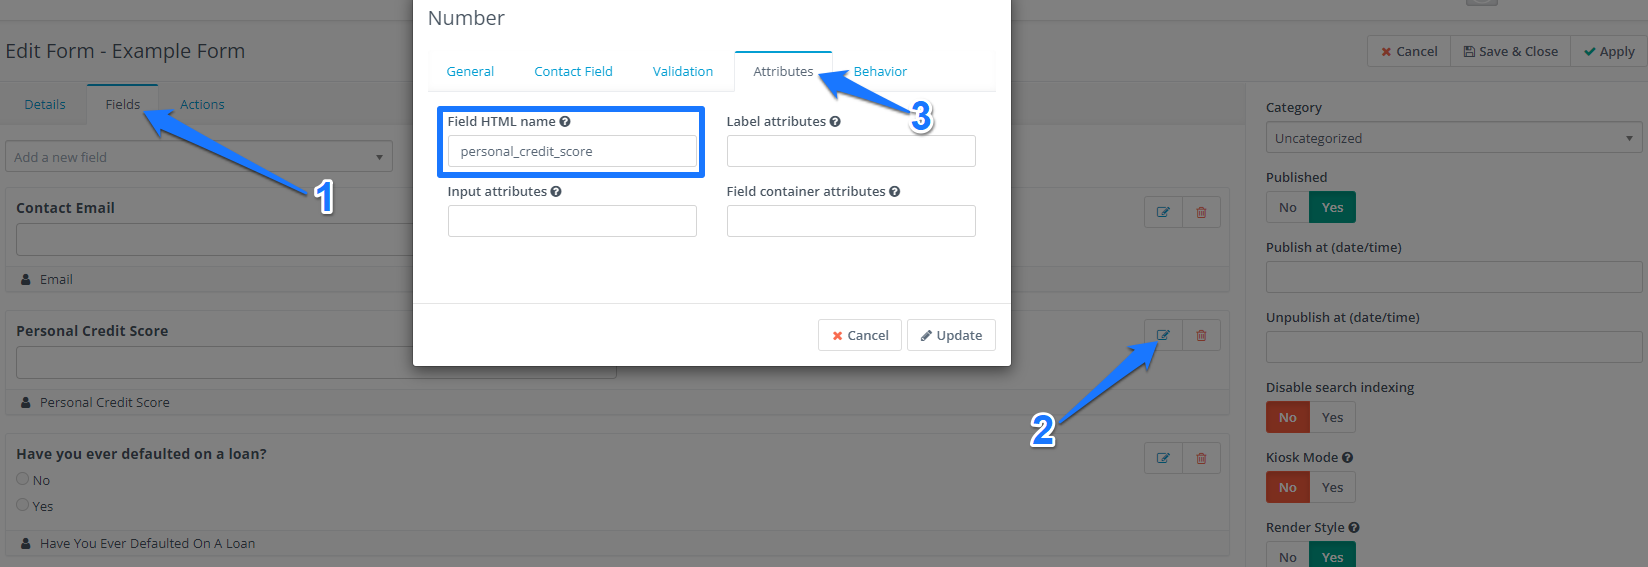
The values of the submitted form can be read using the class method $x->read(), which takes a field name as an argument. Field names can be found on the Edit Form page. To see the field name, click on the Fields tab, then click the edit button for a field, then click the Attributes tab. The Field HTML name is what you would pass as an argument to $x->read().
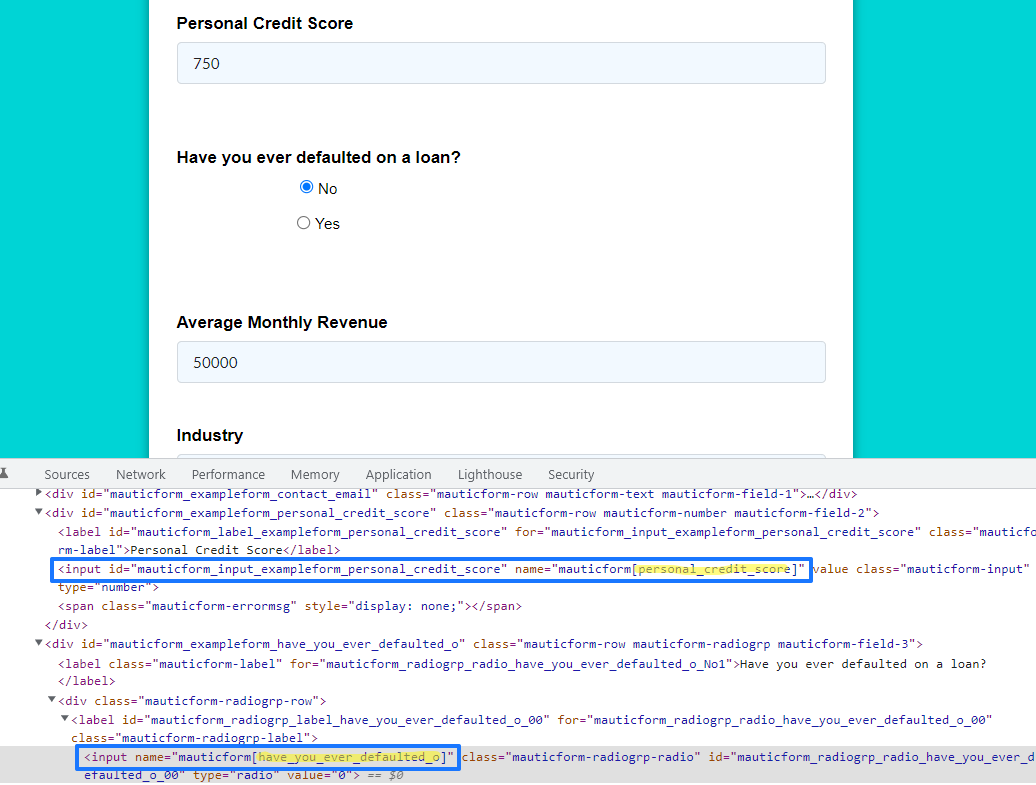
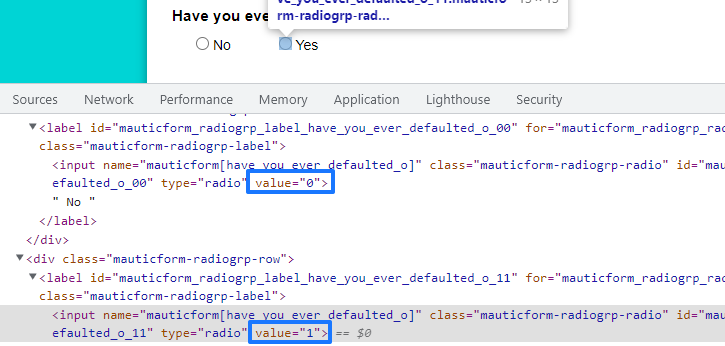
Alternatively, you can find the field names by inspecting the html of the form. The field name is a substring of the name attribute of the input element, which should be of the form “mauticform[{field name}]".
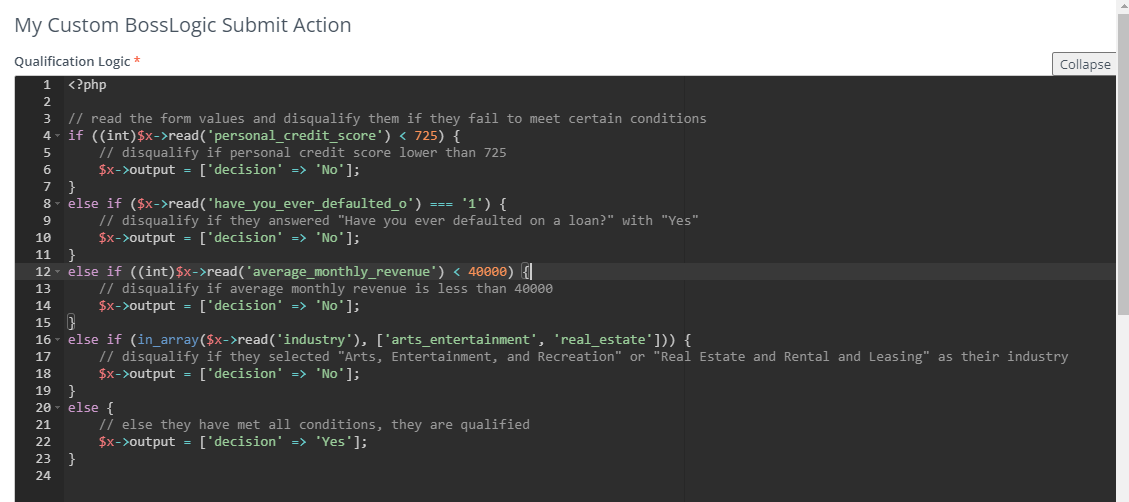
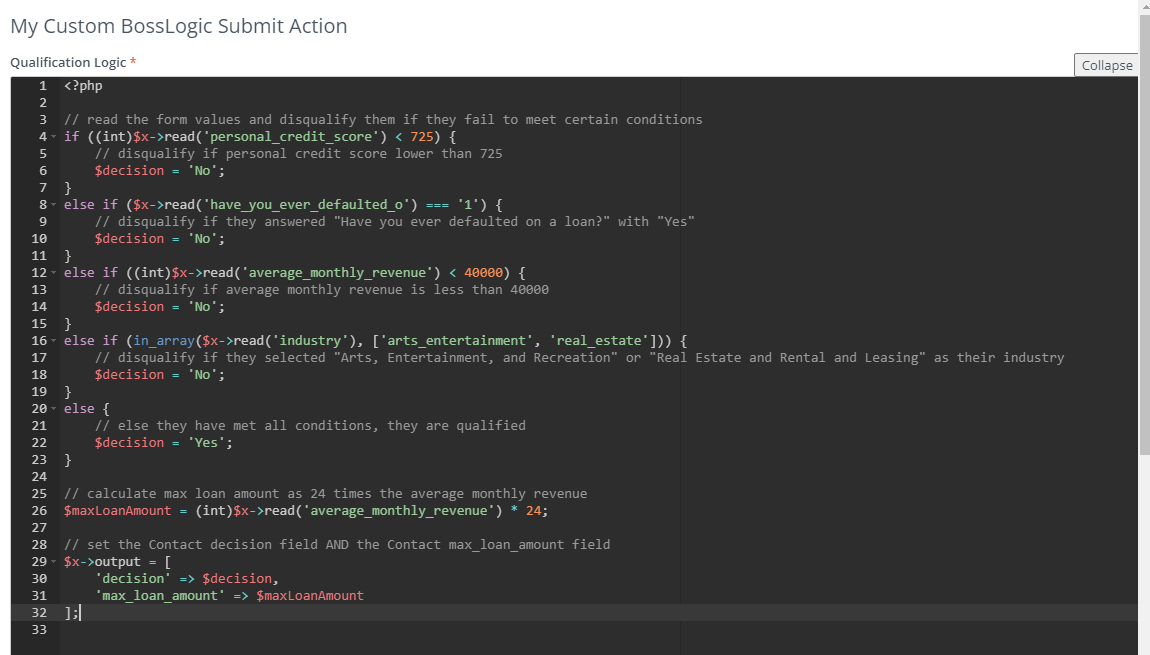
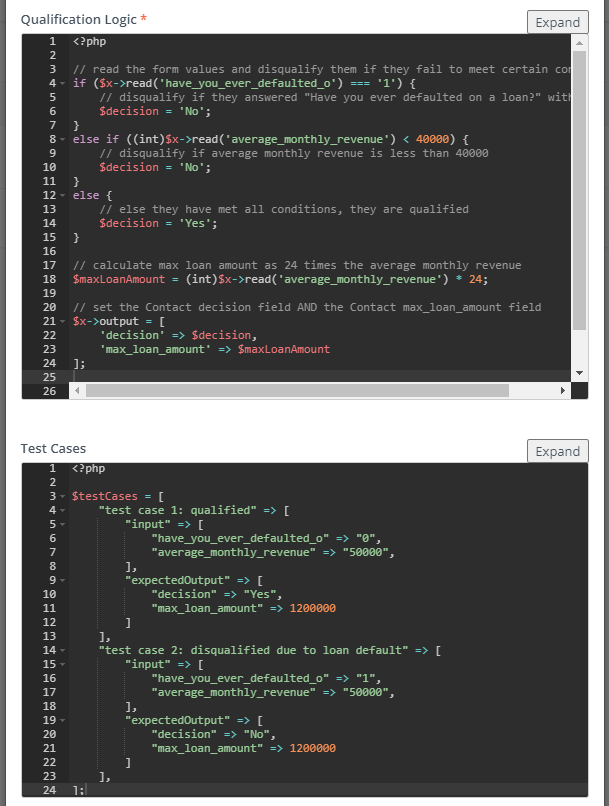
The following example code for Qualification Logic will set a Contact's decision field based on some simple disqualifying conditions:
The values returned by $x->read() are strings, even for Number and Boolean type form fields. Type casting is available if needed.
The decision field can then be used to show a user the most relevant webpage for them once their form has been submitted. It can also be used to sort Contacts within the system into qualified and unqualified groups.
Example 2: Setting non-decision Contact Fields
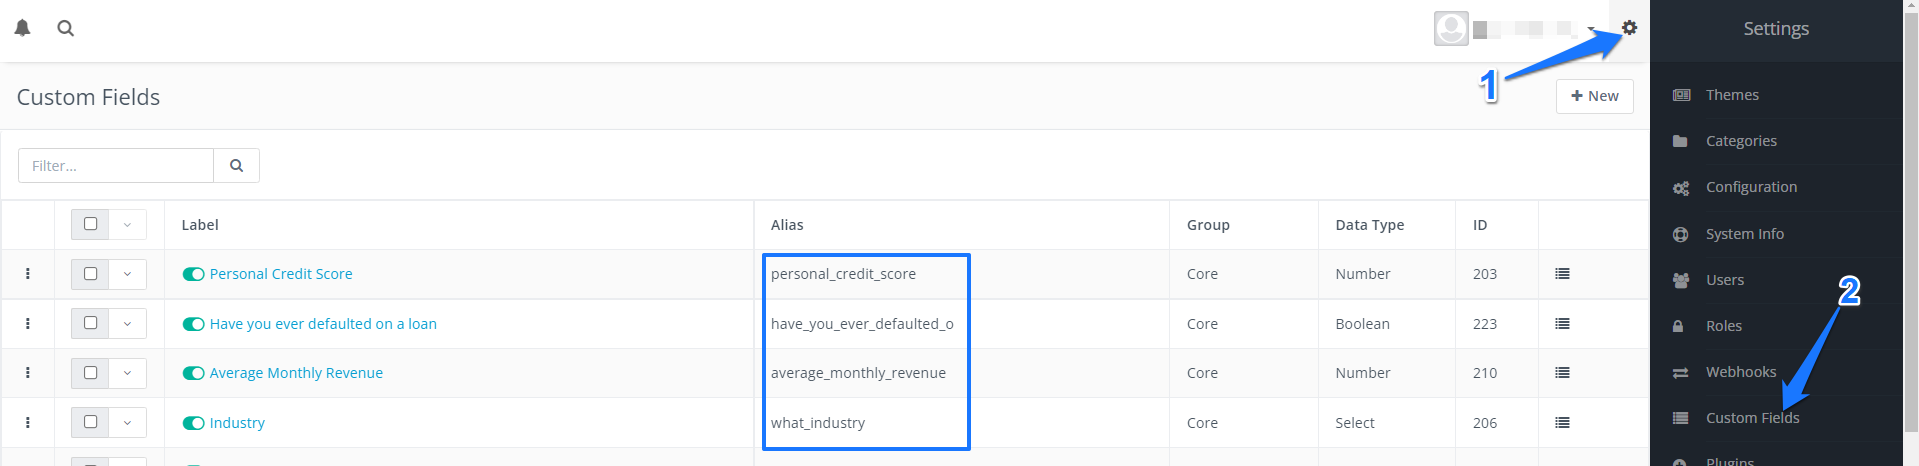
Typically, we use the decision field to mark a Contact as qualified or unqualified. However, the Qualification Logic is not restricted to setting one field. The $x->output array can be used to set any Contact field. The keys in the $x->output array should be field aliases. Field aliases can be found in the Custom Fields list, which you can get to by clicking the cog in the top right of the marketing app, and then clicking Custom Fields in the sidebar menu on the right.
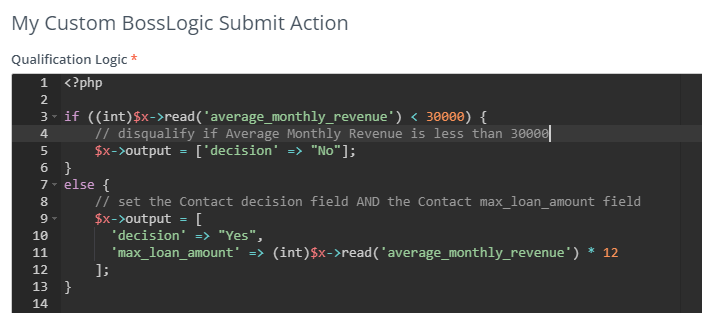
Continuing from Example 1, suppose we also wanted to set a max_loan_amount field on a Contact upon form submission. The following code would accomplish that:
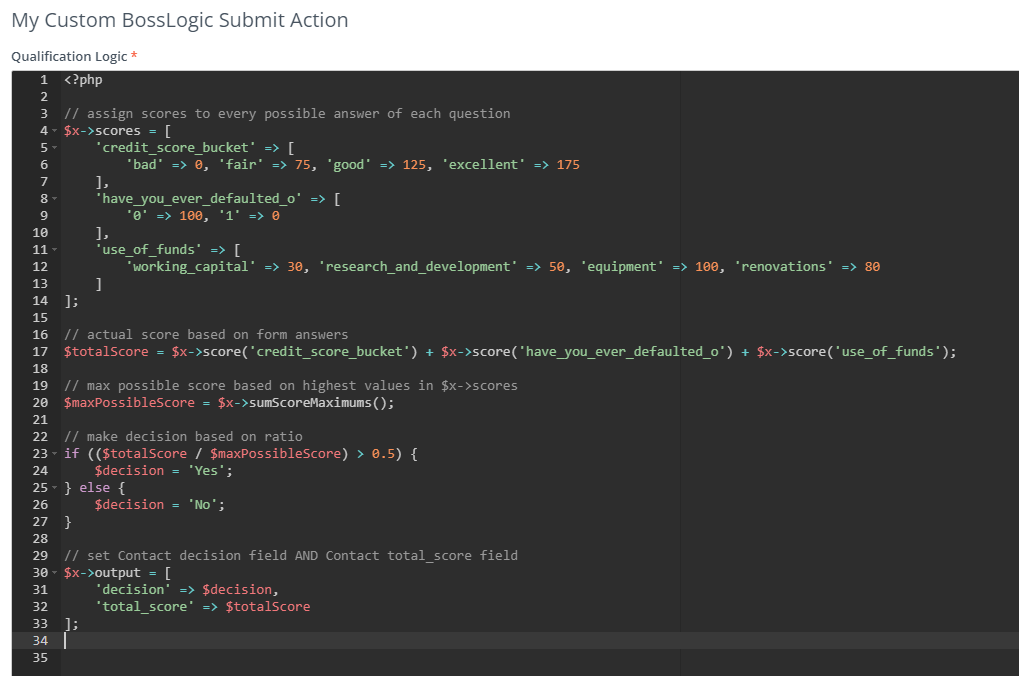
Example 3: Weighted Scoring of Form Questions
The class that $x instantiates has some methods to support weighted scoring of questions. Consider the following example form:

The $x object has an array property called $x->scores which can be used to assign number values to each possible answer of a question. The key should be the field name, and the value should be a subarray that gives each possible value a score. For the example form, a scores array might look like this:
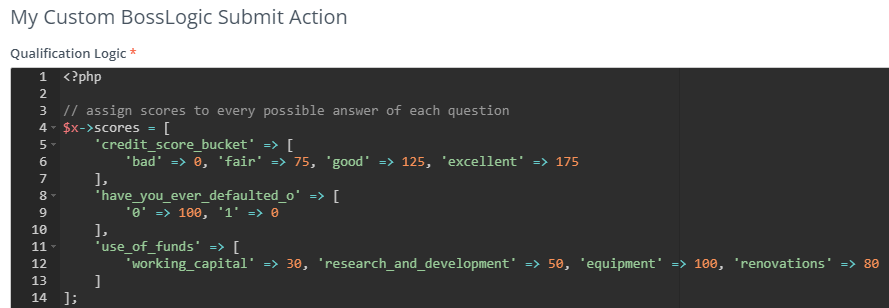
Note that the subarray keys are the radio values, not the labels (i.e. have_you_ever_defaulted_o uses '0' and '1', NOT 'No' and 'Yes':
The $x object has some class methods that are useful for working with scores, which you can use once you have an $x->scores array defined. For example:
See the next section for a full list of available class methods.
Utilities available within Qualification Logic
$x Class Properties
Property | Description |
|---|---|
scores | A multi-level array used to assign integer scores to possible answers. Format should be:
CODE
|
output | An array used to modify Contact fields. Format should be:
CODE
|
$x Class Methods
Method | Description |
|---|---|
read(string $fieldName): string | Returns the given field’s submitted value as a string. Returns a string even for Number and Boolean type form fields. Type casting is available if needed. |
score(string $fieldName): int | Looks up the field’s name and submitted value in the |
scoreMax(string $fieldName): int | Returns the highest possible score for the given field, based on the |
scoreRatio(string $fieldName): float | Returns |
sumScoreMaximums(): int | Returns the max possible score of an entire form by summing the |
PHP Functions
Our qualification logic engine also provides a subset of the PHP scripting language to provide flexibility to craft sophisticated qualification and calculation formulas.
Examples of functions you might find useful are:
Function | Description |
|---|---|
Find lowest value | |
Find highest value |
Test Cases
The Test Cases and section of the My Custom BossLogic Submit Action pop-up is used to define test cases which can help ensure that the Qualification Logic works as expected. In the Test Cases code editor, you can define a multi-level array with the variable name $testCases. The code must start with the PHP opening tag <?php, and the array must be defined according to PHP syntax.
The $testCases array should have test case names as keys, and subarrays as values. The subarrays must have input and expectedOutput as keys. The input subarray should be of the form ['fieldName' => 'testValue',..]. The expectedOutput subarray should have the form ['fieldAlias' => 'expectedValue',..].
When you click the Run Test Cases button, your Qualification Logic will be executed once for each of your test cases. It will run as if someone had just submitted a form with the values in the input array, and calculate the $x->output array as written in your Qualification Logic code. If the $x->output array is equal to the expectedOutput array, your test case passes. If the two arrays are not equal, your test case fails. When you click the Run Test Cases button, a new code editor will appear just above the button, and that editor will contain a JSON array summarizing the results of your test cases.
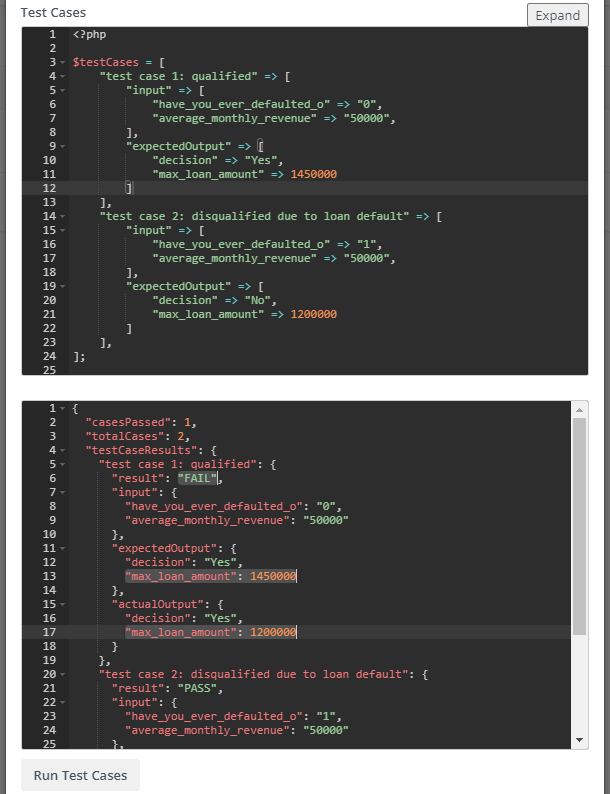
Test cases are also run automatically upon form submission. A failing test case will prevent form submission, so ensure that all included test cases are passing.
Integration Selection and Integration Mappings
The Integration Selection and Integration Mappings sections of the My Custom BossLogic Submit Action pop-up are only used for CRM Integrations, which are disabled by default. If you are not integrating with a CRM, select Nonefor Integration Selection and leave the Integration Mappings section blank. See the relevant docs for more information: CRM Integrations
Using the results of Qualification Logic
Example 1: How to show dynamic content based on Contact decision field
We can use something called Dynamic Web Content to control what the user sees after they have submitted a form. Dynamic Web Content allows you to show content based on conditions that you define.
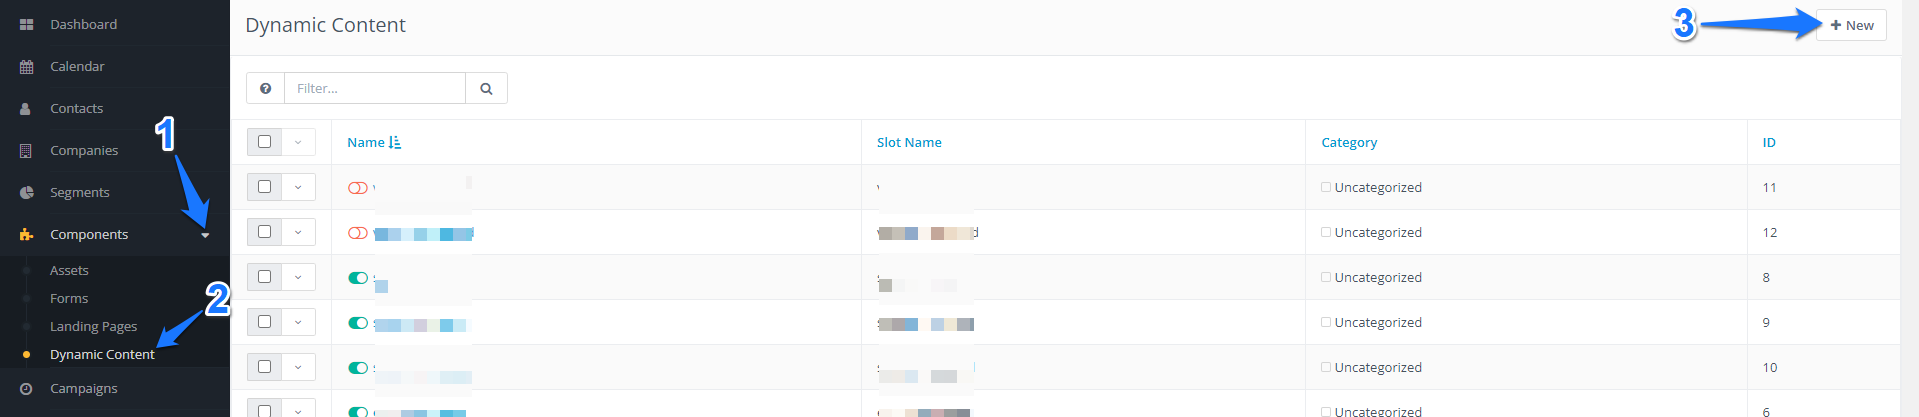
Click
Componentsin the sidebar on the left, then clickDynamic Content. Then, click the+Newbutton at the top right.
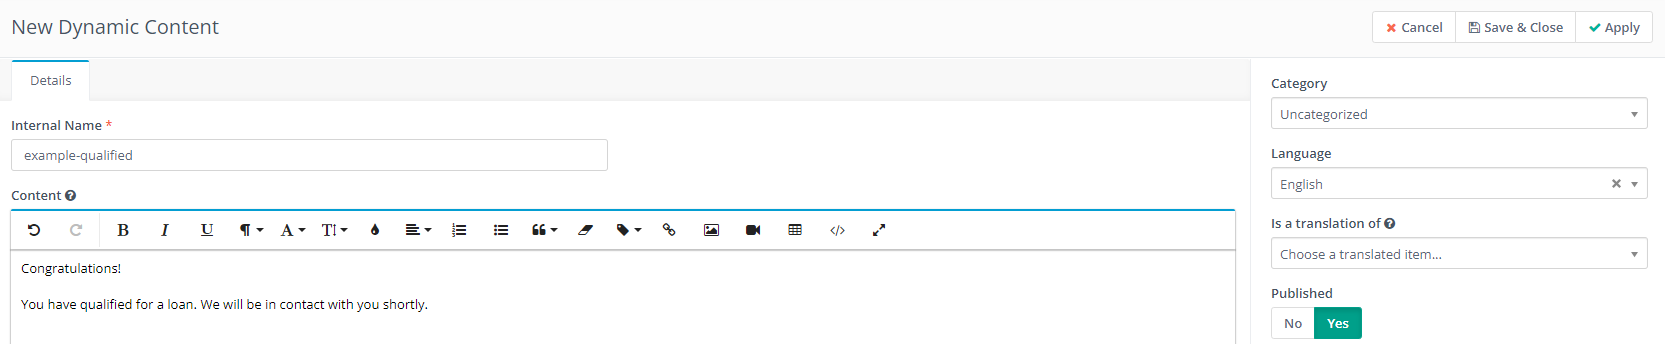
2. Fill in the Internal Name field and fill in the Content section with what you would like to display to a qualified form submitter.
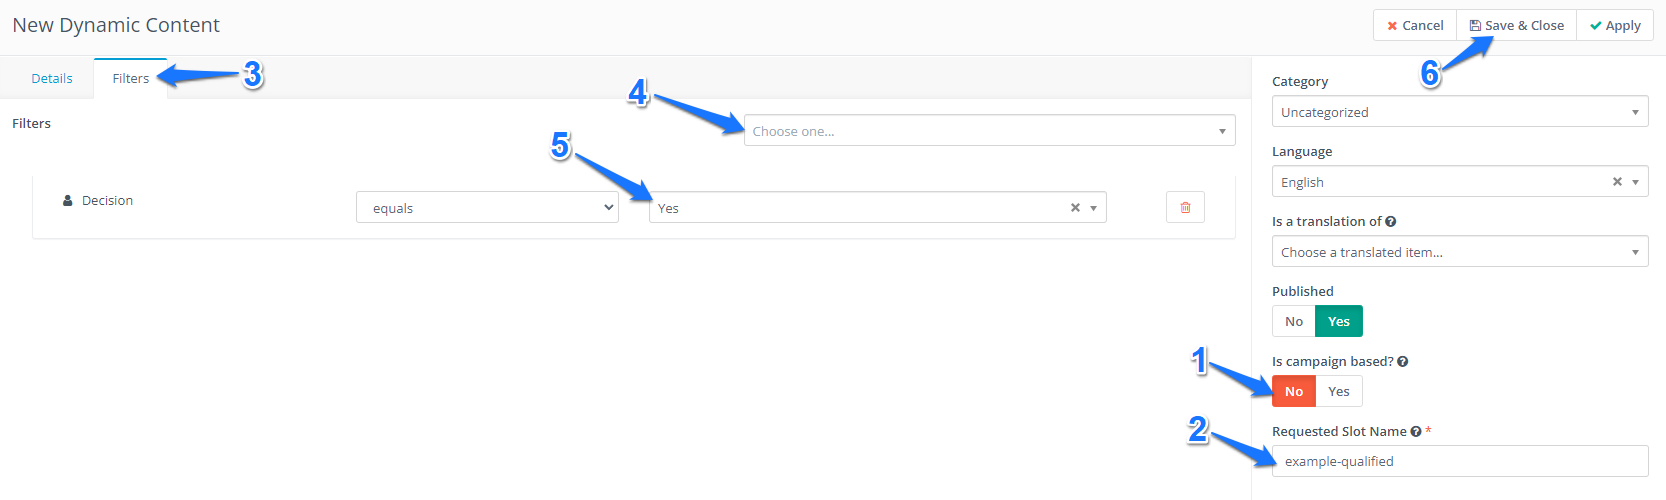
3. On the right, where it says Is campaign based?, select No. Fill in the Requested Slot Name field and make a note of the slot name, you will need it later. Then, click the Filters tab and use the Choose one dropdown menu to select the Decision field. Since this dynamic content is for qualified submissions, use the dropdown next to Decision equals to select Yes. Then click Save & Close to save your new dynamic content.
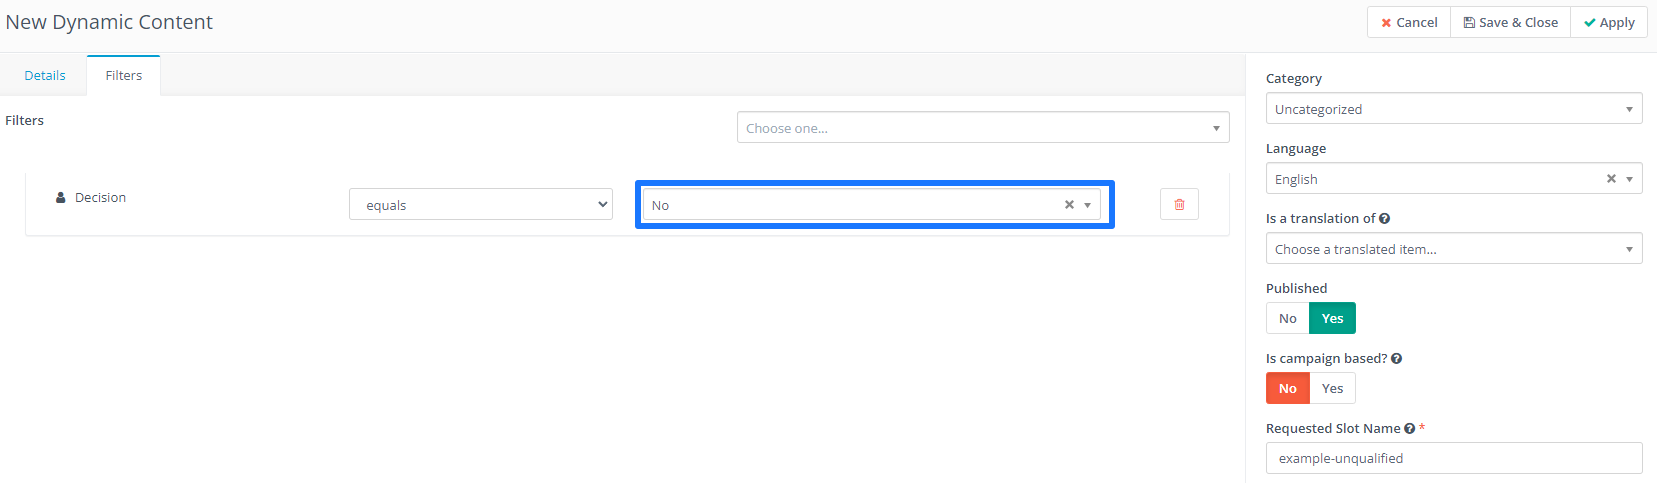
4. Repeat the above process to create another Dynamic Content that contains Content that an unqualified user should see. This time, set the filter to Decision equals No.

5. Now that we have our two Dynamic Contents, we need to create a Landing Page that uses them. Click Components in the sidebar on the left, then click Landing Pages. Then, click the +New button in the top right.

6. Give your page a Title and Alias, then click the Builder button in the top right.

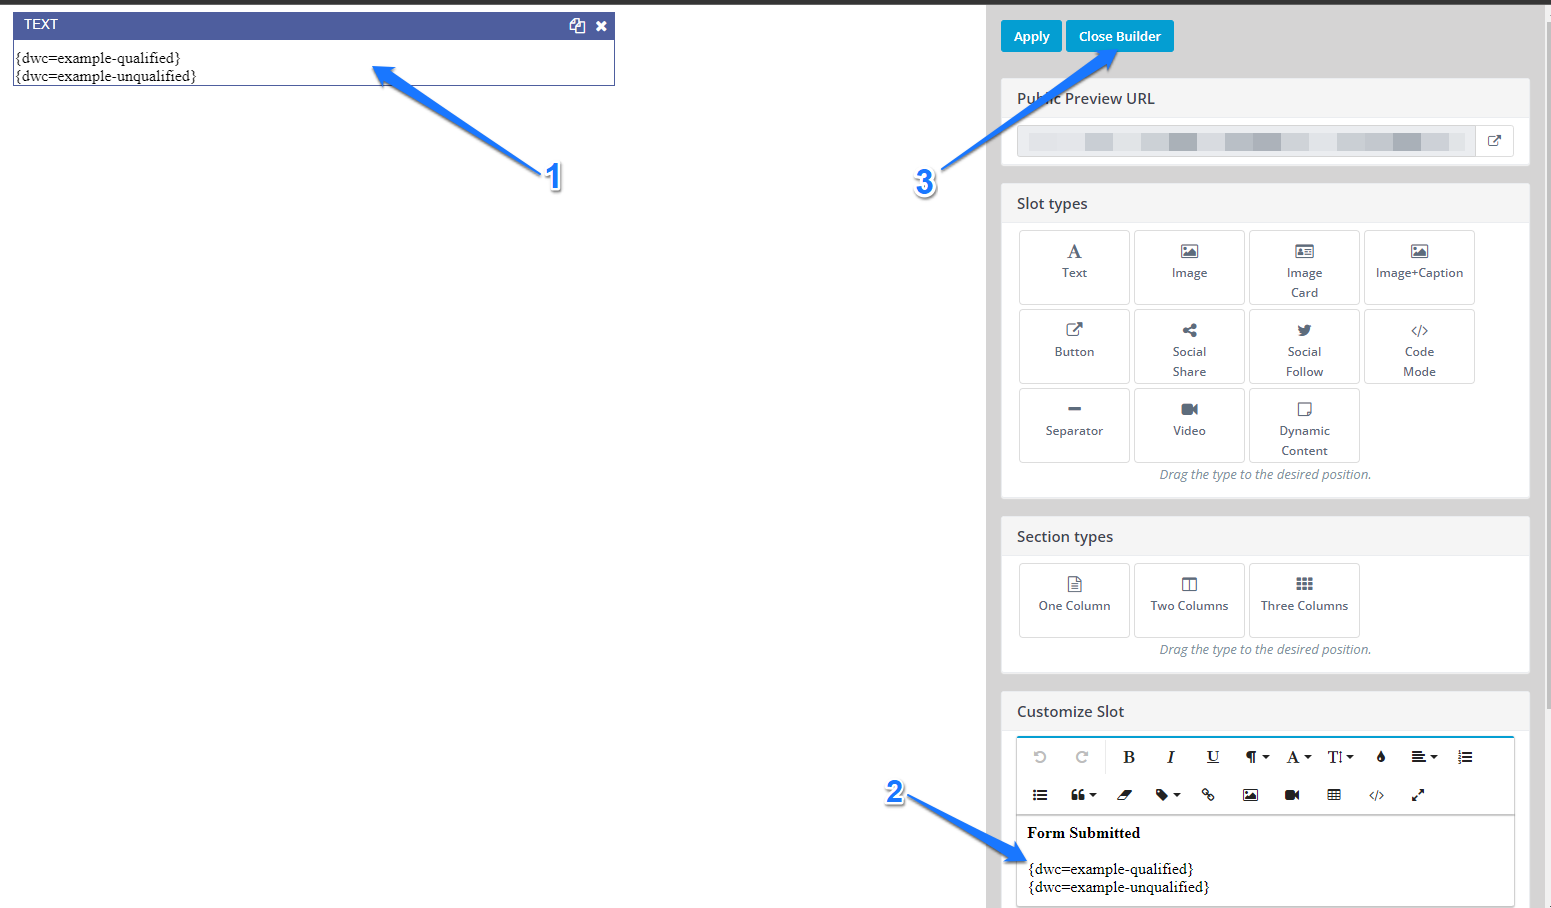
7. Click on the existing Text slot, and use the Customize Slot editor on the right to modify the content. Include any static content (content that should be shown to qualified and unqualified users), and use dwc tags to include the Dynamic Contents we created earlier. The syntax is {dwc=requestedSlotName}. Then click Close Builder, and then Save & Close.

8. Copy the Page URL of the Landing Page you just created.

9. Click Forms in the left menu, then click the name of your form, then click the Edit button in the top right.

10. Use the Successful Submit Action dropdown and select Redirect URL. Paste the Page URL you copied into the Redirect URL/Message field. Then click Save & Close.

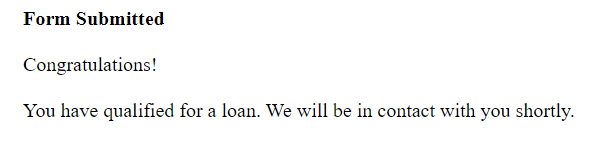
Done. Now, whenever someone submits this form, they will be redirected to the Landing Page, which will have different content depending on whether their Contact decision equals “Yes” or “No”. In the above example, the “Form Submitted” text is static content and will be shown to every user who submits a form. If the user is qualified (their decision equals “Yes”), the {dwc=example-qualified} tag will be replaced with the content we created earlier, and the {dwc=example-unqualified} tag will be removed. So, a qualified user would see this after submitting their form:
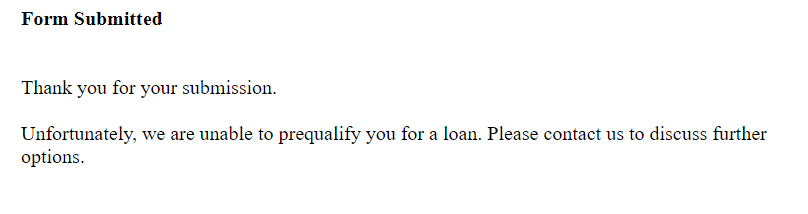
If the user is not qualified (their decision equals “No”), the {dwc=example-qualified} tag will be replaced with the content we created earlier, and the {dwc=example-unqualified} tag will be removed. So, an unqualified user would see this after submitting their form:
Note: If you are testing Dynamic Content on a browser where you are logged in to the marketing app, you will see the raw dwc tags, not the replaced content. Test in incognito mode to see what an actual user would see.
Example 2: Including Contact field values in content
Consider a form that asks for Average Monthly Revenue, and then uses the Qualification Logic to set a max_loan_amount field for the Contact. Here is some example Qualification Logic:
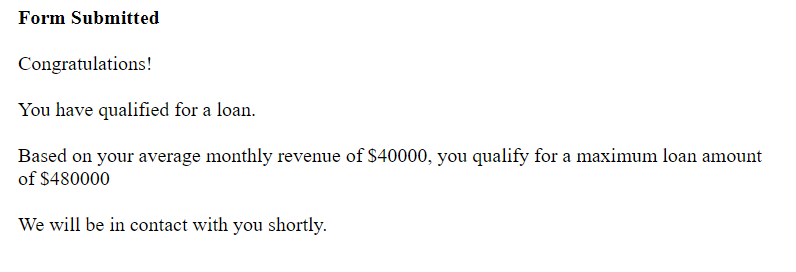
We can use contactfield tags in our content to include submitted fields like average_monthly_revenue, and/or calculated fields like max_loan_amount. The syntax for these tags is {contactfield=fieldAlias}.
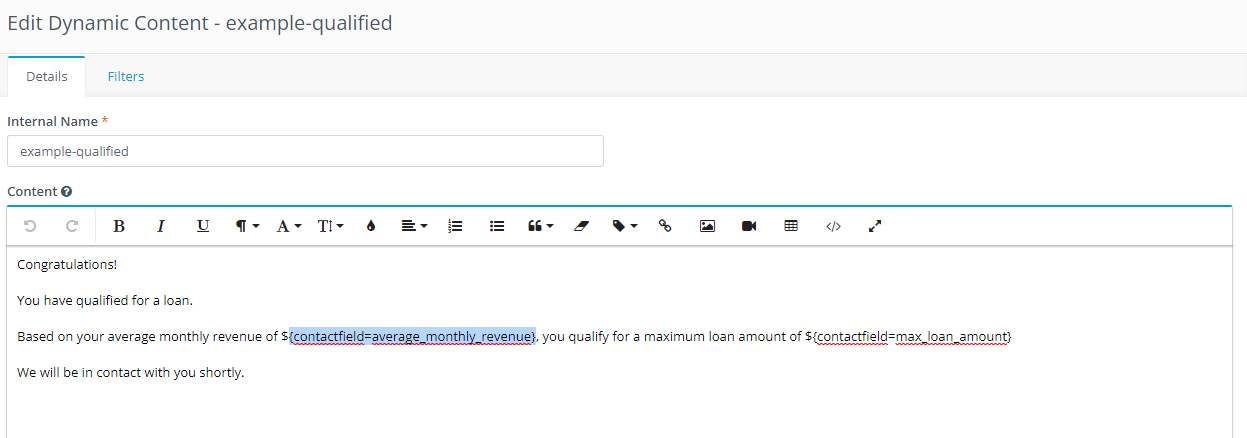
When the user arrives at this page, the tags will be replace by the value of the Contact field with the given alias. For example, if a user entered 40000 into the Average Monthly Revenue form field, their max_loan_amount would be calculated by the Qualification Logic, and they would see a page like this:
Note: If you are testing contactfields tags on a browser where you are logged in to the marketing app, you will see the raw contactfield tags, not the replaced content. Test in incognito mode to see what an actual user would see.