Set Up Microsoft SSO (Entra ID)
Setting up single sign-on (SSO) is a great secure way to make signing in to your Boss Insights portal more convenient for your team. This guide will outline how to set up Microsoft SSO from your admin portal and through the Microsoft Azure portal. We will be using a service called Microsoft Entra ID.
Microsoft Azure Active Directory is now called Microsoft Entra ID.
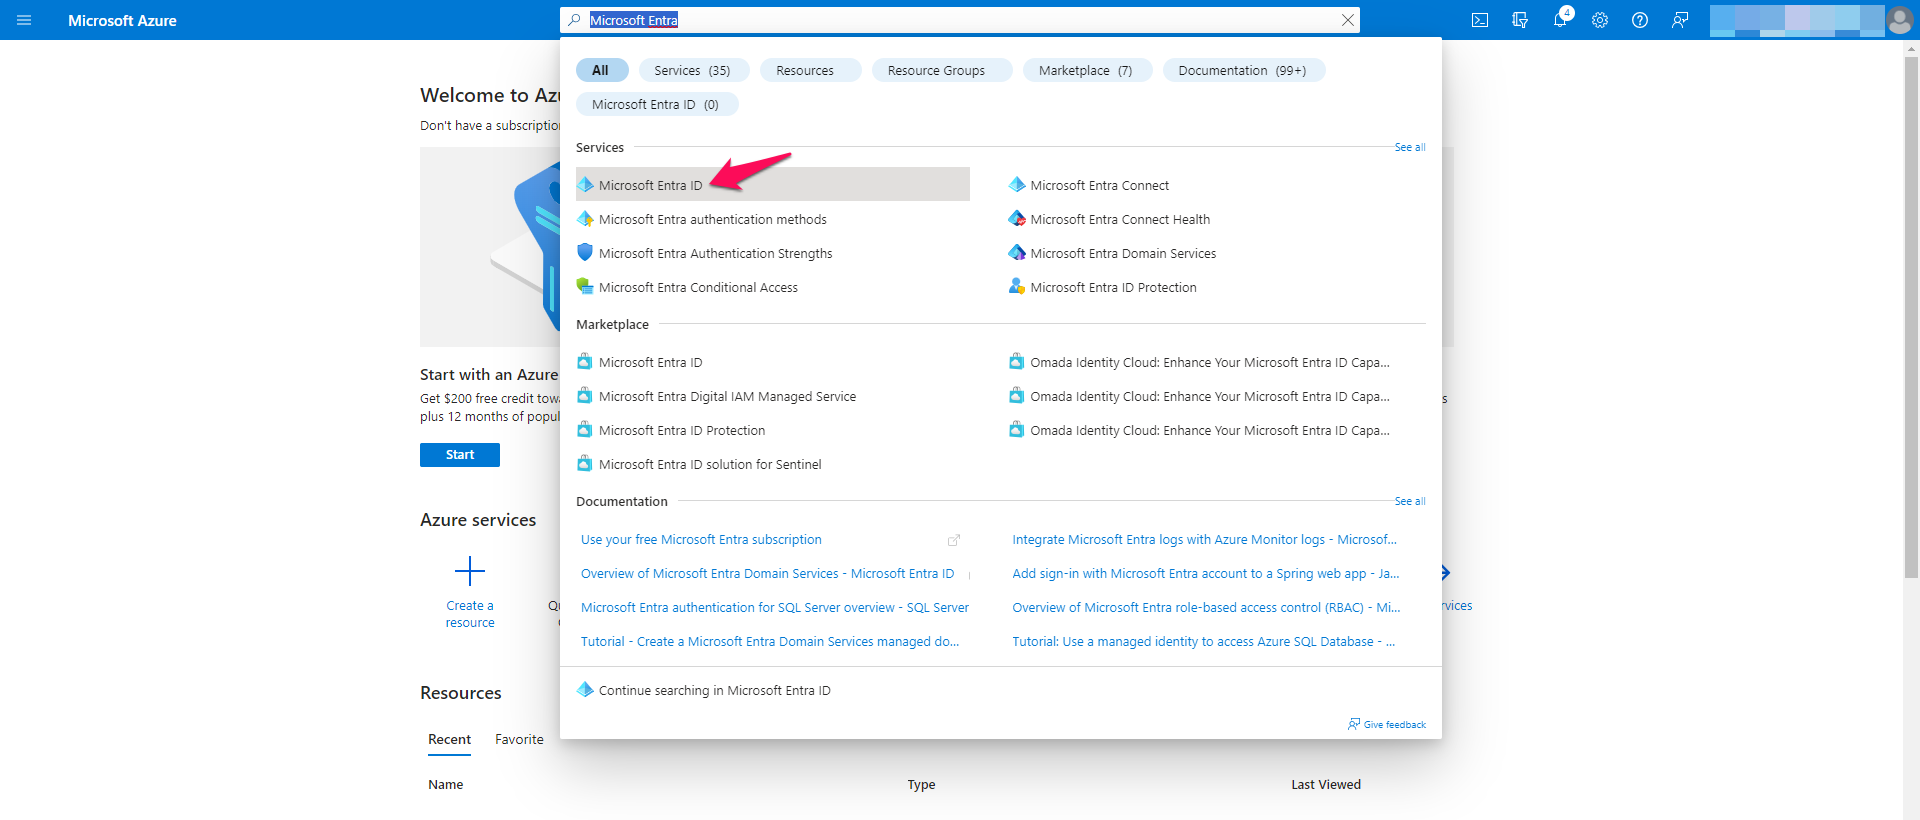
Step 1: Visit Microsoft Entra ID
After logging in to your Microsoft Azure portal. please use the search bar found at the top of the screen to search for “Microsoft Entra ID”. You may select the service from the suggestions.
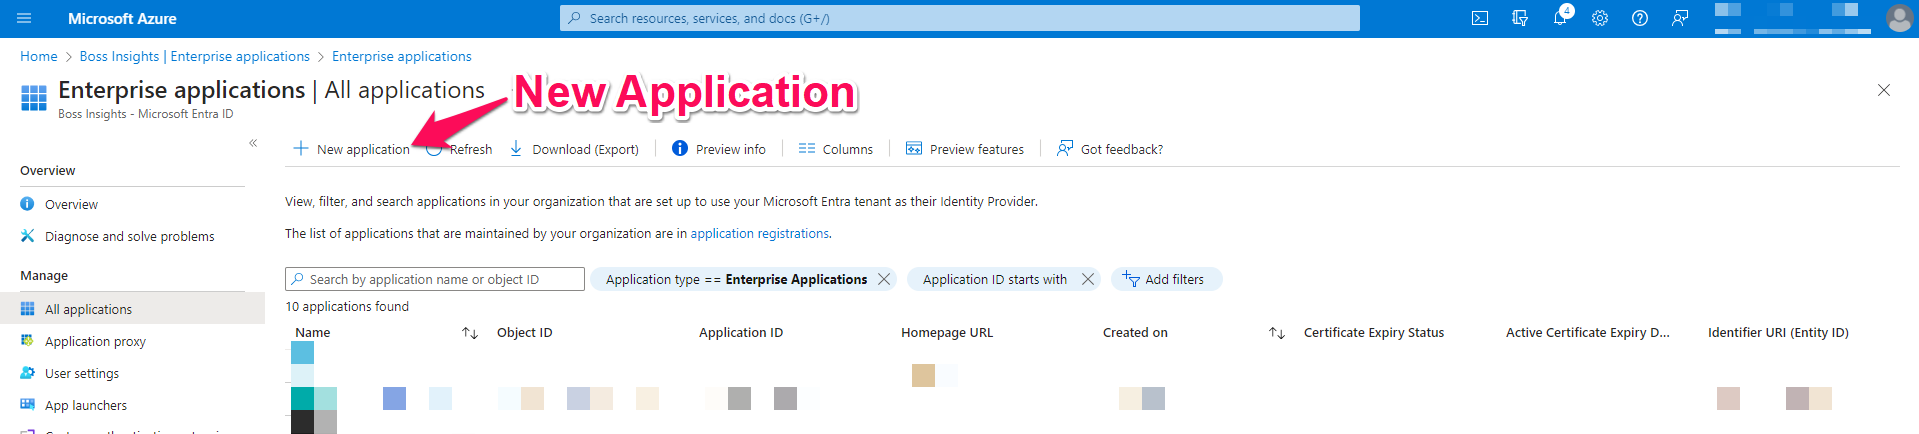
Step 2: Create New Application
From the overview page, please select the “Enterprise Applications” tab from the left navigation menu.

You will be redirected to a new tab showing all your applications. Please select the “New application” button in top navigation menu.
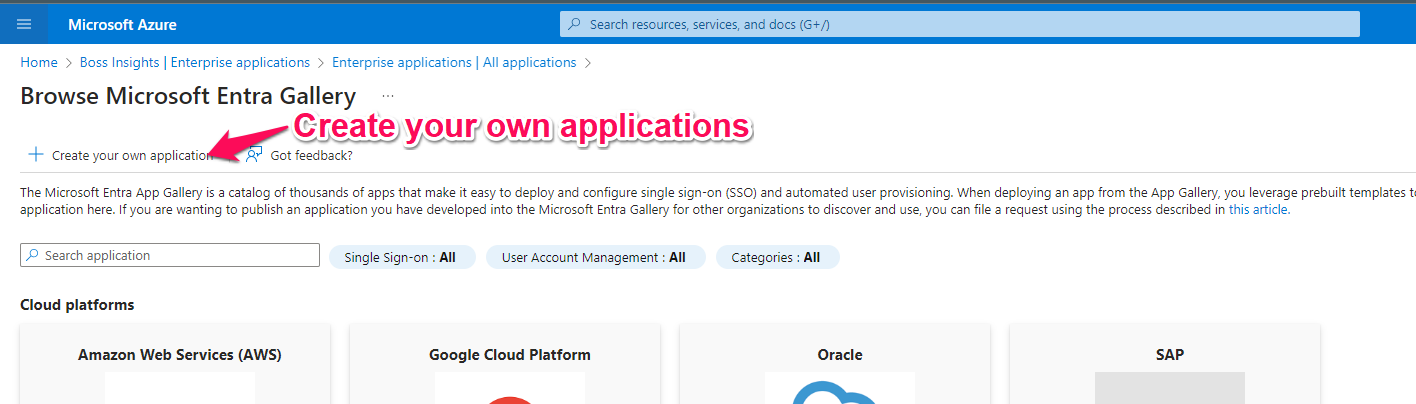
You will be redirected to a new page titled “Browse Microsoft Entra Gallery”, Please select the “Create your own application” button found under the title.
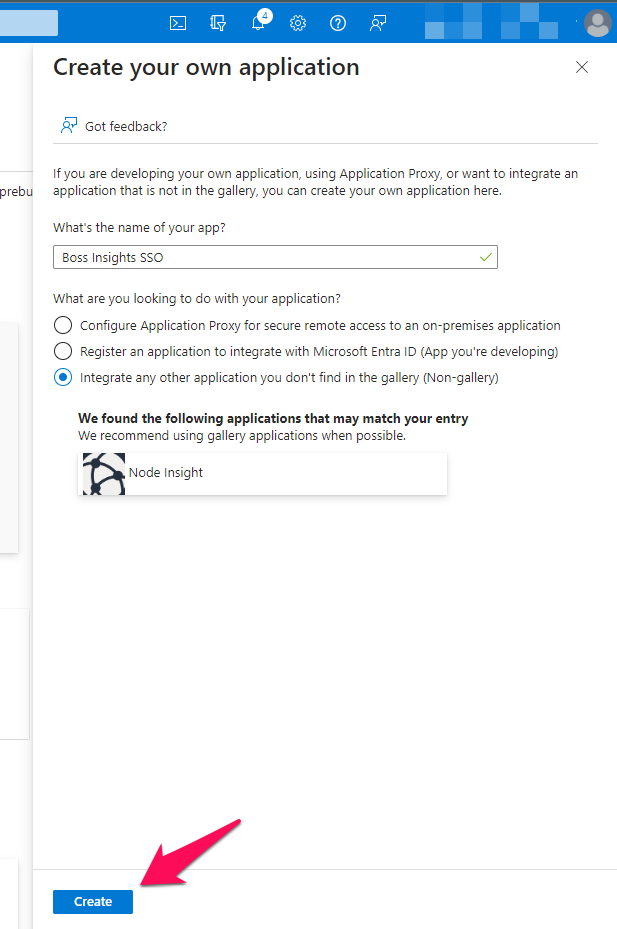
A menu will pop up to the right of your screen. Please give your application a unique name and choose the third option for application use intention, as shown in the image below. Please click the blue “Create” button when you are done.
Step 3: Select Single Sign-On Method
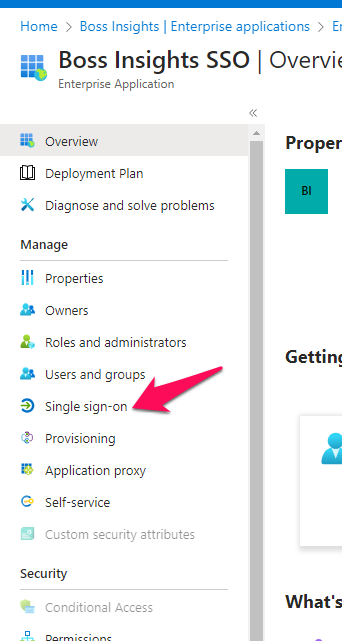
Once you have created your application, you will be redirected to its overview page. From the left navigation menu, under “Manage”, please select the “Single sign-on” item.
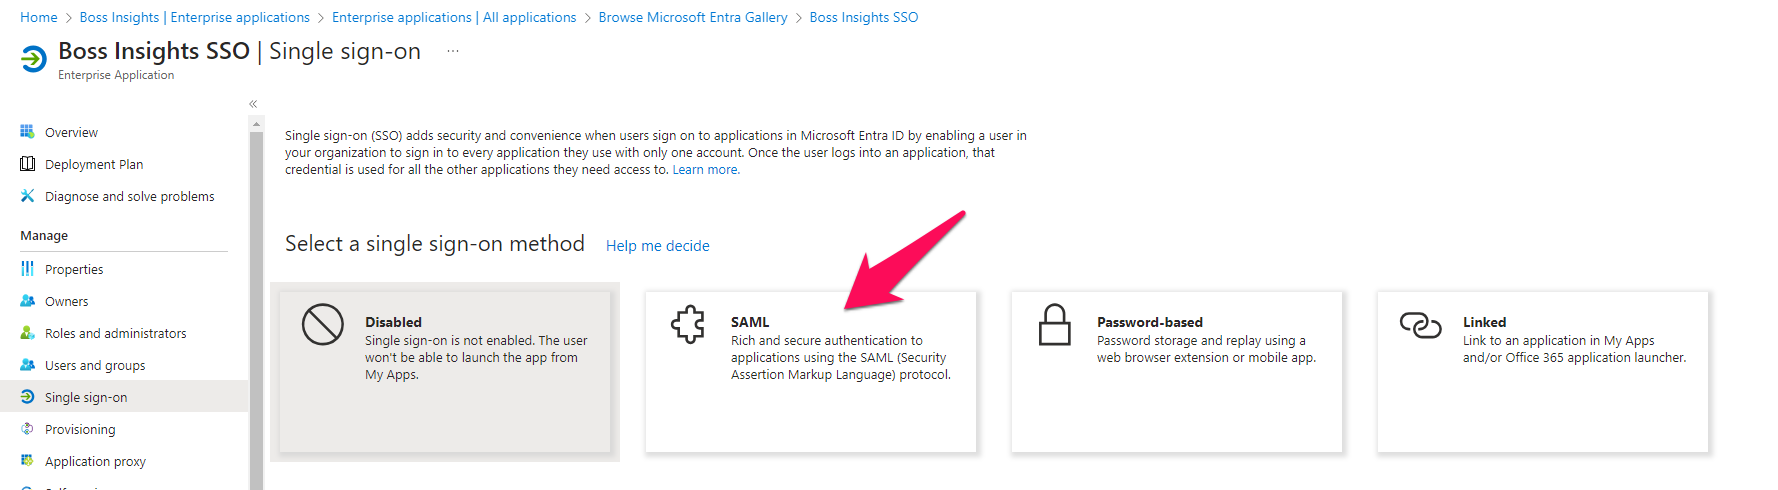
You will be redirected to the SSO page. From here, please select the “SAML” tile.
Next, we will be configuring the SSO settings.
Step 4: Configure Settings
This step will go through each section of the configuration sections.
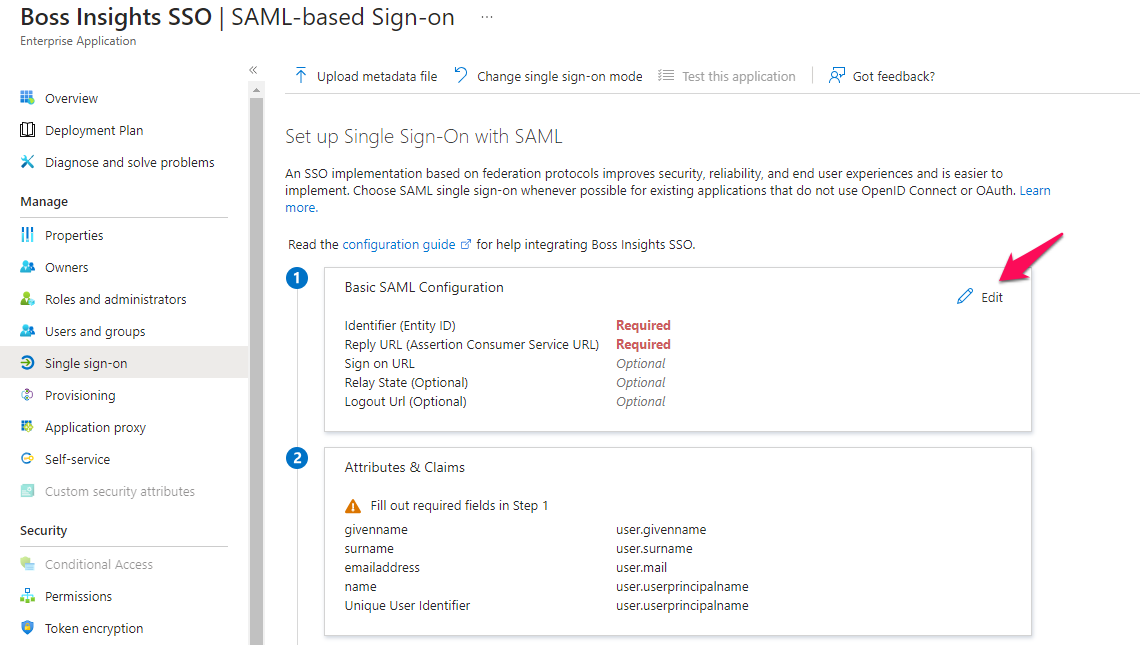
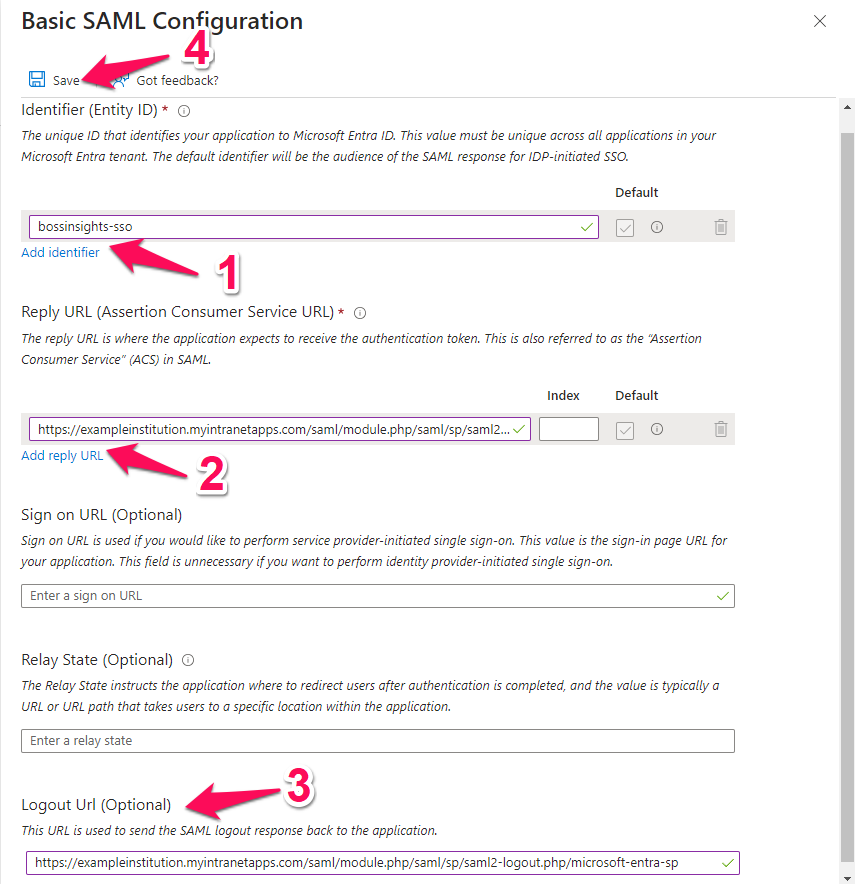
Basic SAML Configuration (Steps 1 and 2)
Please select the “Edit” button to begin editing step 1 from the provided list.
Please fill in the form with the following details. There is also a reference image below the table. Please do not forget to select “Save” when you are finished.
Field | Value | Description |
|---|---|---|
Identifier (Entity ID) | Any unique ID. | This ID must be unique across all applications within Microsoft tenant. An example would be bossinsights-sso. |
Reply URL (Assertion Consumer Service URL) |
| Please replace {{subdomain}} with your own subdomain. Please replace {{domain}} with your own domain. Unless you have a custom domain, this will either be: |
Logout URL |
| Please note that while the subdomain and domain will remain the same as the Reply URL, the content after is different. |
Attributes & Claims (Step 2)
You may leave this section with the default values. If you would like to set up group claims, please continue reading otherwise please proceed to Step 3 SAML Certifications.
Group Claims (Optional)
To set up group claims, please select the Edit button under Attributes & Claims.
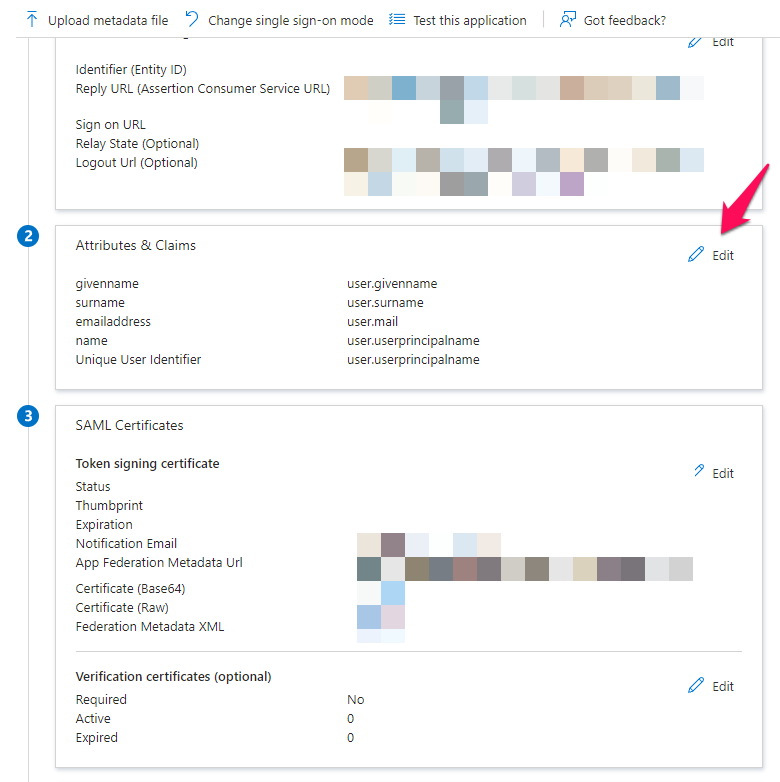
This will redirect you to a new page with a list of attributes. Please click the “Add a Group Claim” button.
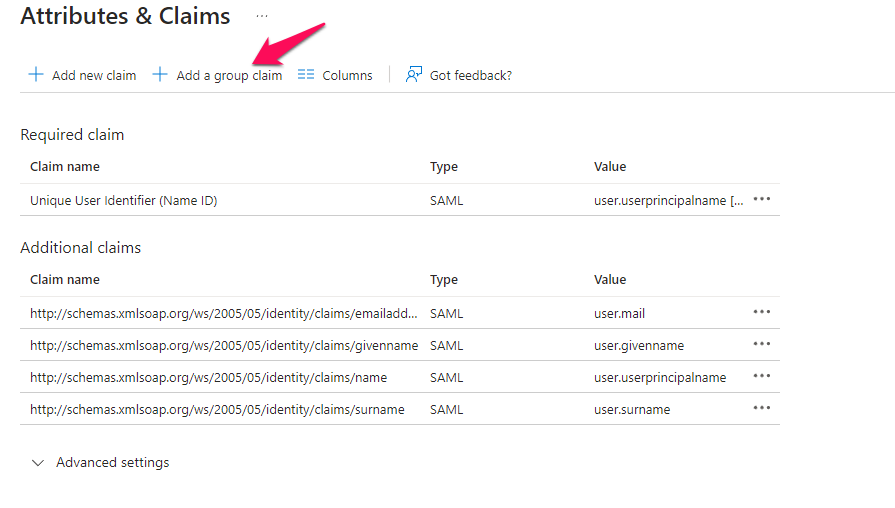
Configuration options will open to the right of your screen. Please take note of your Group ID as you will need it for configuration options on the Boss Insights platform (Step 5).
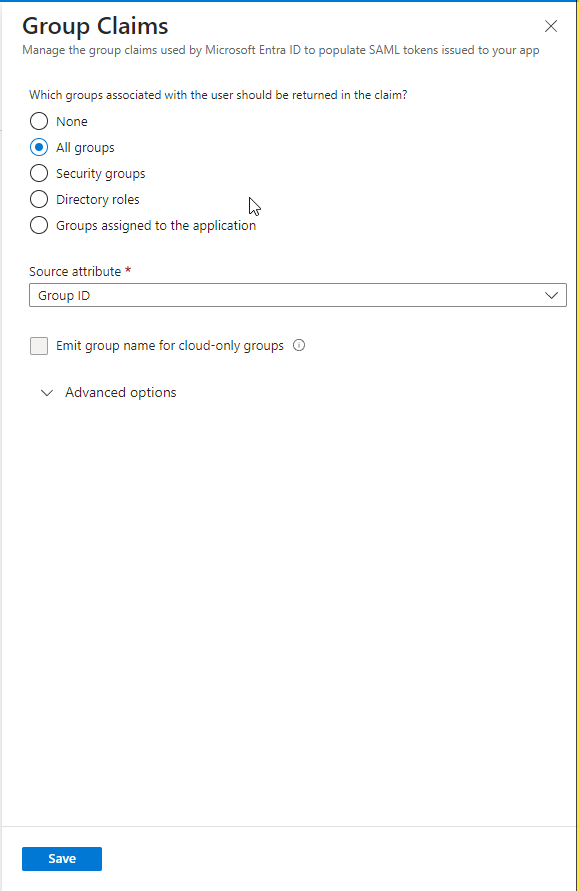
Please click the blue “Save” button when you are done. The Additional Claims table will update with your group claim.

SAML Certifications (Step 3)
Next, please click the “Edit” button for Step 3: SAML Certificates.
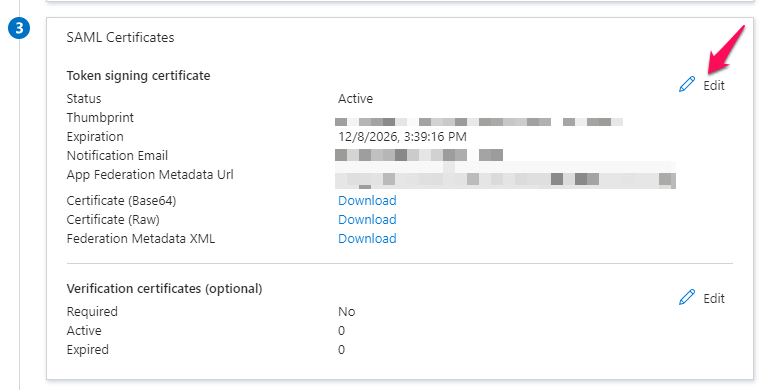
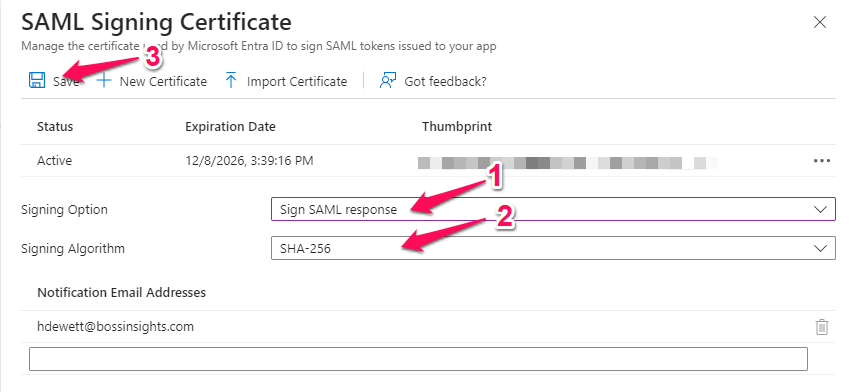
This will open up a section to the right of the page. Please use the table below to fill out this form. There is a reference image below the table. Please remember to save when you are done.
Field | Value |
|---|---|
Signing Option | Sign SAML response |
Signing Algorithm | SHA-256 |
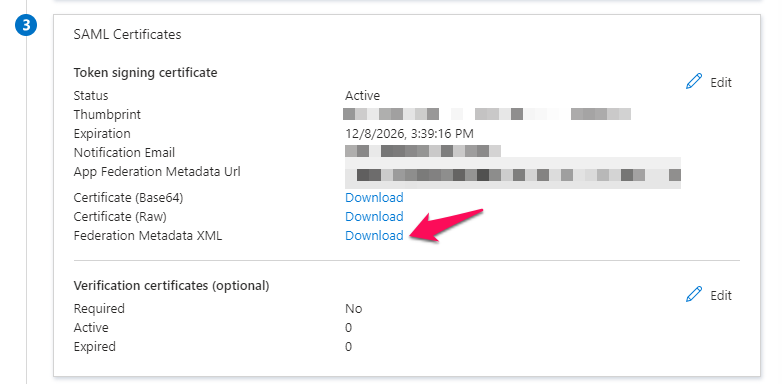
Finally, please download the Federation Metadata XML, you can do so by clicking the download button.
Step 5: Adding Users
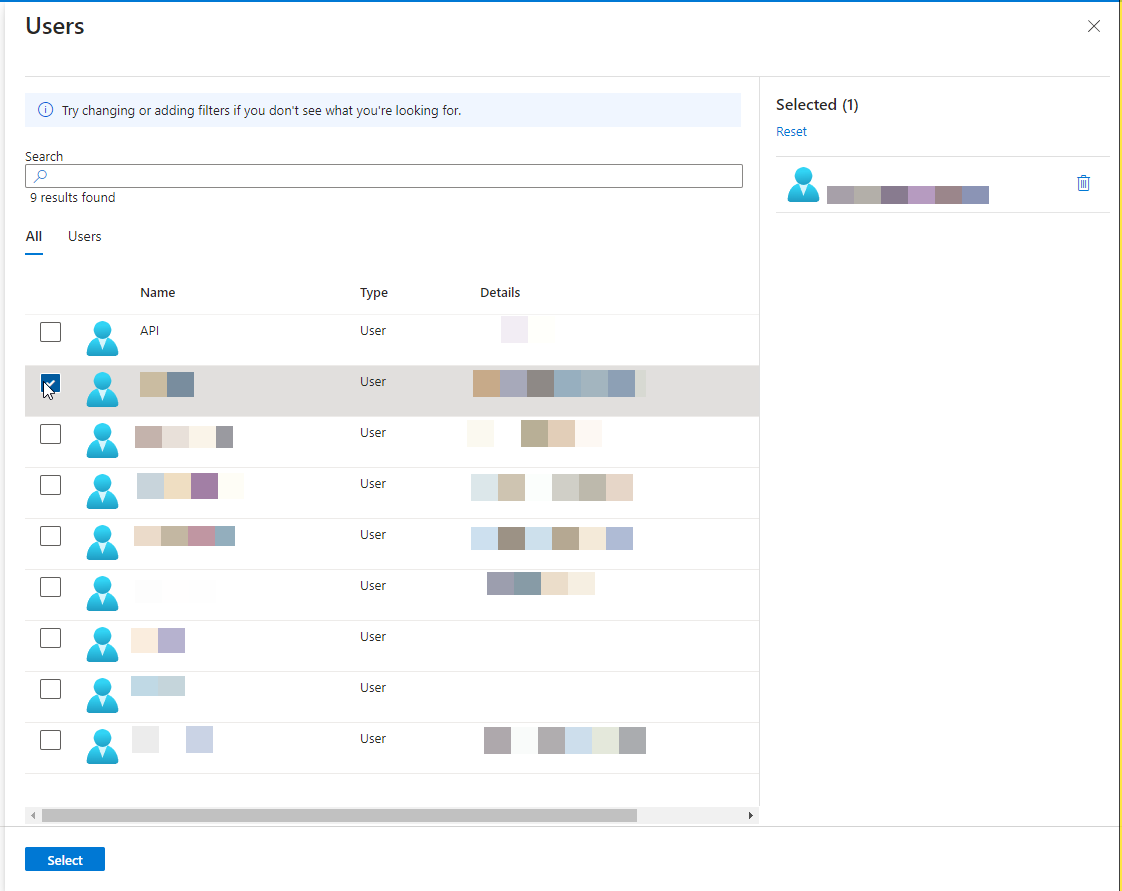
Please select the “Users and Groups” item from the left navigation menu. Next, select “Add User/Group” from the navigation at the top.
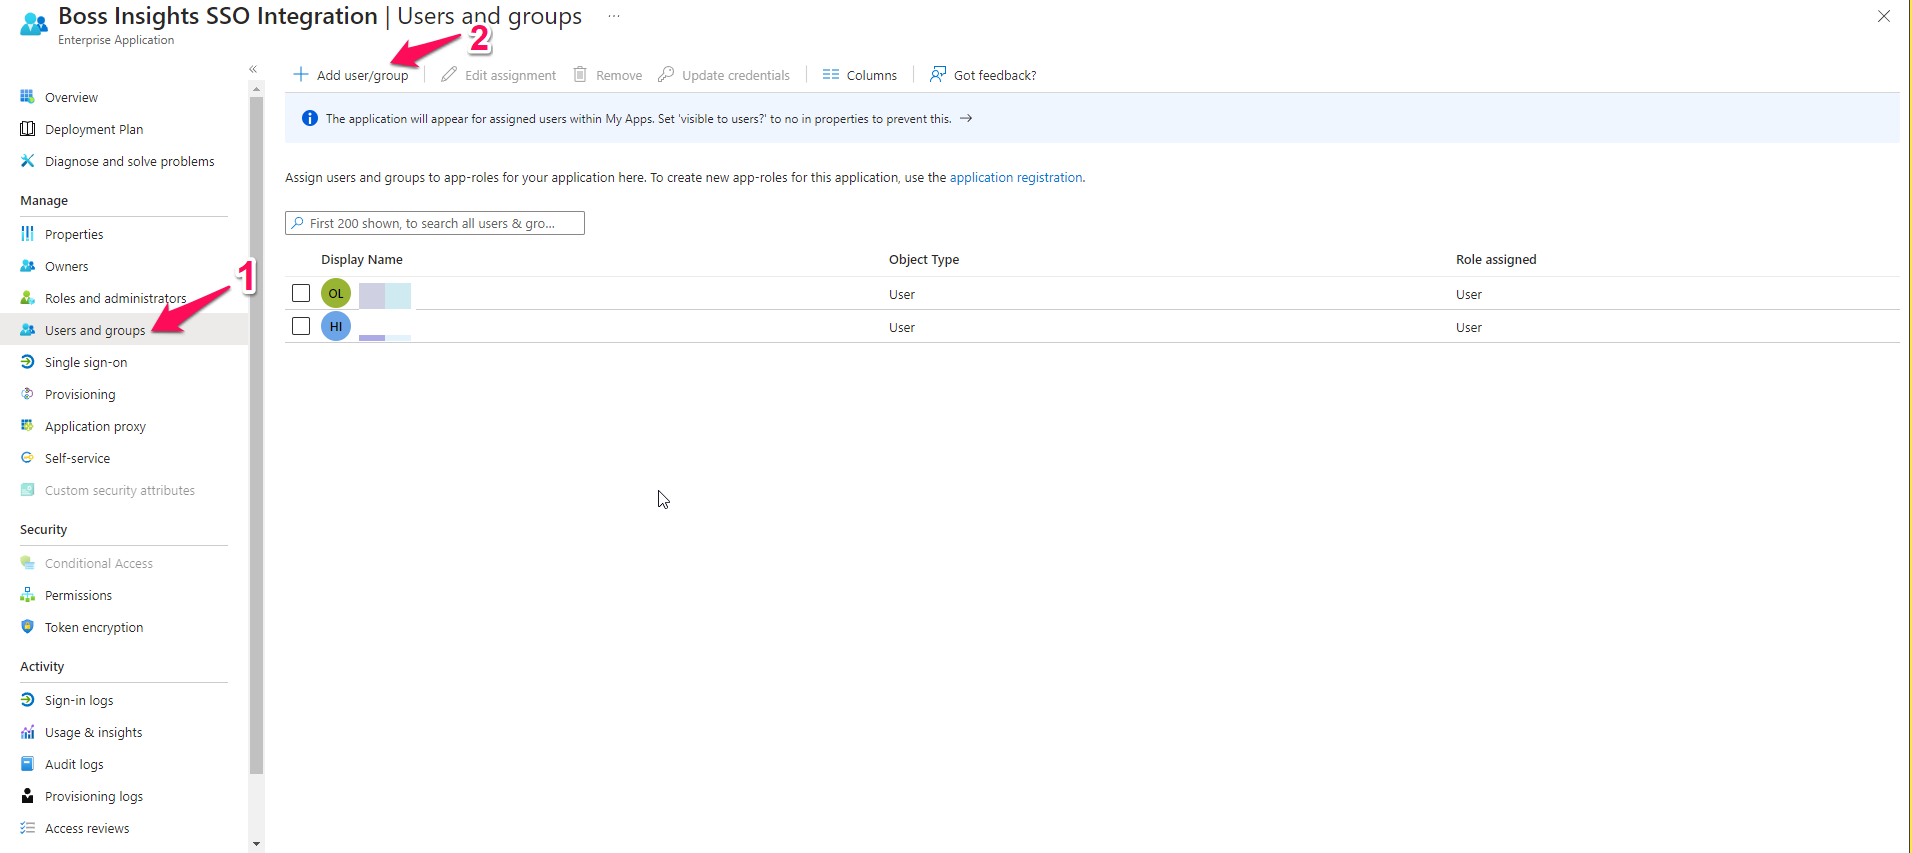
This will open up a configuration menu on the right of your screen. Please select users that you would like to be able to use the SSO. Click the blue “Select” button when you are done.
Next, we will be configuring SSO from the Boss Insights platform.
Step 6: Configuring Boss Insights Settings
After signing in to your administration portal, use the left navigation menu to get to Management > Settings.
From here, select the “Security Tab”.

Under Administration Provider, please select “Microsoft - Entra ID” (1) and then enter in your Entity ID (2). Please note that your Entity ID must match the Entity ID you entered for Basic SAML Configuration in Step 4.
Next, please upload or copy and paste the Federation Metadata XML (3).
If you added an optional group claim in Step 2, please add the Microsoft Azure to BossInsights comma separated group mapping: GROUPIDINAZURE=GROUPNAMEINBOSSINSIGHTS (4).
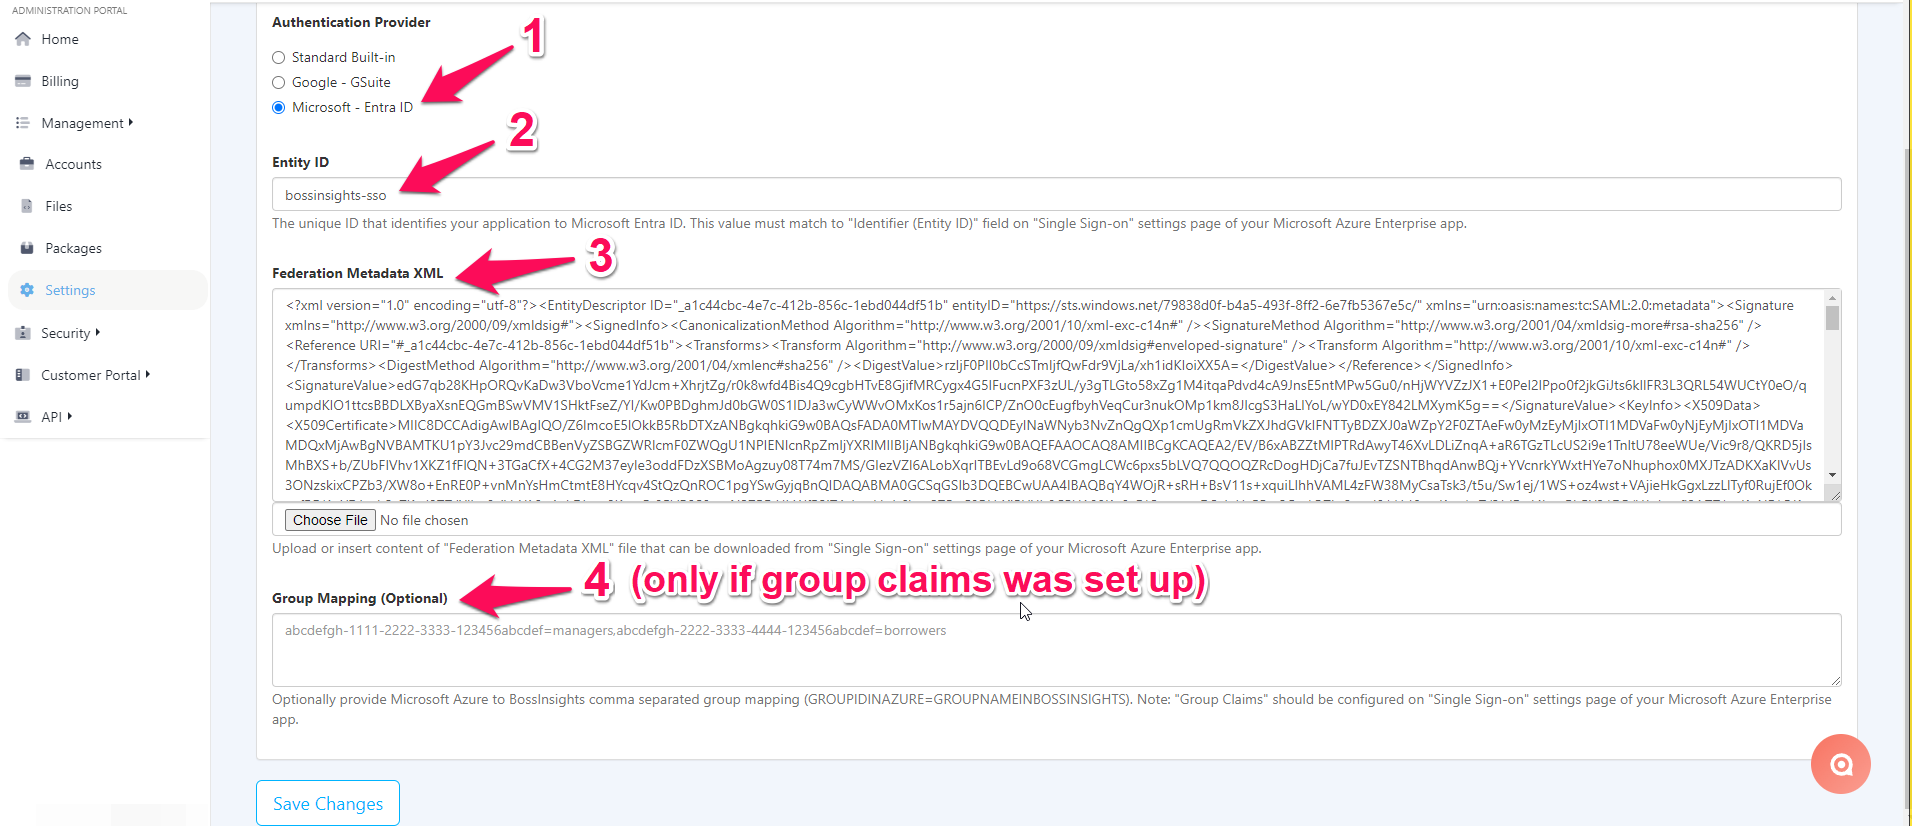
Please select “Save Changes” when you are done.
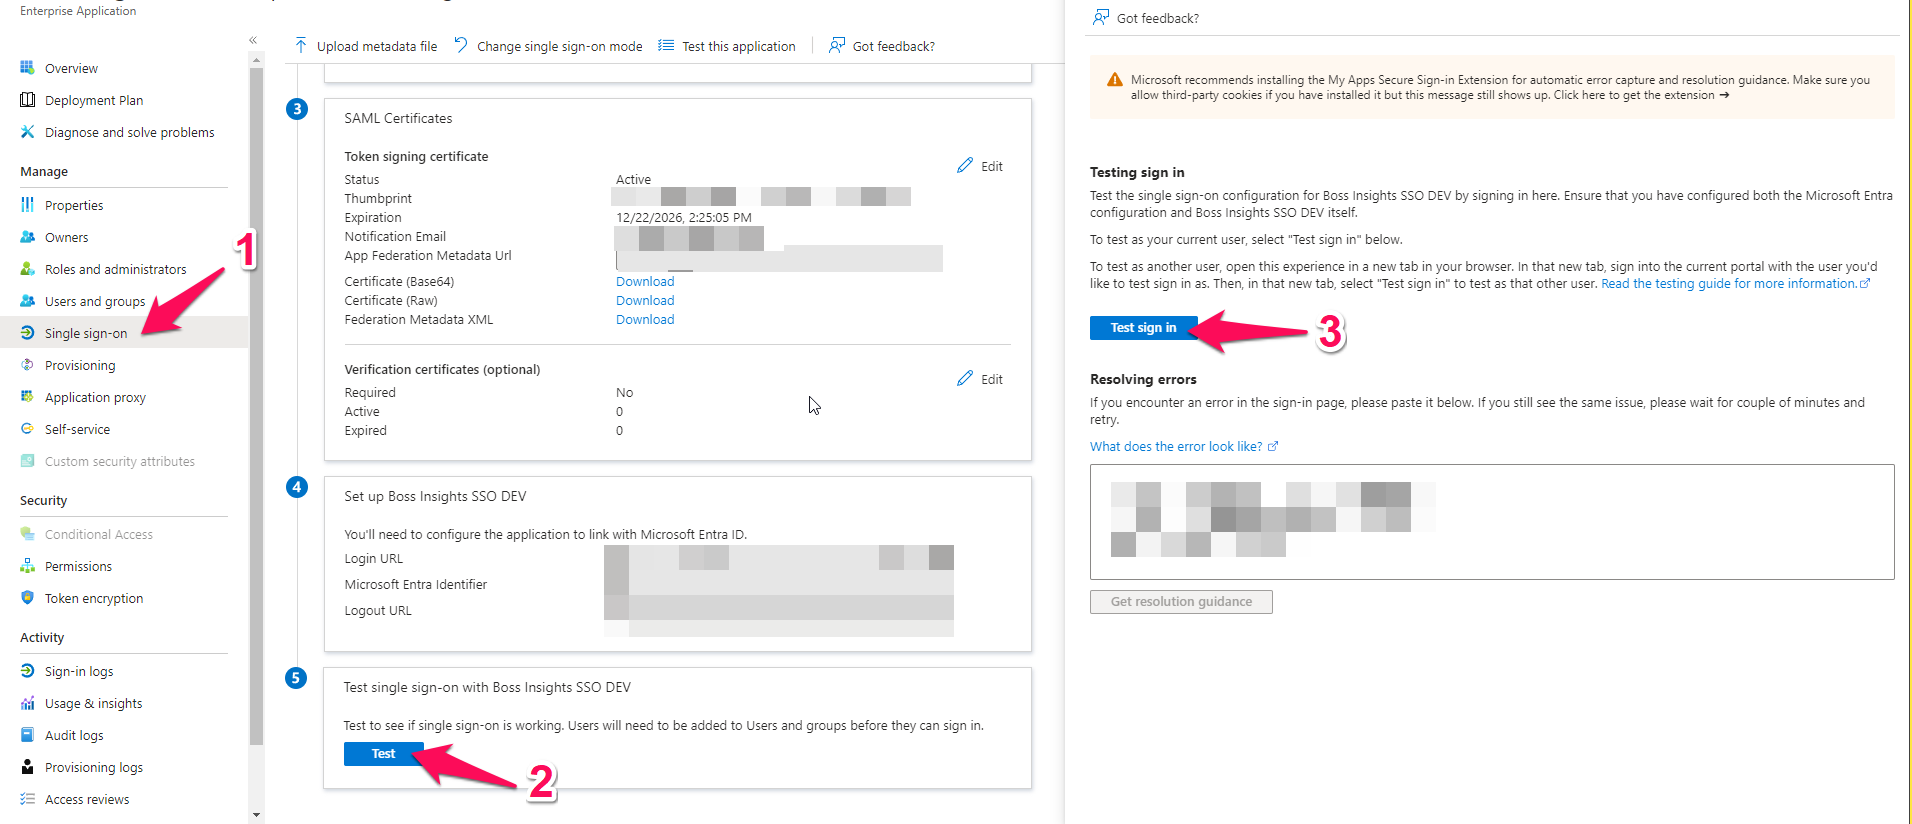
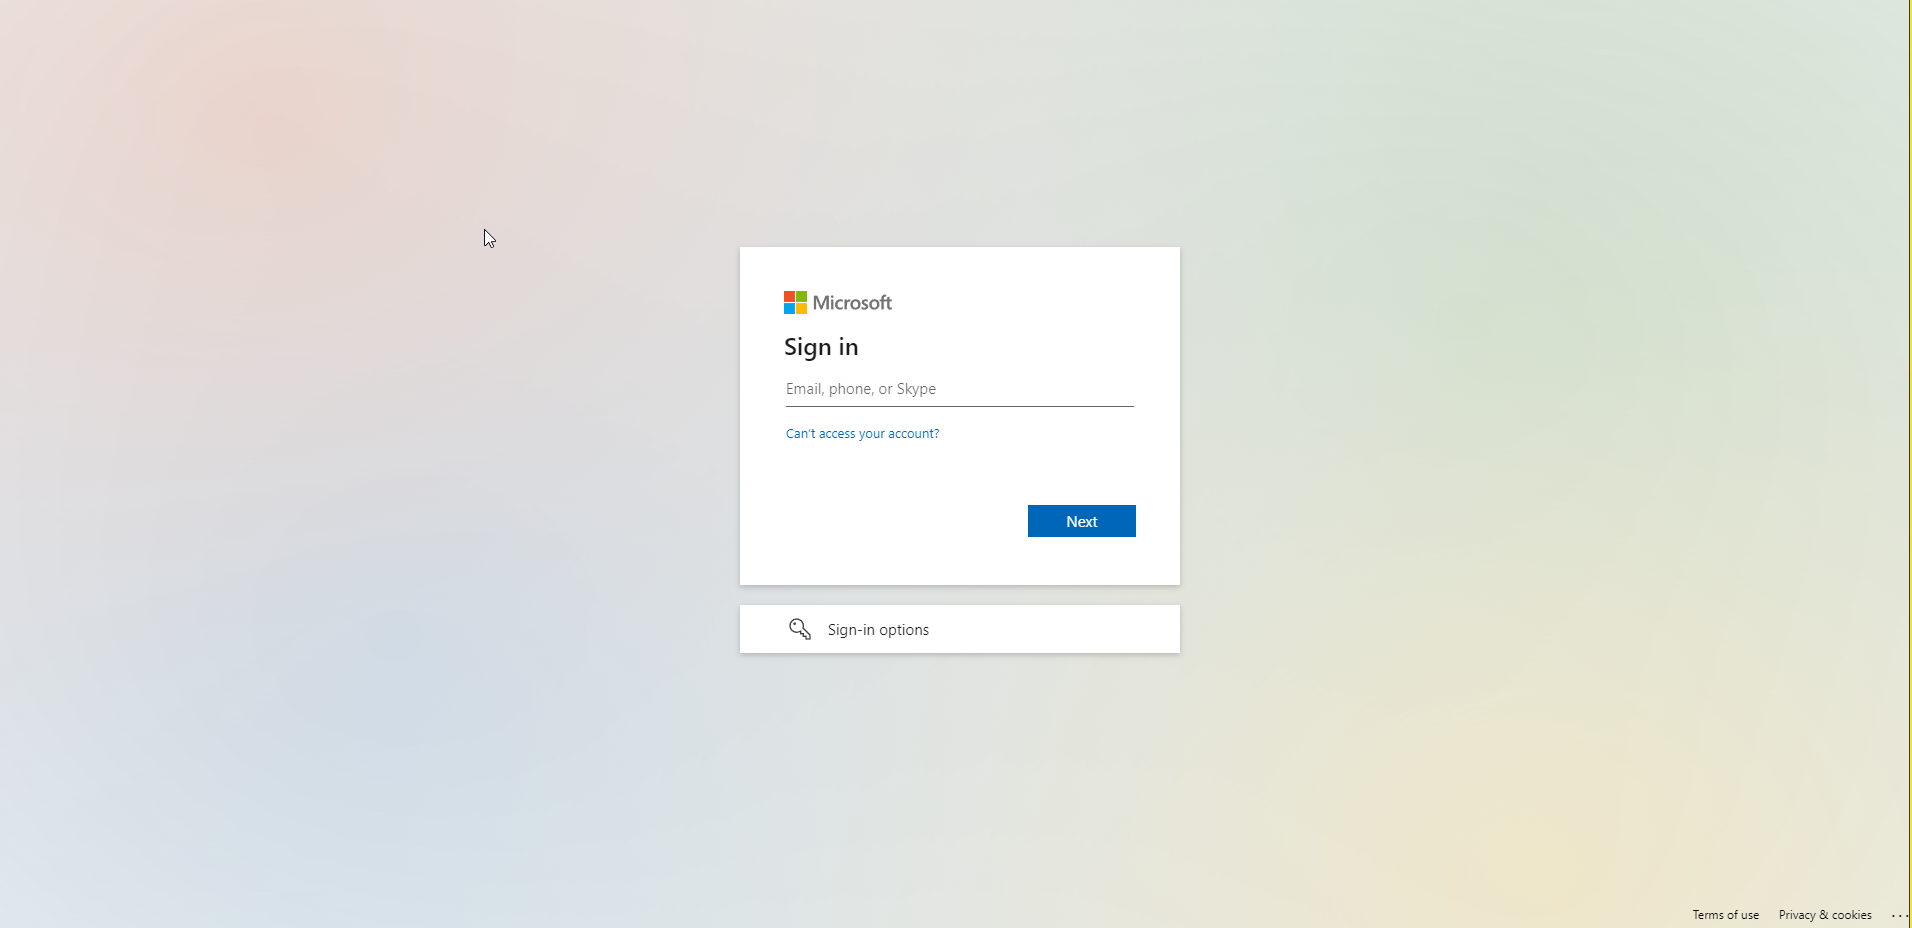
Step 7: Getting Ready for Testing
At this point, your SSO configuration is complete. Your users will be able to use it to sign in. When they visit their portal, they will come across a screen like below:
If you would like to test this process, you can select the “Single Sign On” item from the left navigation menu back on Microsoft Azure (1). Then select the blue “Test” button (2). Finally, you can select “Test Sign-in” from the configuration menu that appears on the right (3).