Custom Domain Name
The process of setting up a custom domain name is somewhat technical and may require the assistance of a web developer or IT administrator.
If you would like to operate the platform under your own custom domain name you will need to carefully follow these steps:
Park your domain on our platform by setting a CNAME record in your domain name DNS settings
Setup a security certificate for encrypted communications by verifying domain ownership with an additional CNAME record in your DNS settings
Prevent spam signups by setting up a Google ReCaptcha API key
Submit ReCaptcha key and secret through the admin portal
If you were parking mycompany.com then after setup if your domain was companycapital.myintranetapps.com it will now be companycapital.mycompany.com, any customers that join your platform will also be assigned subdomains under the mycompany.com domain.
If you wish you may still point the Apex/Root domain name - e.g. mycompany.com and perhaps the www subdomain to your own web host provider using a DNS A record to continue to serve your existing marketing website.
Park your domain
In order to park your domain name you will need the ability to add new DNS records for your domain name.
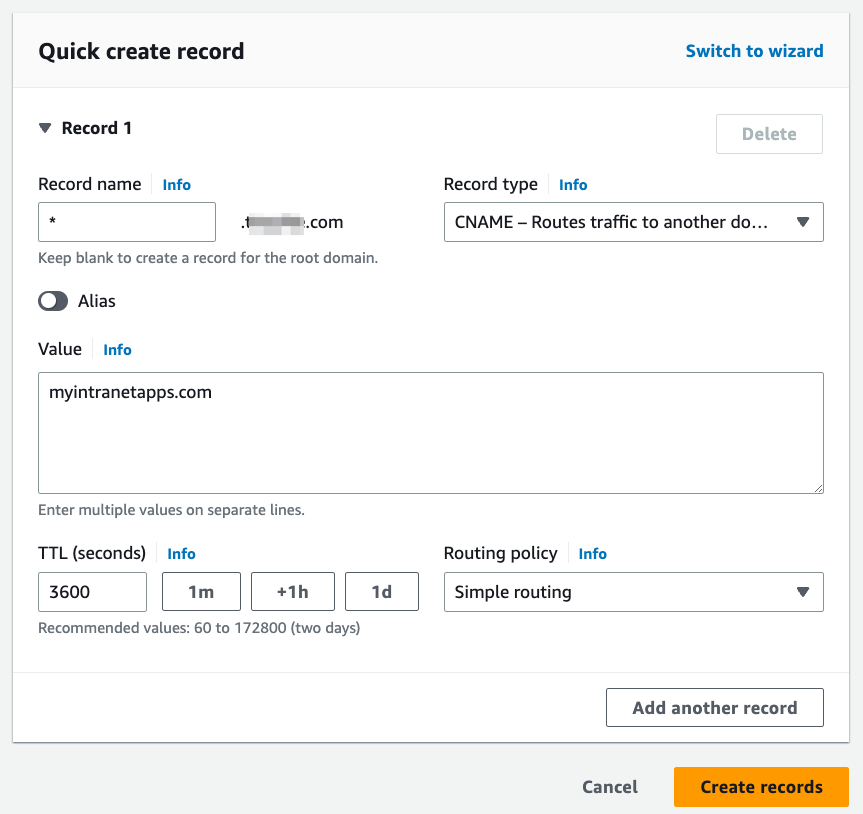
Create a wildcard CNAME record:
Record Name | * |
Record Type | CNAME |
Value | myintranetapps.com |
You must set the value of the record to the correct Boss Insights domain name where your platform is geographically hosted. I.e. com = US, ca = Canada, uk = United Kingdom
In the AWS Route53 DNS manager it looks like this: (your control panel may differ)

Once the record has been created it may take some time to propagate to DNS servers around the internet, you will now need to contact support to set up a security certificate.
You can verify the DNS records have been entered by using a third party tool such as MXToolbox to lookup the DNS records as they appear on the internet. Because you’re setting up a wildcard entry you should test with a fictitious subdomain, such as test.mycompany.com and it should resolve and show a canonical name of the Boss Insights domain name
Some popular domain registrars & DNS management companies include help on how to do this:
GoDaddy - https://www.godaddy.com/help/manage-dns-records-680
AWS Route 53 - https://docs.aws.amazon.com/Route53/latest/DeveloperGuide/dns-configuring-new-domain.html
Microsoft Azure - https://learn.microsoft.com/en-us/azure/dns/dns-operations-dnszones-portal
Squarespace - https://support.squarespace.com/hc/en-us/articles/205812348-Accessing-your-Squarespace-managed-domain-s-DNS-settings
Setup a security certificate
To set up a security certificate you need to contact Boss Insights help desk and request a security certificate for your custom domain. The team will then provide you with a DNS based validation record that will need to be setup within your DNS management system to prove that you control this domain name. Once these records are in place you should update your help desk request to notify the Boss Insights team. It may take some time before the process validates and completes.
You can verify the DNS records have been entered by using a third party tool such as MXToolbox to lookup the DNS records as they appear on the internet.
Prevent spam signups
You must have a Google account managed by your company to proceed, sign up here. Please do not use a personal Google account.
To prevent automated account signups on the platform we support using Google ReCaptcha. ReCaptcha is a free service but you must have a Google account to set it up. It is recommended to set up a Google account that is managed by the IT admin of your organization.
To start, please log in to your account and click the plus “+” symbol in top navigation.

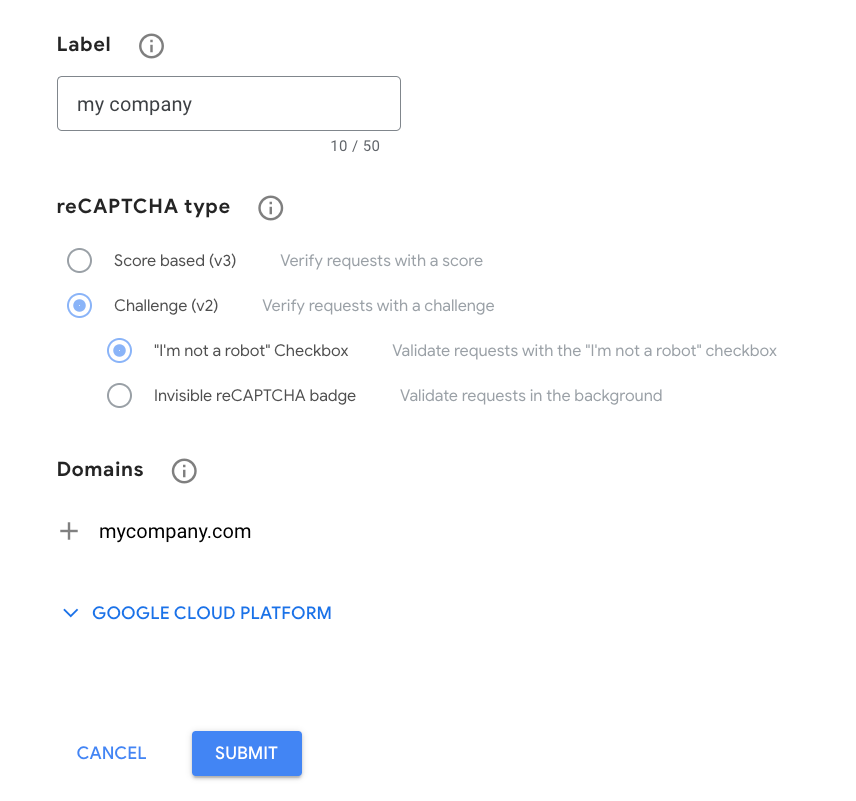
Then fill out the appropriate information on the page. When using a custom domain you need to create a new site with a “v2 checkbox” style of validation and include your domain name. An example is shown below.

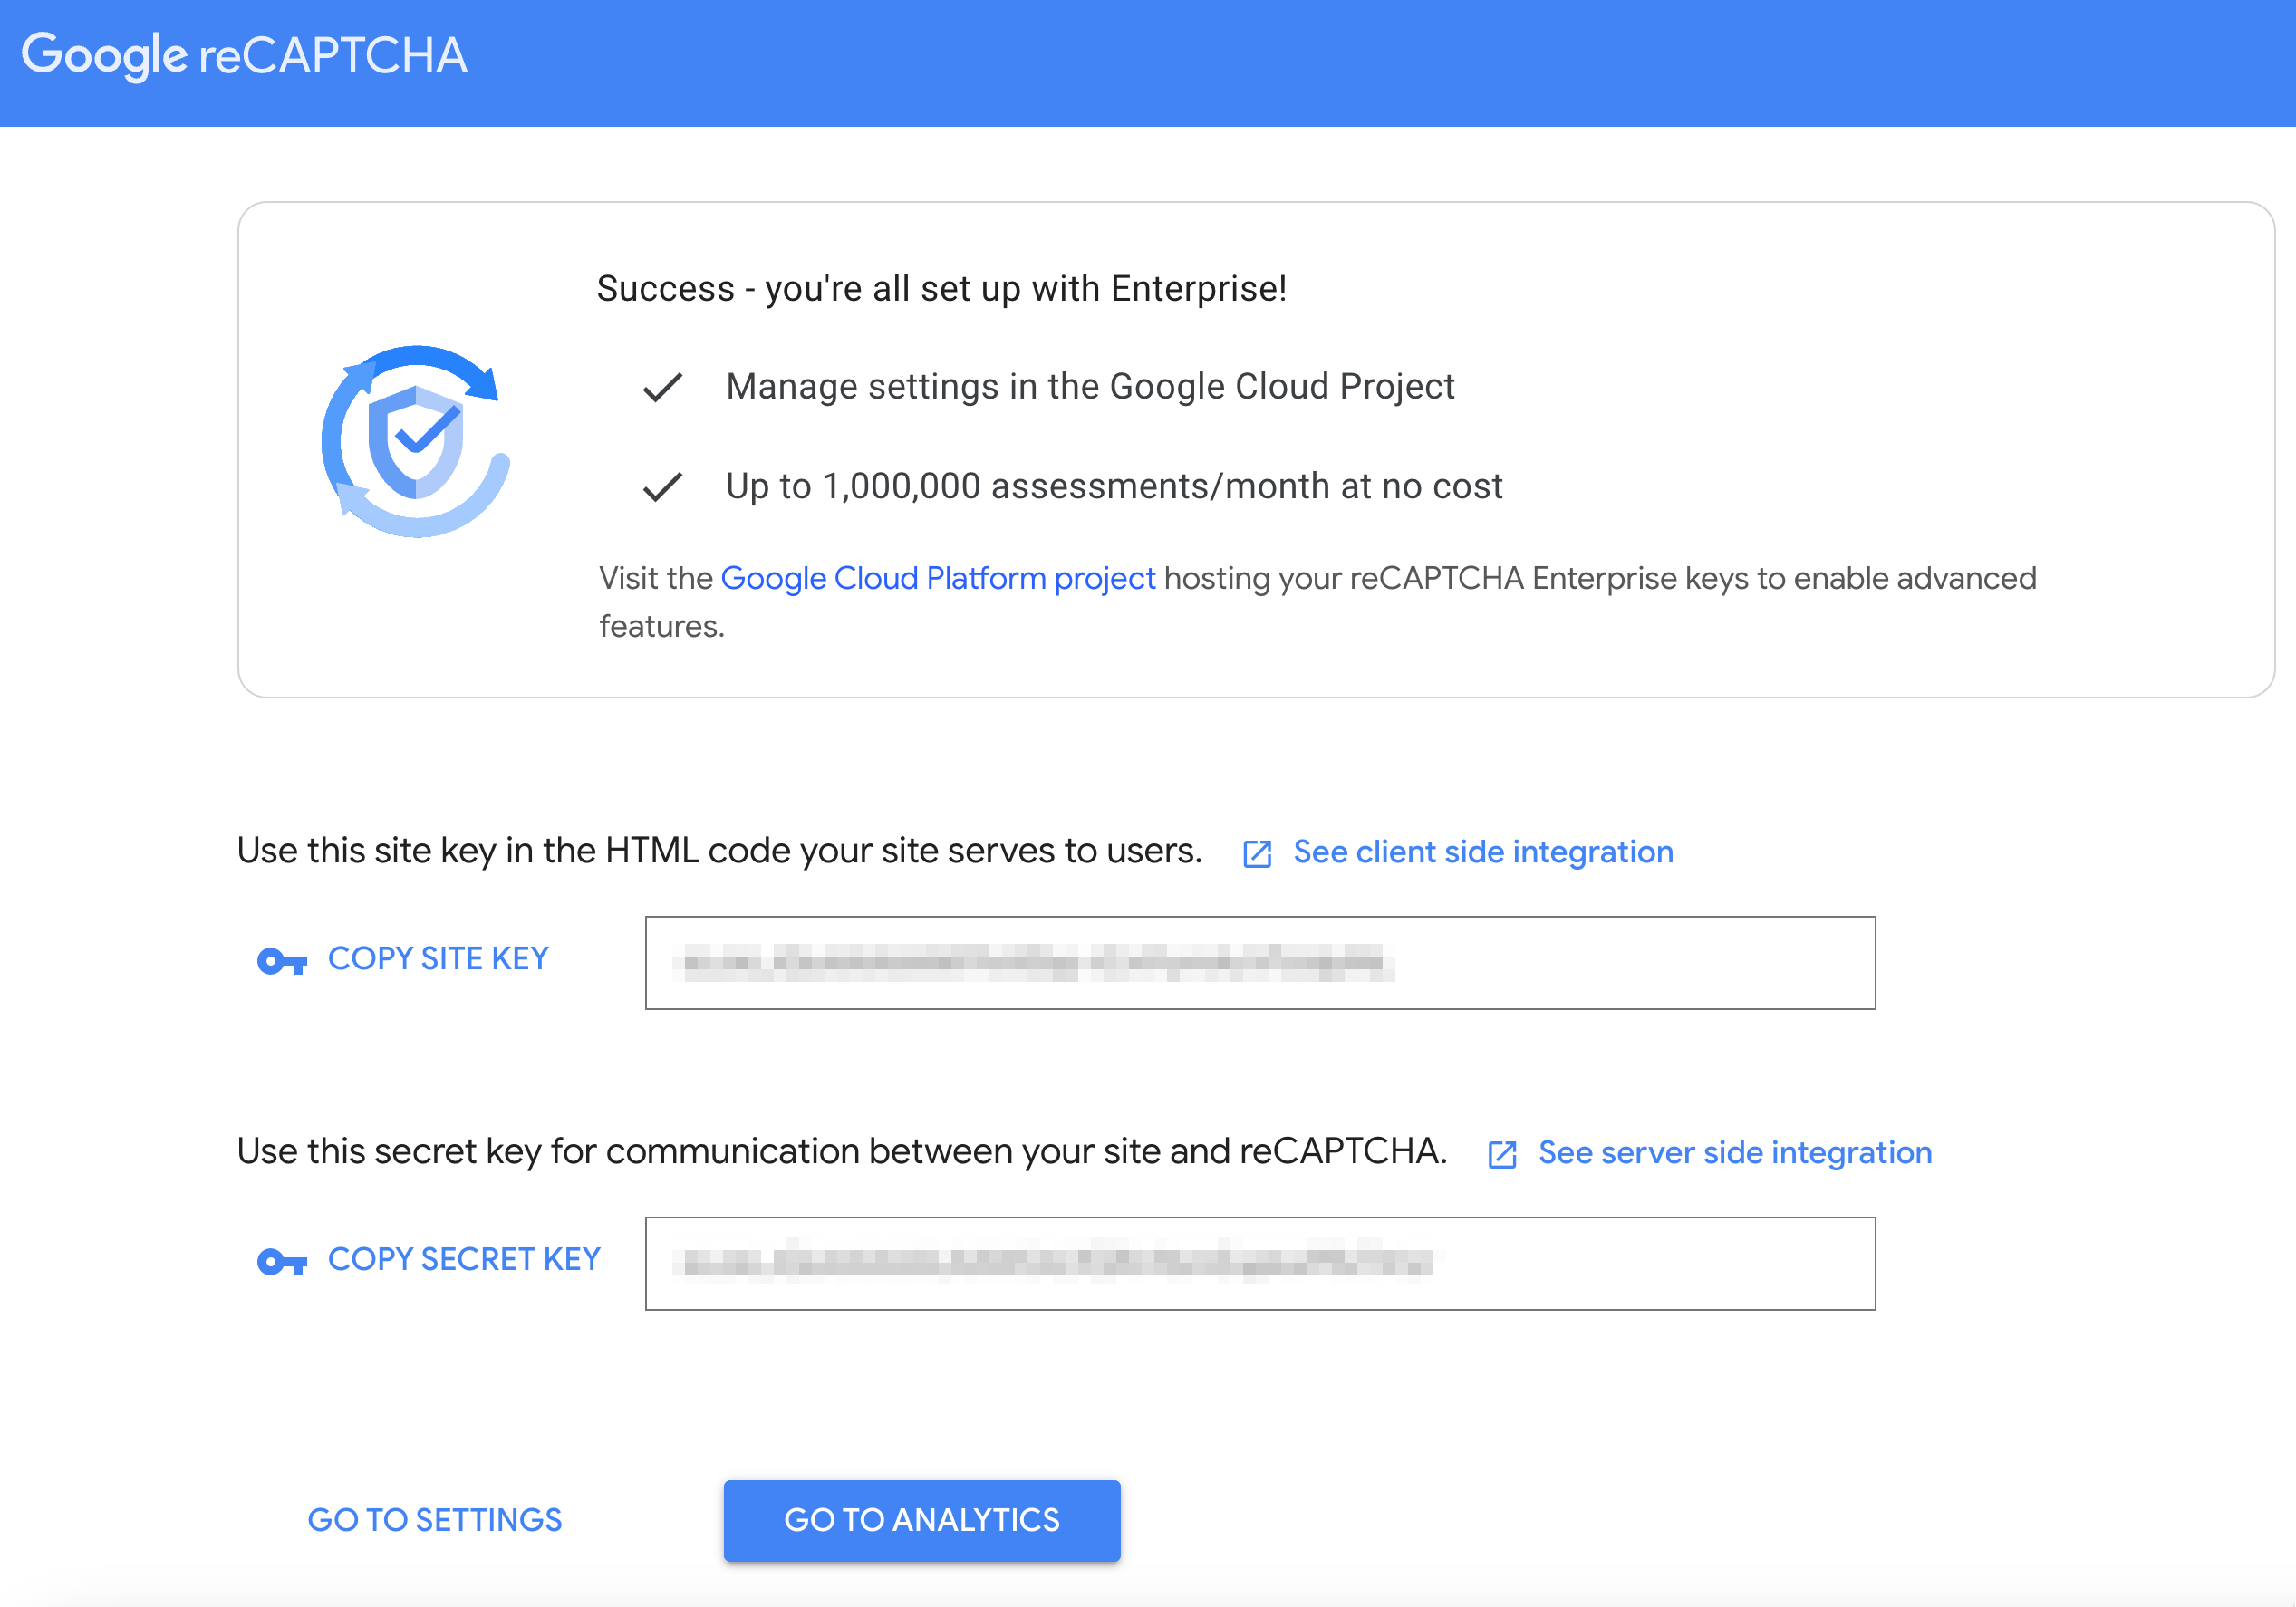
Upon successful setup, you will be shown a confirmation screen.

Submit Info to Boss Insights through admin Portal
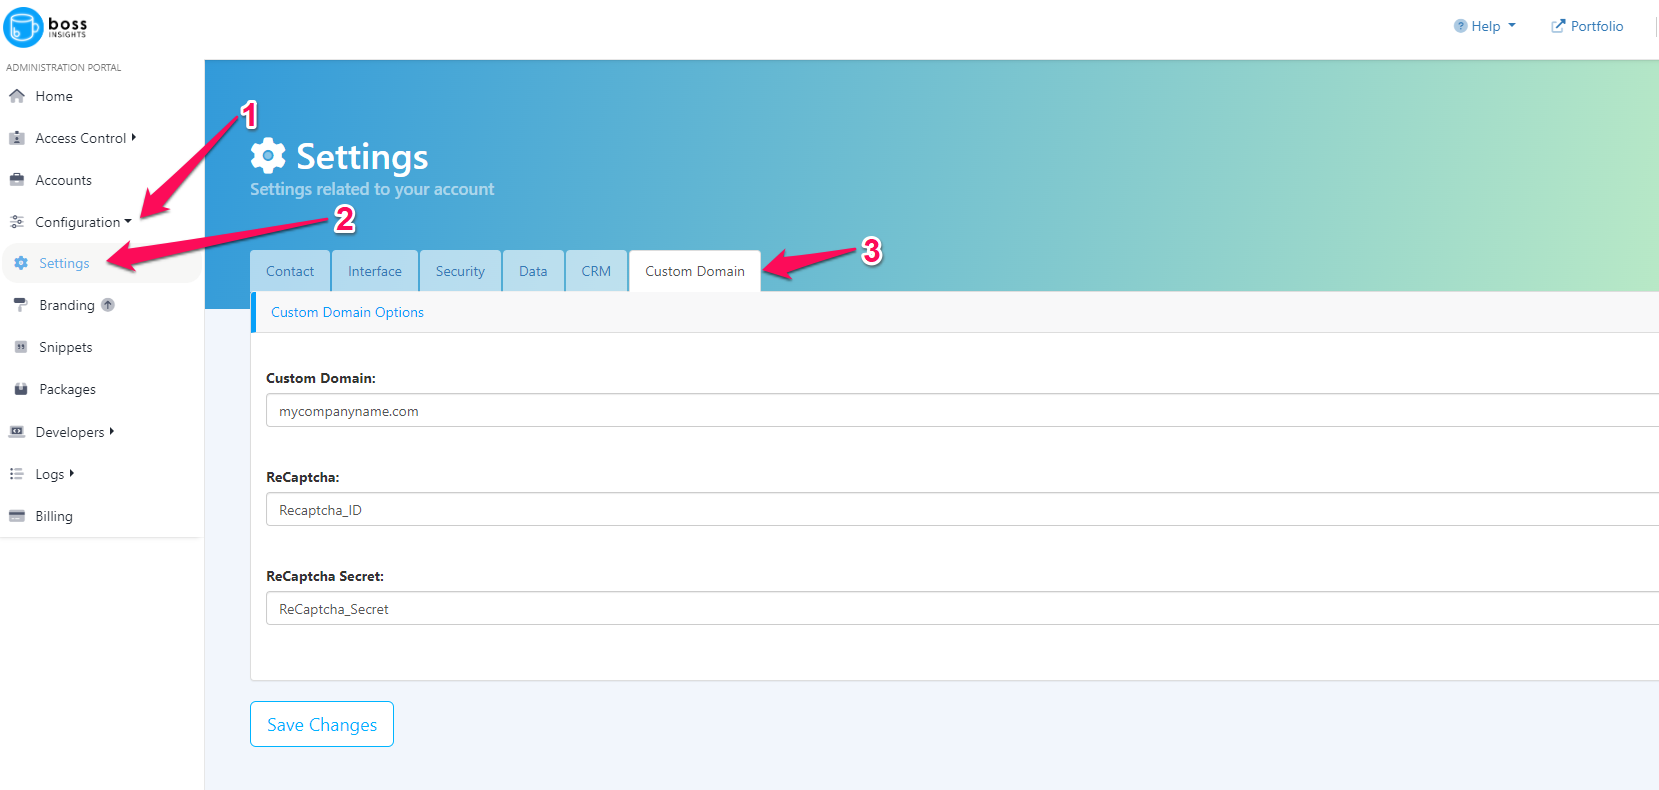
Go to the Admin portal and then navigate to Configuration → Settings → Custom Domains
Enter in your custom domain, ReCaptcha key, and ReCaptcha secret that was given by google in the previous step
