Workflow Customization
A workflow is used within the portal application that an end user accesses to provide a guided experience in collecting data.
A set of steps is defined in a JSON file, this file can contain conditional logic to hide/show steps depending on data attributes of the end user. You can decide the number of steps required and also have control over how they are presented visually.
Example workflow
The navigation to the left shows the steps of the workflow. This step of the workflow shows the last step before submission:
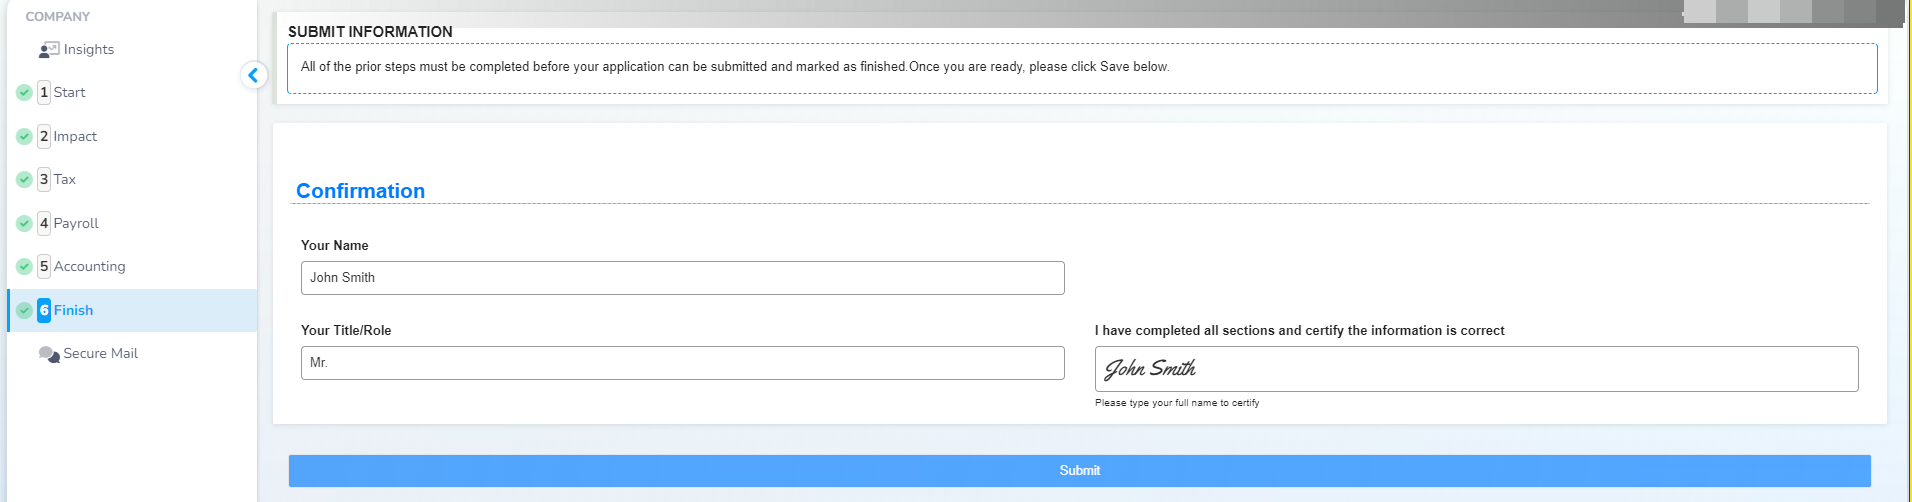
The green checks next to each step are called Checkers.
How To Create A Custom Workflow
Boss Insights offers a drag-and-drop workflow editor to simplify this process! See the documentation here.
In order to customize the workflow you will need to edit the navigation-config.json file within your account via WebDAV.
This file is used by not only your account but also by all of your end user accounts that are sharing data with you. The steps can be arranged in any order you like, though some steps (like mapping of a chart of accounts) will be dependent on earlier steps.
To begin adding workflow steps, you must create a menu array within the root object. Within this array, each workflow step will be a new object. Please see the Navigation-Config Keys table below for more information.
Sample Navigation-Config Code
Below is example code of two steps. To see an example of a complete Navigation-Configuration file please see below.
{
  menu: [
    {
      id: 'profile',
      name: 'Start',
      app: 'company/profile',
      step: '1',
      hint: 'Tell us about your business, we’ll save the information you provide each step of the way',
    },
    {
      id: 'impact',
      name: 'Impact',
      app: 'company/forms',
      step: '2',
      options: {
        key: 'impact'
      },
    },
      ...
    },
  ]
}
Navigation-Config Keys
For additional information and more detailed information on keys/attributes, please see https://bossinsights.atlassian.net/wiki/spaces/PUBLICDEV/pages/889618478/Data+Model#Form-and-Workflow-Data-Model-(FDM) .
Keys | Description |
|---|---|
REQUIRED | The id for the tab and form, this is |
REQUIRED | The title of the tab you would like to show up on the navigation. |
REQUIRED | The page that you want to add a link to in your menu item. For example, |
REQUIRED | You may choose one or the other. The step number of the particular form. If icon is chosen, this can be replaced with a link to an icon instead. |
OPTIONAL | Helpful text that appears in a banner on the form page. This is useful for providing quick context. You may see an example banner in the example image above. |
OPTIONAL | Used to add query parameters to the url of the page this tab is leading to. For forms: For integrations: |
Example Completed Configuration
This configuration matches the image above.
You may also check out the https://github.com/boss-insights/kitchen-sink example on Github to see a range of possibilities, or start with a minimal template using https://github.com/boss-insights/simple-account.
{
    title: ' ',
    menu: [
        {
            name: 'Secure Mail',
            app: 'company/messages',
            icon: 'comments',
            hint: 'Secure Mail',
        },
        {
            title: 'Workflow'
        },
        {
            name: 'Information',
            app: 'company/profile',
            step: '1',
            hint: 'Please ensure your legal name matches your application and verify the completeness and accuracy of other fields.'
        },
        {
            name: 'Connect Applications',
            app: 'company/integrations',
            step: '2',
            hint: 'Please connect your *business* applications and accounts to complete your application. This will only allow us to read your data without any write permission. If you do not use cloud based accounting systems there is an excel form you can fill in on the Upload Files step',
            options: {tags: 'accounting'} // ,commerce,banking
        },
        {
            name: 'Upload Files',
            app: 'company/documents',
            step: '3',
            hint: 'Optional: If you prefer to manually upload files instead of connecting cloud applications you must upload a copy of your chart of accounts and monthly trial balance files. Please see the *templates* box for examples. After upload you need to select the file, select the document type and choose import. For full instructions see https://bossinsights.atlassian.net/wiki/spaces/CH/pages/179273730/Upload+Financial+Documents',
            options: {docFilter: 'CHART_OF_ACCOUNTS,TRIAL_BALANCE', show: 'templates'}
        },
        {
            name: 'Map Data',
            app: 'company/mapping',
            step: '4',
            hint: 'Please fill in the information below which will enable the platform to better understand your finances.\n \
            There are four categories to fill in:\n \
            1.    Period Name: This is pre-filled to default period – there is no need to alter this, it is for your reference and useful if you have multiple periods defined\n \
            2.    Accounting Source: Your accounting system will be included in a drop-down menu. For example, if you used QuickBooks, it will be an option for you to select. Please select it.\n \
            3.    Financial Year End: Please enter the year end of your company\n \
            4.    Accounting Source Start Date: Please enter the date that you started using the cloud based accounting system. If you are using an excel file, please enter the date you started using that file (e.g. January 1, 2019)\n \
            5.    Click save, then click *modify chart of accounts* and review the list to ensure each account is mapped correctly'
        },
        {
            name: 'Reconcile',
            app: 'company/reconciliation',
            step: '5',
            options: {tags: 'accounting'},
            hint: 'When providing new data you should indicate the date it was last reviewed for accuracy, for example you may provide financial information until Apr 20th yet have only verified your accounting transactions up till Mar 31st - in this case you would indicate Mar 31st as the date information can be relied on until'
        },
        {
            name: 'Forecast Table',
            app: 'company/forms',
            options: {
                key: 'forecasts'
            },
            step: '6',
            hint: 'Please fill in your forecasted numbers for the following metrics.\n \
                    AutoFill instructions:\n \
                    1.    Enter the data for the first cell in a row.\n \
                    2.    Click and drag the blue square in the bottom right of the cell. Drag across the entire row.\n \
                    3.    You can use the popup menu to set the increment/decrement between each cell, or to copy your number as-is. \n \
                    4.    Click the blue arrow button to the right of your desired option to complete your AutoFill.'
        },
        {
            name: 'Submit',
            app: 'company/forms',
            step: '7',
            hint: 'Verify the completeness and accuracy of your data before submitting the form below.',
            options: {key:'submit'}
        },
        {
            name: 'Integrations App',
            icon: 'menu',
            menu: [
                {
                    name: 'Document Sending',
                    app: '../integrations-extension',
                    icon: 'file-plus',
                },
                {
                    name: 'Bank Accounts',
                    app: '../dock/manage-banking-connection',
                    icon: 'money-box',
                    options: {
                        integration: 'yodlee'
                    }
                },
            ]
        }
    ]
}