How to change portfolio permissions
In this article, we explain how you can set the permissions for the Portfolio and Invitations pages. The permissions control which companies a user can see in their Portfolio and Invitations, and they are set based on user groups.
How to open data.json5 for editing
Before beginning these instructions, please follow this guide:Uploading Files via WebDAV so you are able to connect to your Boss Insights Portal via WebDAV.
The portal server contains code and configuration files that run your Boss Insights portal. Please do not make any unnecessary changes to any files.
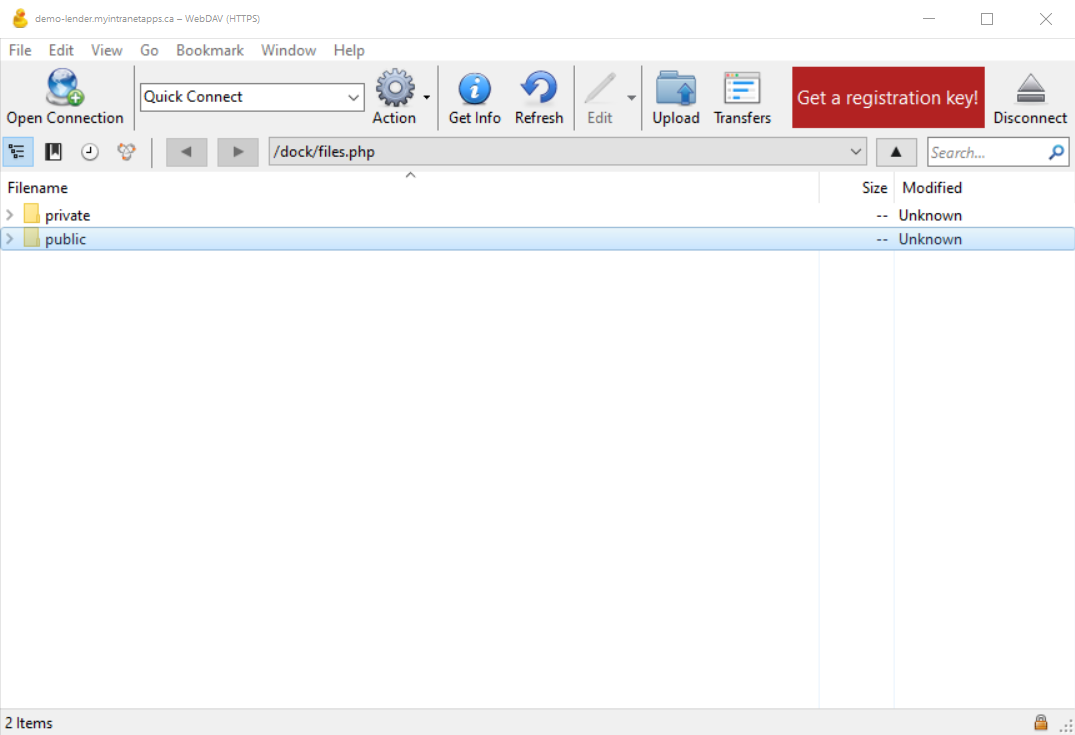
Connect to your Boss Insights Portal via WebDAV. The guide linked above has detailed instructions for doing this. Once connected, you should see a screen showing you the folders/files on your Portal.
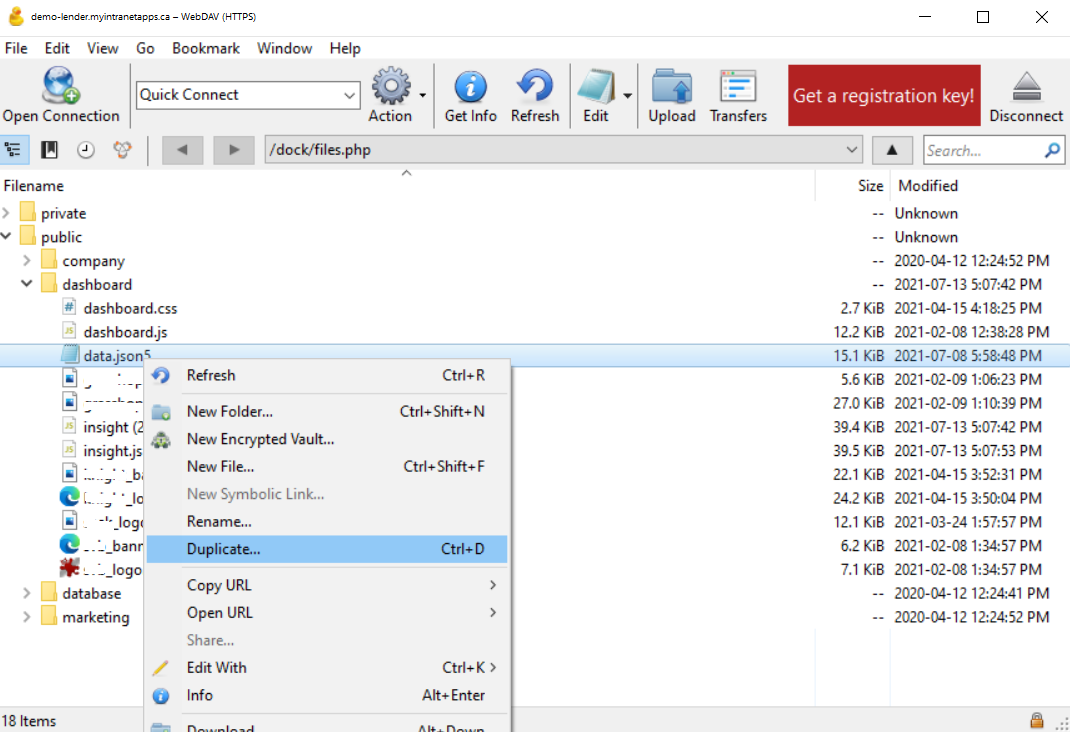
Click to expand ‘public/dashboard' folder. There should be a file there named ‘data.json5’. This is the file that must be edited to change portfolio permissions. Create a backup copy of the file by right-clicking and selecting 'Duplicate’. Use the default suggested name for the duplicate file. Never make changes to the data.json5 file without first creating a backup copy.

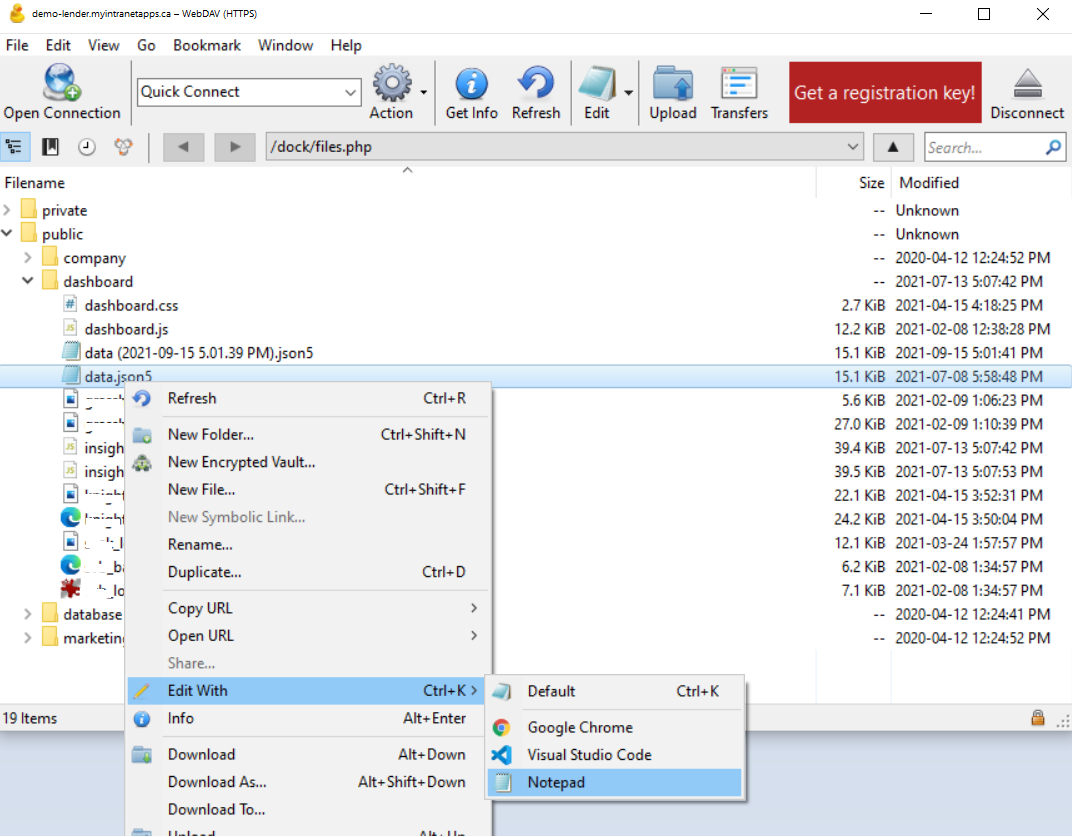
Right-click on the ‘data.json5’ file and select ‘Edit With’, and choose your preferred text editor from the list. The data.json5 file will be opened in the selected text editor, and any time you save changes to the file, your copy will immediately overwrite the data.json5 file on the server.
How to change Portfolio permissions in data.json5
Permissions are configured by user groups. You can read more about user groups and how to use them here: Users & Groups | Group-Management
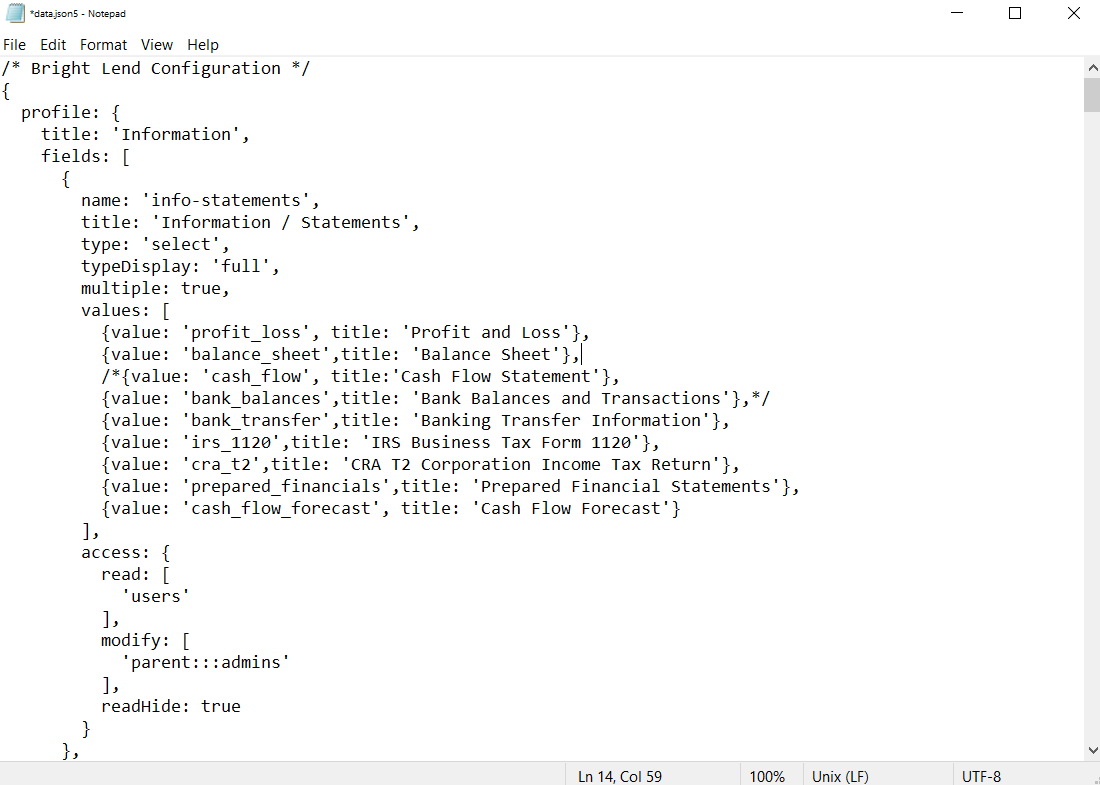
Press ctrl+F and search for the word “portfolio” until you find a section of the file that looks similar to this:
JSONportfolio: { owners: [ 'admins', 'users' ], permissions: [ { groups: [ 'admins' ], access: { view: 'all', edit: true } }, { groups: [ 'users' ], access: { view: 'own' } } ], fields: [ ...Configure who can be an ‘Owner’ of a portfolio company by adding or removing groups in the “owners” array. Any user that belongs to a group in the “owners” array can be selected as an Owner of a portfolio company.
The “permissions” array is an array of objects, where each object can be thought of as a permissions policy. The ‘policy’ object has a “groups” array which is a list of groups that the policy applies to, and an “access” object which determines the permissions granted by the policy. Create as many policy objects as is needed for your use case, whether that is a single policy that applies to all groups, or one policy per group.
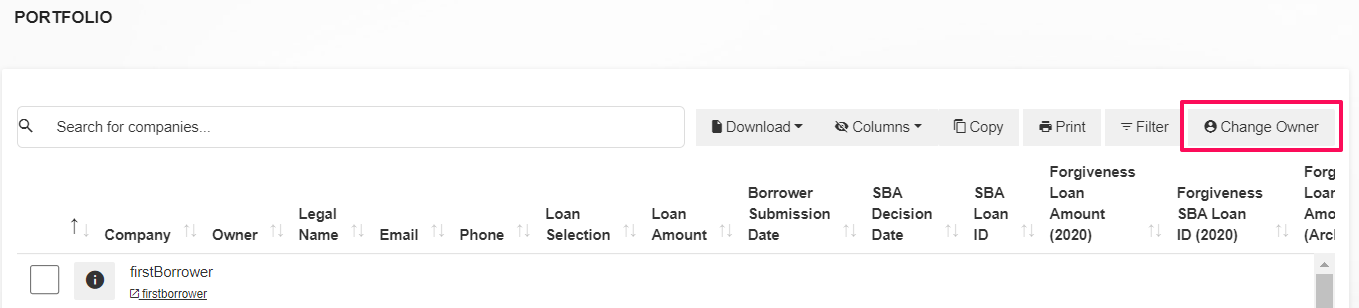
CODE... permissions: [ { groups: [ // list of groups that the following access permissions apply to 'admins' ], access: { view: 'all', // what companies are visible in the portfolio? 'all' or 'own' edit: true // can they use the 'Change Owner' button? true or false (or not set) } }, { groups: [ 'users' ], access: { view: 'own' } } ], ...Configure which companies are visible in the portfolio using the “access”->”view” setting. If ”view” is set to ‘all’, users in the applicable group will be able to see any and all companies in their portfolio. If ”view” is set to ‘own’, they will only be able to see companies for which they are the ‘Owner’. If ”view” is not set, they will not see any companies in their portfolio.
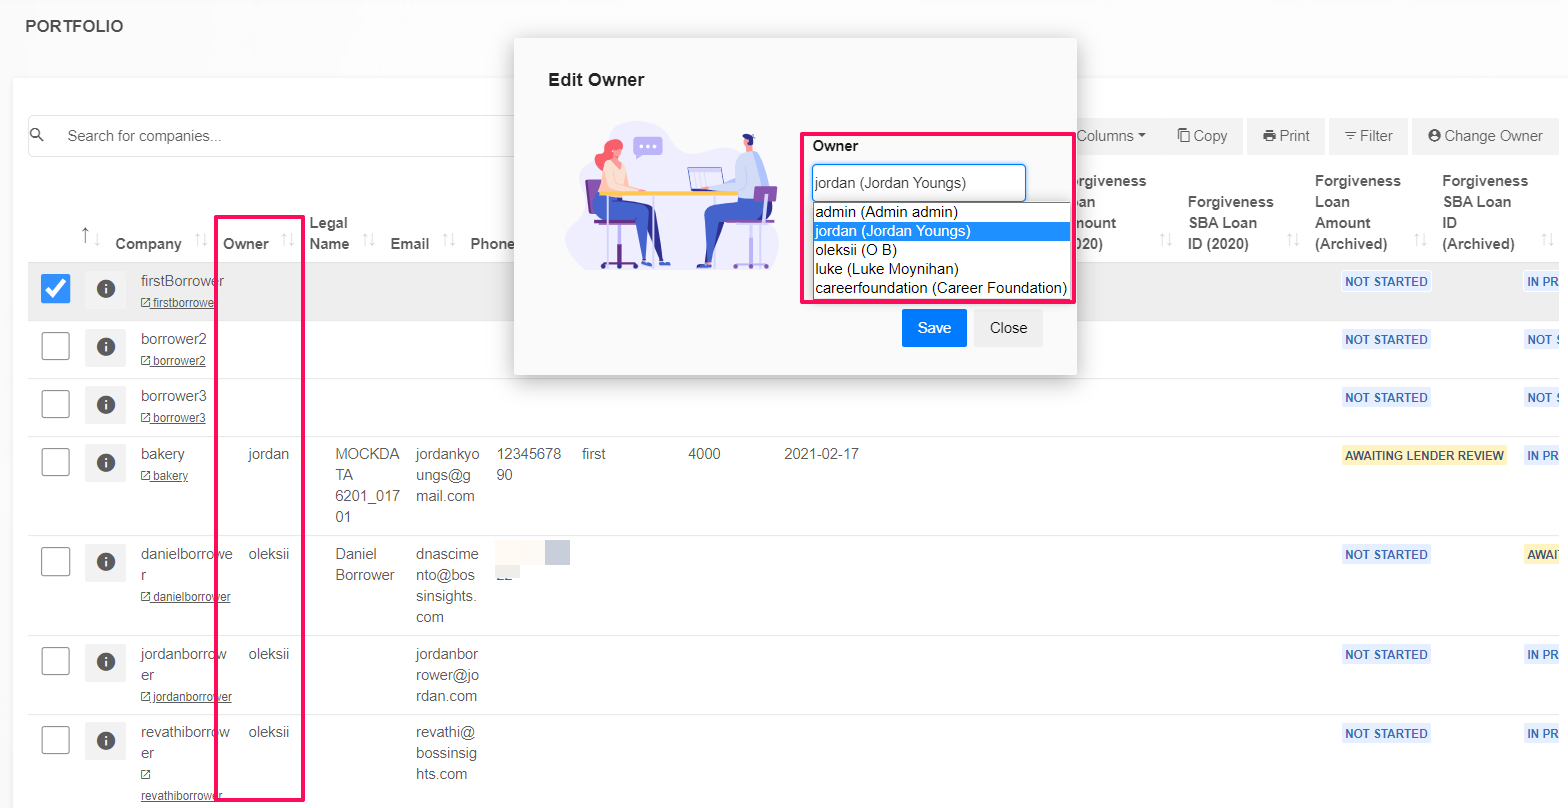
Configure who can use the ‘Change Owner’ button using the “access”->”edit” setting. If ”edit” is set to true, users in the applicable group will be able to edit the Owners of portfolio companies using the ‘Change Owner’ button at the top right of the portfolio. If ”edit” is set to false, or not set at all, they will not have access to the ‘Change Owner’ button.
Once you have made all of your changes, put them live on your Boss Insights Portal by using WebDAV. If you opened data.json5 using WebDAV’s “Edit With” option, simply save your file by pressing ctrl+S or going to File->Save, and your file will be automatically uploaded to your Portal server. If you downloaded data.json5, you can upload your modified version by dragging and dropping it into your WebDAV window, and confirming that you want to overwrite the existing data.json5.
How to Change Invitations Permissions in data.json5
Permissions are configured by user groups. You can read more about user groups and how to use them here: Users & Groups | Group-Management
Press ctrl+F and search for the word “invitations” until you find a section of the file that looks similar to this:
JSONinvitations: { uniqueJoinField: 'company-legal-name', owners: [ 'admins', 'users' ], permissions: [ { groups: [ 'admins' ], access: { view: 'all', add: true } }, { groups: [ 'users' ], access: { view: 'own', add: true } } ], fields: [ ...Configure who can be an ‘Owner’ of an invitation by adding or removing groups in the “owners” array. Any user that belongs to a group in the “owners” array can be selected as an Owner of an invitation.
The “permissions” array is an array of objects, where each object can be thought of as a permissions policy. The ‘policy’ object has a “groups” array which is a list of groups that the policy applies to, and an “access” object which determines the permissions granted by the policy. Create as many policy objects as is needed for your use case, whether that is a single policy that applies to all groups, or one policy per group.
CODE... permissions: [ { groups: [ // list of groups that the following access permissions apply to 'admins' ], access: { view: 'all', // what invitations are visible in the Invitations? 'all' or 'own' add: true // can they use the 'Invite Account' and 'Upload Account List' buttons? true or false (or not set) } }, { groups: [ 'users' ], access: { view: 'own', add: true } } ], ...Configure which invitations are visible in the Invitations using the “access”->”view” setting. If ”view” is set to ‘all’, users in the applicable group will be able to see any and all invitations. If ”view” is set to ‘own’, they will only be able to see invitations for which they are the ‘Owner’. If ”view” is not set, they will not see any invitations.
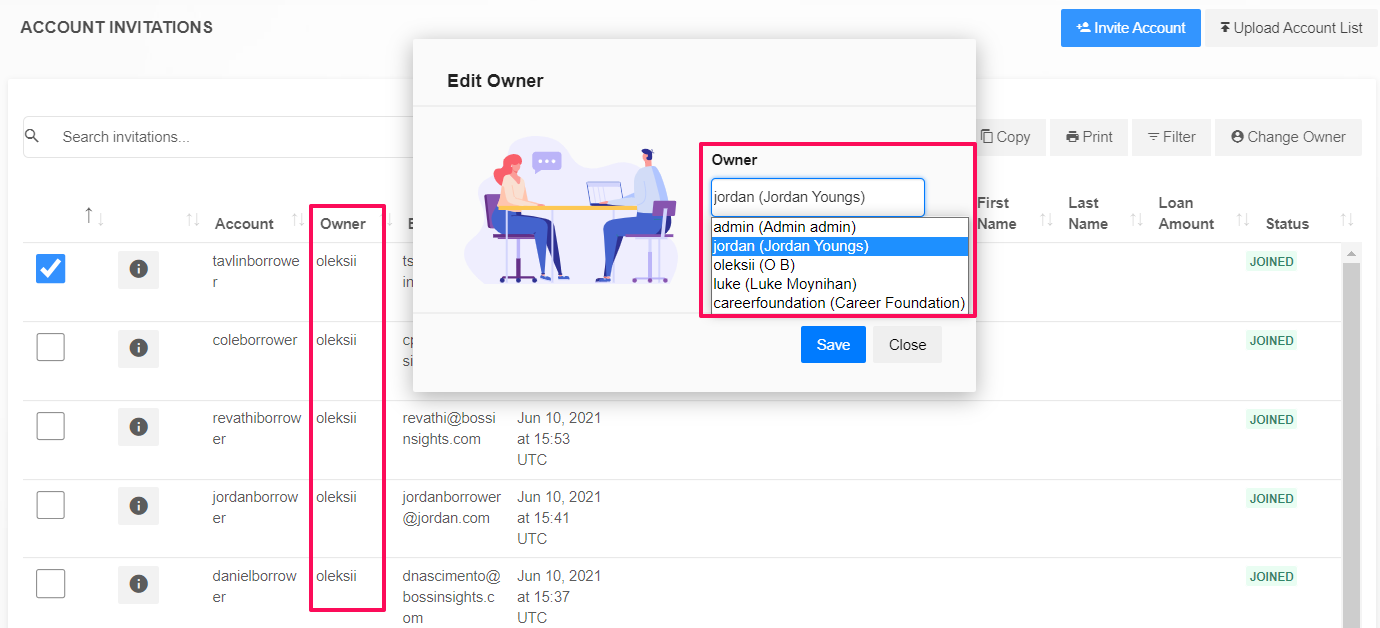
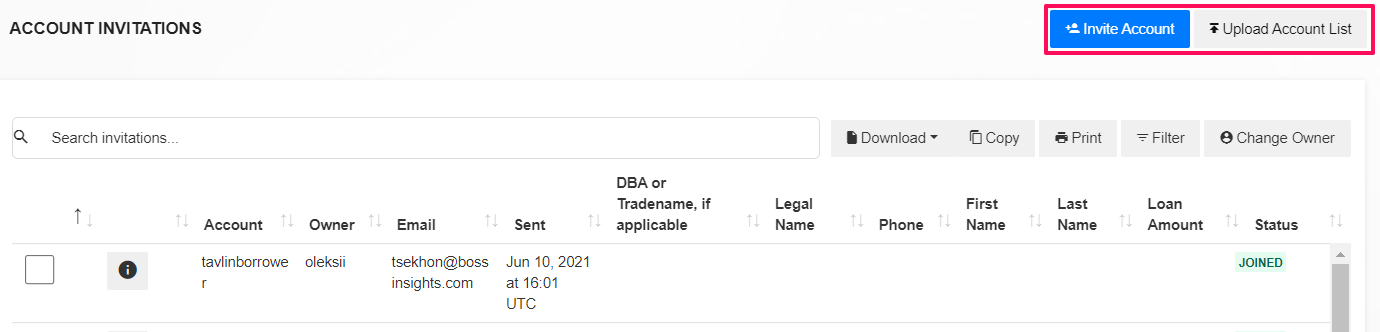
Configure who can use the 'Invite Account' and 'Upload Account List' buttons using the “access”->”edit” setting. If ”edit” is set to true, users in the applicable group will be able to create new invitations using the 'Invite Account' and 'Upload Account List' buttons at the top right of the Invitations. If ”edit” is set to false, or not set at all, they will not have access to the 'Invite Account' and 'Upload Account List' buttons.
Once you have made all of your changes, put them live on your Boss Insights Portal by using WebDAV. If you opened data.json5 using WebDAV’s “Edit With” option, simply save your file by pressing ctrl+S or going to File->Save, and your file will be automatically uploaded to your Portal server. If you downloaded data.json5, you can upload your modified version by dragging and dropping it into your WebDAV window, and confirming that you want to overwrite the existing data.json5.
