Snippets
Adding snippets is a great way to add pieces of information or text that can be reused many times throughout pages within your workflow.
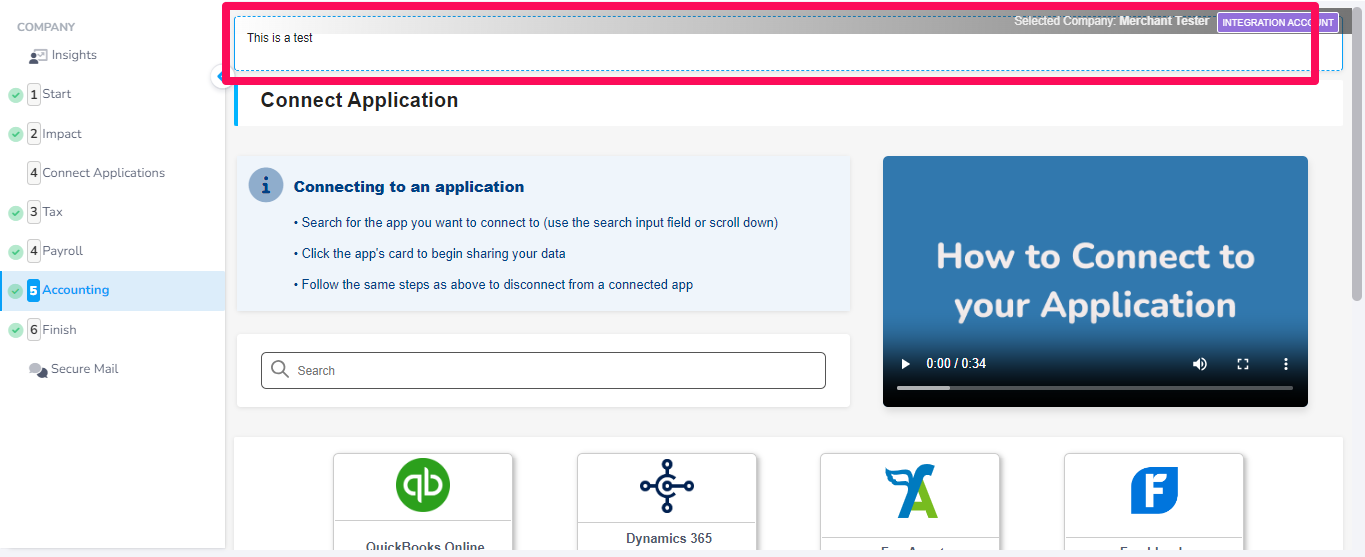
A snippet will take the place of a hint on a specific page. For example, in the image below the text “This is a test” is a snippet taking the place of a hint.
Creating a Snippet
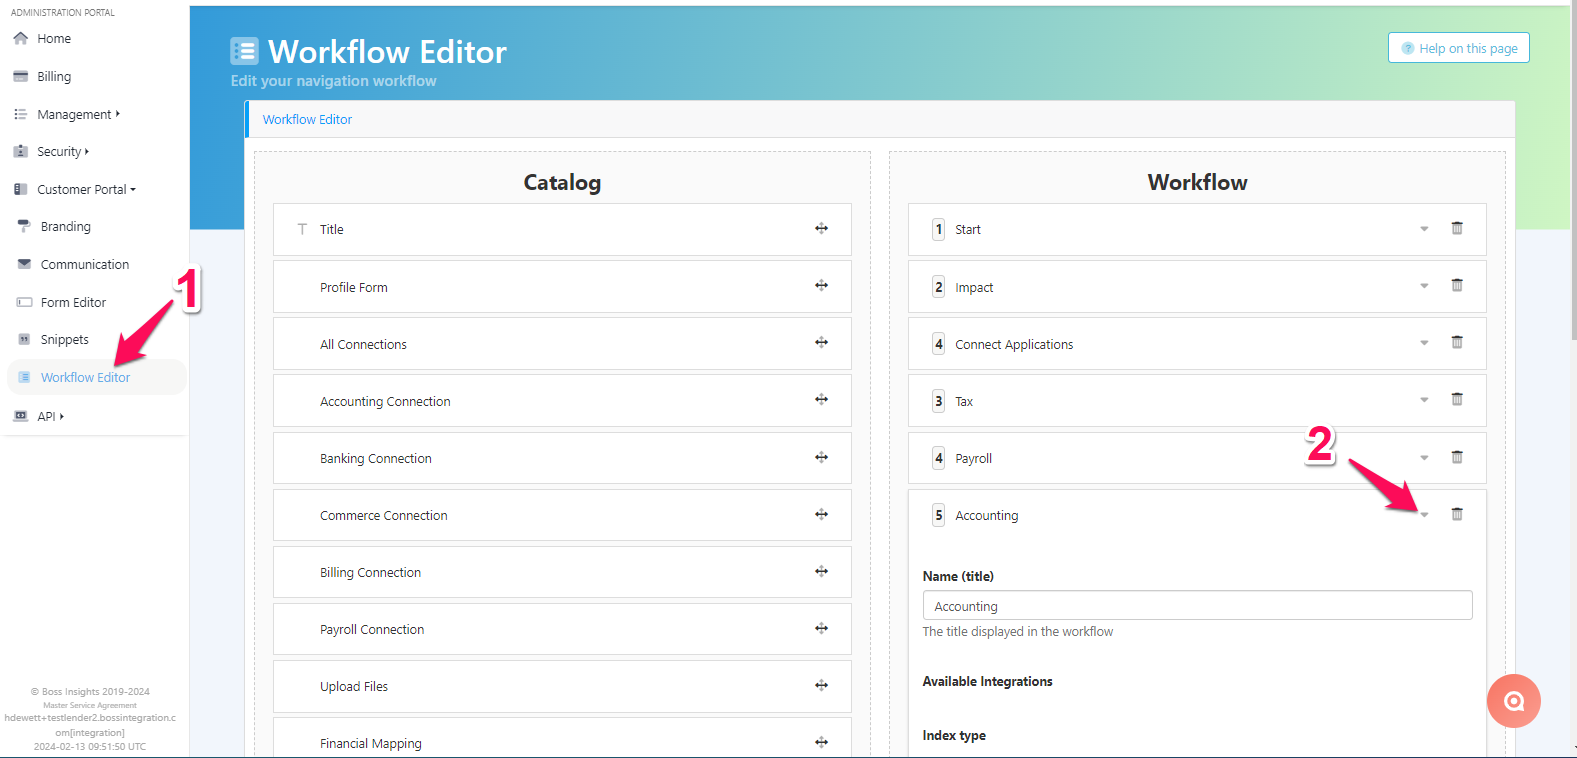
To create a snippet, please visit your administration portal. From the navigation menu, please select Customer Portal and then Snippets. This will lead you to the correct page, from here please select the “Add Snippet” button on the right.

You will be redirected to the Add Snippet page. There are three fields that need to be configured on this page.
Field | Description | Example |
|---|---|---|
Snippet Key | A unique key. Please note that this cannot be changed when it is set. This key will be used to reference the snippet. | snippet_1 |
Snippet Content | This is where you will put the information you wish to display to your business customers. Please note that the content will not accept use of the “Enter” key for new lines. | “Please upload any relevant documents on this page.” |
Active | Yes or No. If you select “No” then the snippet will become unusable. | Yes |
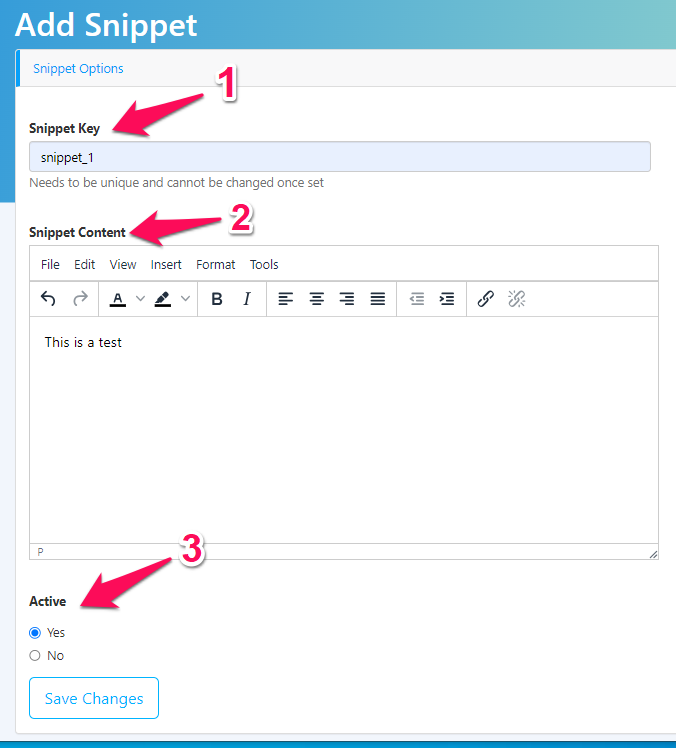
Please select “Save Changes” when you are ready to save.
Syntax
Syntax for snippets uses Twig. The general formula is as follows:
{{snippets.snippetKey|escape('js')}}
snippetKey should be replaced with the actual key of your snippet, the rest of the syntax remains the same. Please refer to Creating a Snippet for more details.
Workflow Editor
You should already your workflow set. For more information on the workflow, please see Workflow Customization.
You may insert the snippet either through the Workflow Editor or directly through the Data.JSON5 file. This section will cover the Workflow Editor.
Once on the Workflow Editor page, please select the down arrow on one of your workflow items. This will reveal a set of configuration items.
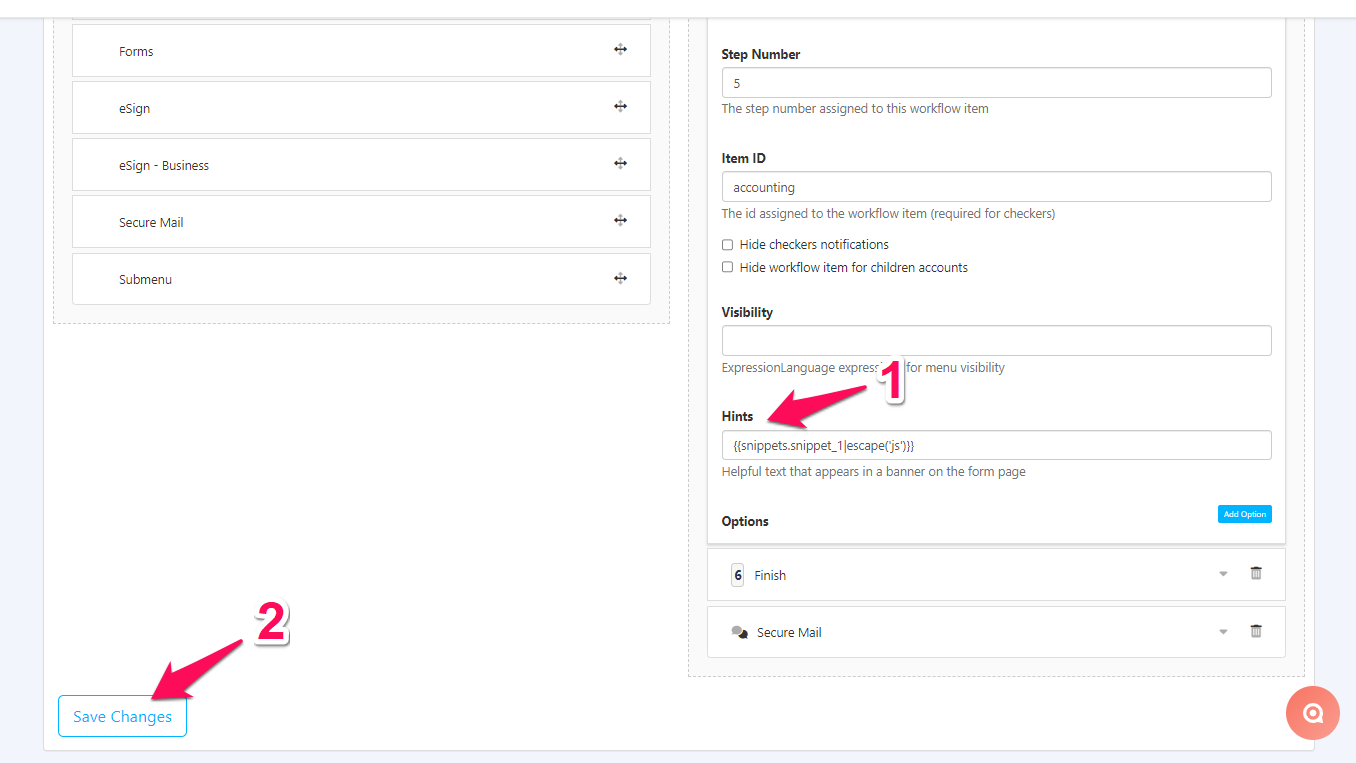
From the configuration options, please locate the Hints field towards the bottom. This is where you can copy and paste your snippet from the syntax section above. You may also add a snippet to the Name field but it is not recommended. Snippets cannot be used with any other field.
Please be sure to select the “Save Changes” button at the bottom of this page.
Now when your business customer visits the associated page, they will see the snippet at the top of their screen.
Navigation Configuration File
You may insert the snippet either through the Workflow Editor or directly through the navigation configuration file, this section will cover the latter. Please visit the workflow customization page for more details on the navigation configuration file, including how to access it.
Within your navigation configuration file, please find the workflow item/page that you would like your snippet to appear on. In the code example below, we are going to add the snippet to the Start page.
Next to the hint key, please add the snippet code as shown in the syntax section above. You may also add a snippet to the name key but it is not recommended. Snippets cannot be used with any other key.
Now when your business customer visits the associated page, they will see the snippet at the top of their screen.
{
    "menu": [
        {
            "name": "Start",
            "step": "1",
            "app": "company\/profile",
            "hint": "{{snippets.snippet_1|escape('js')}}",
            "id": "profile"
        },
        ...
    ]
}