eSign
Fillable PDFs can be uploaded to the portal to be completed by multiple parties. The eSign feature streamlines the review process for forms and ensures that these documents are kept in one centralized and secure location. When one party completes their fields, the next party is notified by email, prompting them to either sign or review. This promotes a smooth and efficient workflow.
The eSign feature is a part of the form editor, you may view the guide to learn more.
Prerequisites
Fillable PDF Form. Please ensure you have a fillable PDF form with the names of the fillable fields on hand.
A form can be made fillable with tools like Adobe Acrobat. The names of each fillable field are necessary in order for the program to locate the fields.
If you do not have the names of the fillable fields. You may use a product like PDF Editor to obtain the names. They will be saved as strings.
Form Configured Correctly. Please ensure the configuration for the fillable PDF is set up appropriately including: font size, field input sizes, positioning and order. The individual that makes the form fillable will complete this when configuring the form before uploading it to the portal.
Names of Fields. Please ensure you know the names of the fillable fields within your form. The names of each fillable field are necessary in order for the program to locate the fields.
If you do not have the names of the fillable fields. You may use a product like PDF Editor to obtain the names. They will be saved as strings.
Set Up
A folder must be created to store the fillable PDFs.
Step 1: Create eSign folder
From your administration portal, please select the “Developers” option and then the “Files” option from the left navigation menu. Here, you will see the file explorer.
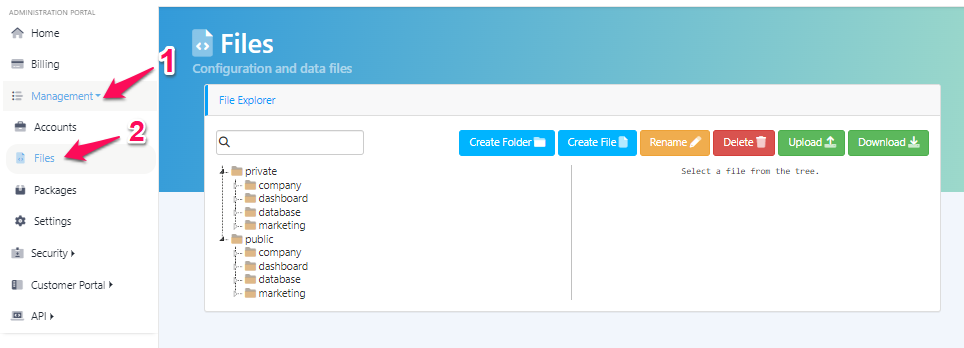
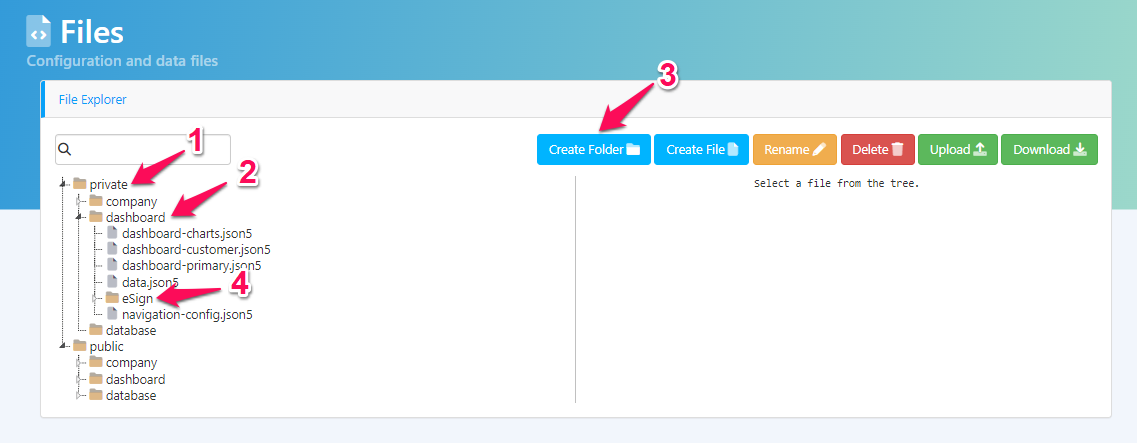
Please select the private folder and then the dashboard folder. Within the dashboard folder, please select the “Create Folder” button to create a new folder, re-name it “eSign”. The path should be private/dashboard/eSign.
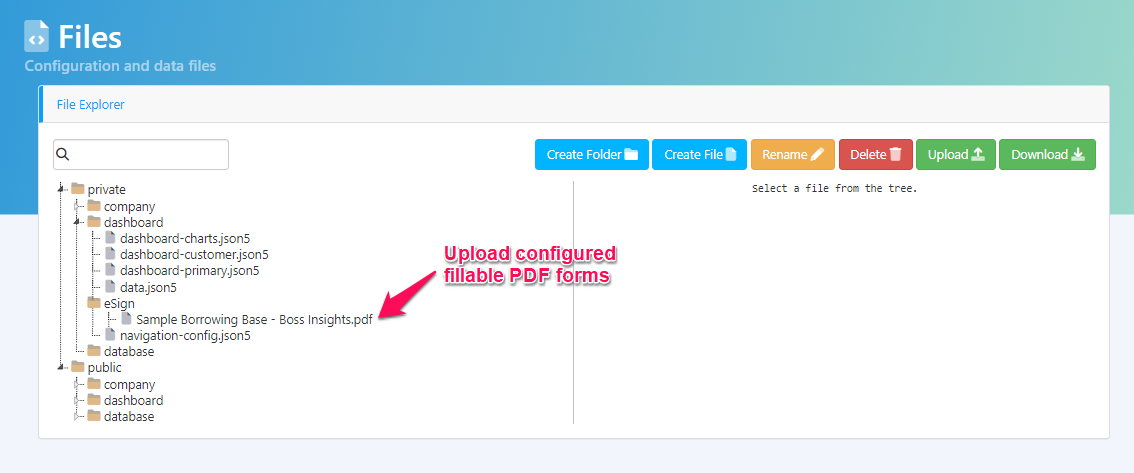
Step 2: Upload Fillable PDFs
Once the eSign folder has been created, you may upload your fillable PDF files to that folder.
Create Form
Next, you must create a new form and indicates that it is a fillable PDF.
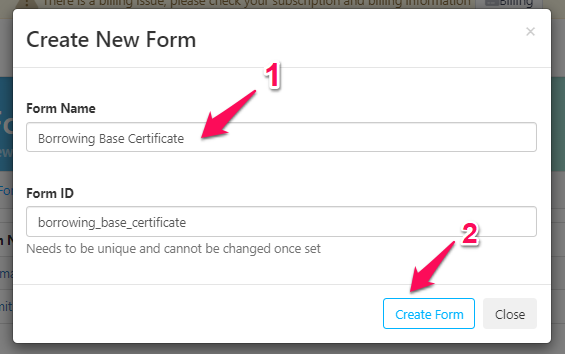
Step 1: Create a Form
From the left navigation menu, please select “Form Editor”. Then select “Create New Form”.
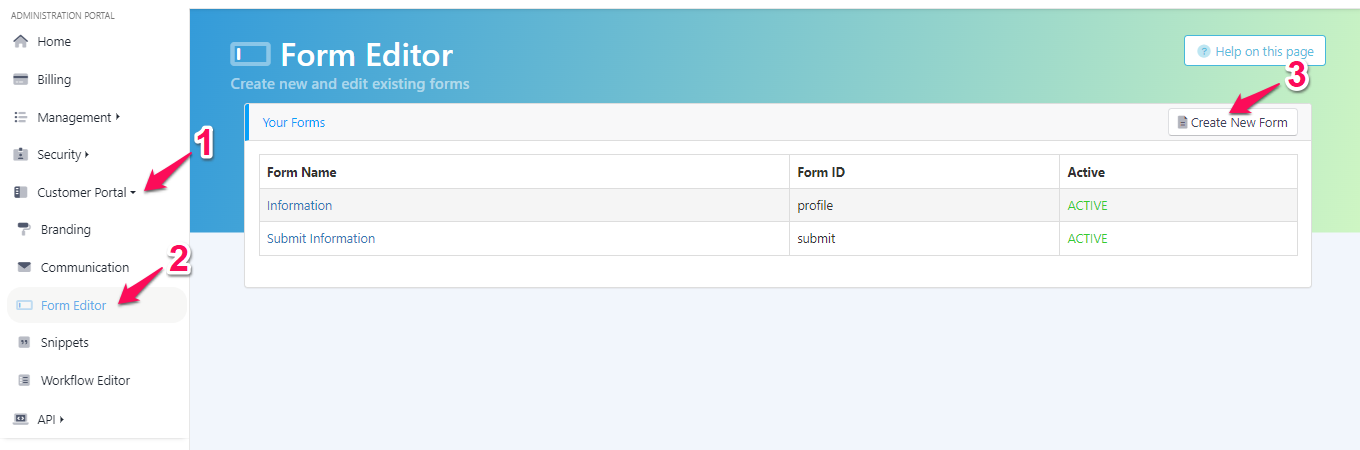
Please name your form appropriately. The Form ID will be generated automatically from the Form Name. Please select “Create Form” when you are done.
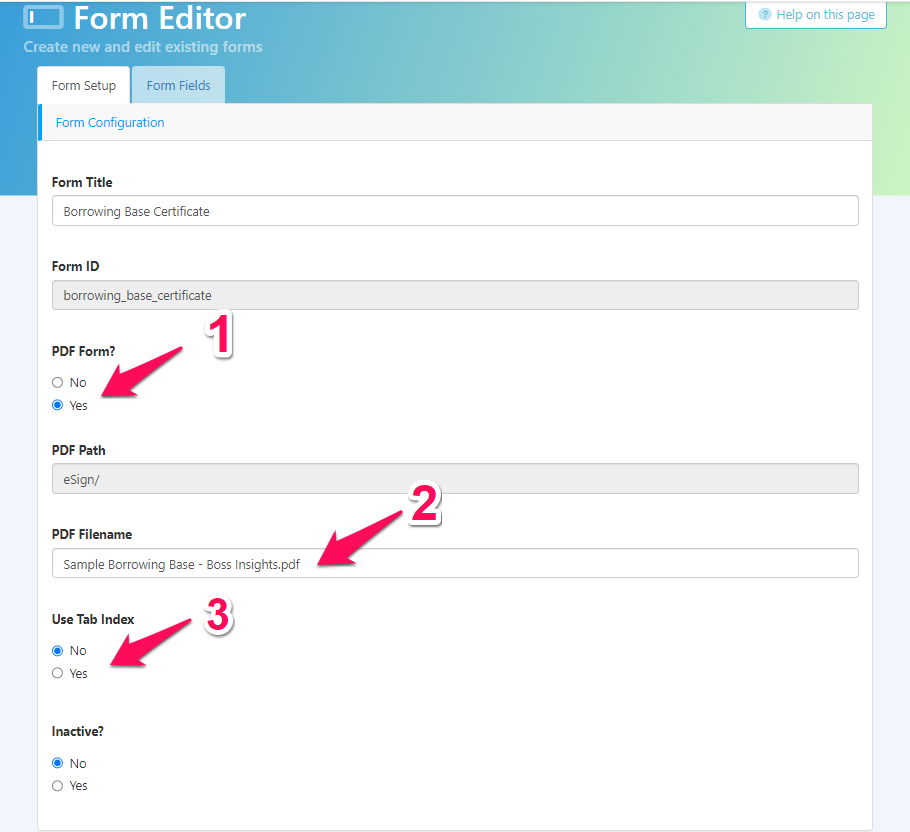
Step 2: Form Set Up
Your new form will be displayed in the table named “Your Forms”. Please select your new form.

Once you have selected your form, you will see two tabs at the top of the editor. Please click “Form Set Up”.
First, under ”PDF Form?” ensure that “Yes” is select. Second, please add the PDF Filename as it is exactly. Third, you may choose whether the form uses Tab Index or not by selecting “Yes” or “No”.
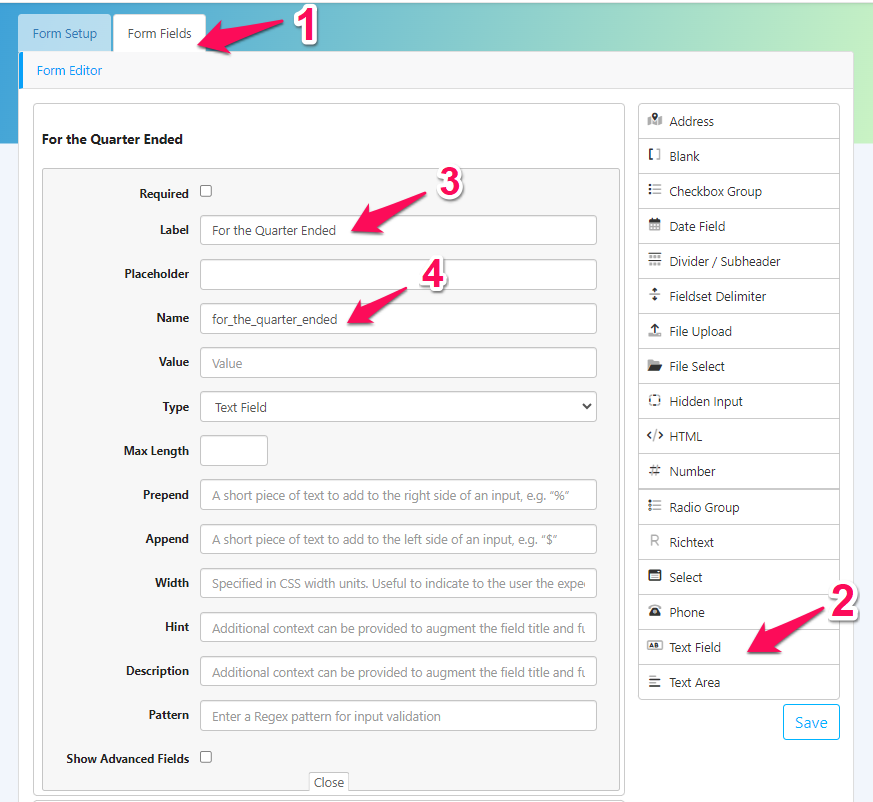
Step 3: Form Fields
Next, please click the “Form Fields” tab. Each fillable field from your fillable PDF form must be added to this form as either a “Text Field” or “Text Area”. Please drag either component from the right column to the left editor.
From here, please give the text field a Label and then a Name. For more details on using the form editor, please see our Form Editor Guide.
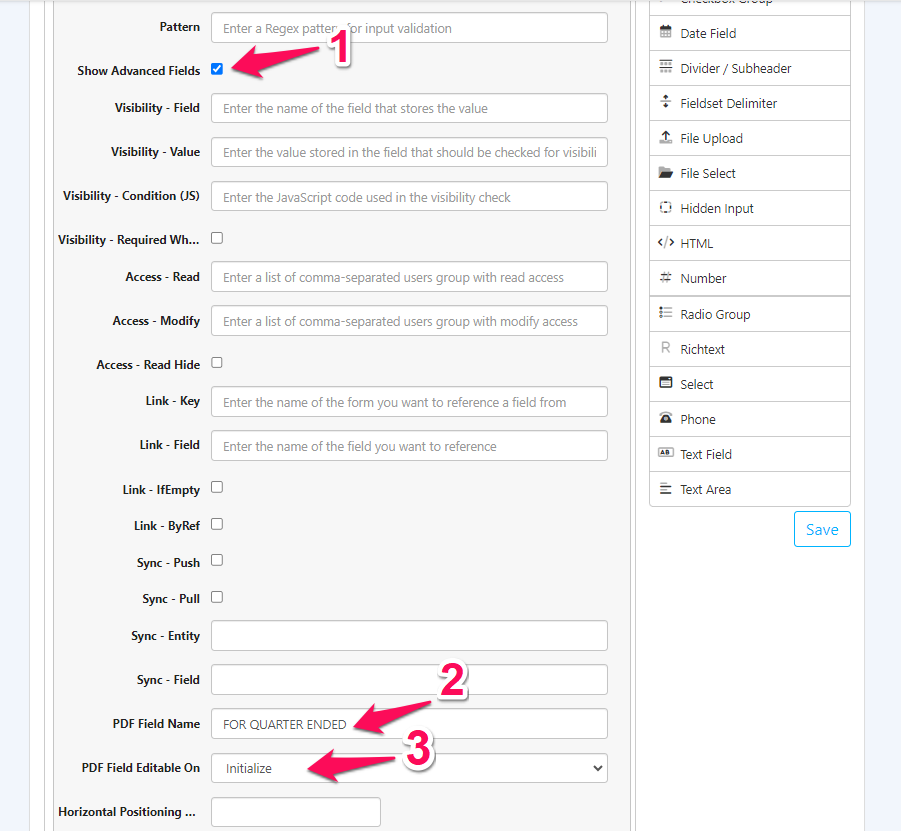
Step 4: Advanced Form Fields
From the same configuration options, please check the “Show Advanced Fields” box.
Next, please enter the field name for the fillable field under “PDF Field Name”. As a reminder, these names should have been set by the individual creating the fillable PDF form. Please refer to Step 3 of the prerequisites listed above.
Next, please choose an option from the dropdown menu under “PDF Field Editable On”. The options are listed in the table below.
Please remember to select the “Save” button at the bottom right of the screen to save your work when you are finished.
PDF Editable On Dropdown Menu Options
Option | Description | Additional Information |
|---|---|---|
Initialize | Available for the Financial Institution to fill out first before sending the form to the business. | If the Financial Institution hasn’t initialized the form and the business tries to access the form, they will receive a message as such:  |
Business Fill | Fields to be filled by the business. The business will be notified by email to log in and see which fields are assigned to them. | |
Signatory 1-5 | Order of the assignees that need to fill the information before the form can be finalized. For example, this field needs to be filled by Signatory 4. | |
Finalize | Once everyone has signed the form, Financial Institution reviews and can digitally sign it and send it to everyone. |
Step 5: Troubleshooting
If the form you uploaded was not configured properly, you may notice that fields are misplaced or the font doesn’t show up as intended. You are able to make minor changes through the editor although this is not recommended. Under the “Advanced Field Options” section is where you will find the options below.
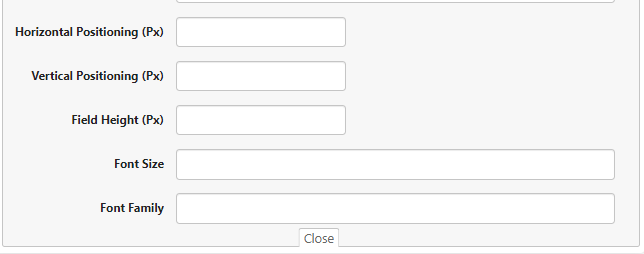
You may also refer to the table below for descriptions of each option:
Additional Configuration Options:
Option | Description |
|---|---|
Horizontal Positioning | The fillable field where the user types can be move x px to left or right. |
Vertical Positioning | The fillable field where the user types can be move x px up or down. |
Field Height | The height of the fillable field can be increased and decreased by px. |
Font Size | You may adjust the font size that the user types in when filling out fields. |
Font Family | You may adjust the font family that appears as the user fills out the form. |
Add Form To Workflow
The eSign step must be added to your workflow next. You can have multiple eSign steps that lead to different forms within your workflow.
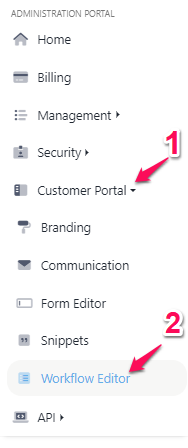
Step 1: Access the Workflow Editor
From the left navigation menu, please select “Workflow Editor”. Here you will see the current workflow that your business customer’s will be presented with.
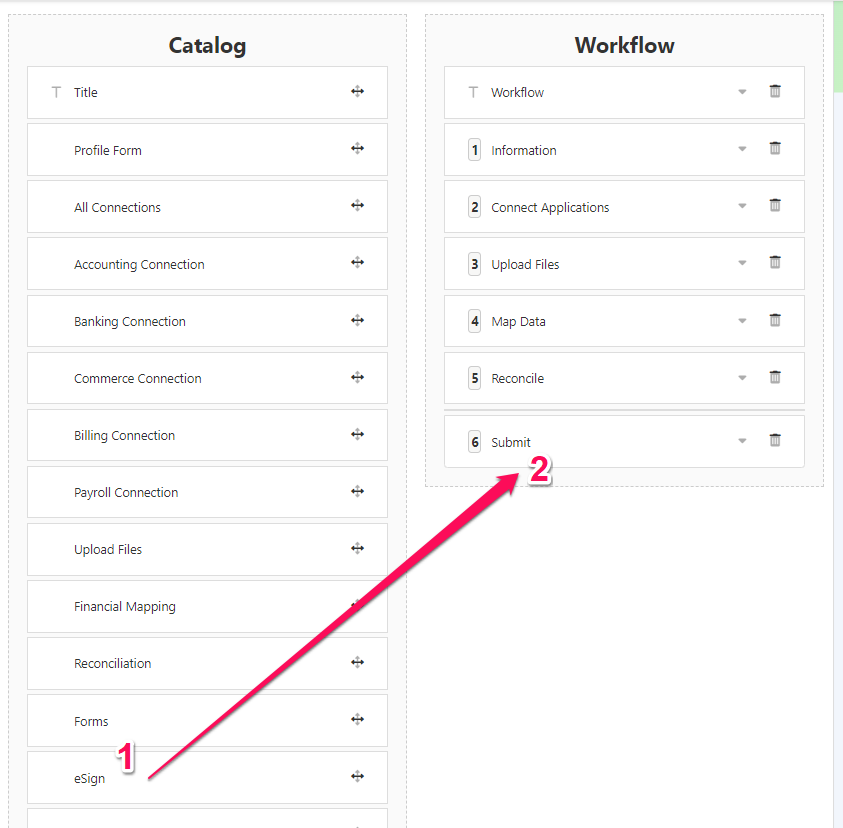
Step 2: Add the Workflow Component
Please drag the “eSign” component over from the left column into the right column.
Step 3: Configure the Workflow Component
From here you can give this step a custom name, select your eSign form from the available forms, and adjust the the step number/icon for the index type. Under Item ID is where you would place the ID if you have set up checkers.
You may also adjust the visibility in this step. If you would like this step to be only visible for your financial institution and not the business, please enter isPrimary as is (case-sensitive) into the field. On the other hand, if you would like this step visible only for the business and not your financial institution, please type in !isPrimary (case-sensitive, leading with an exclamation mark).
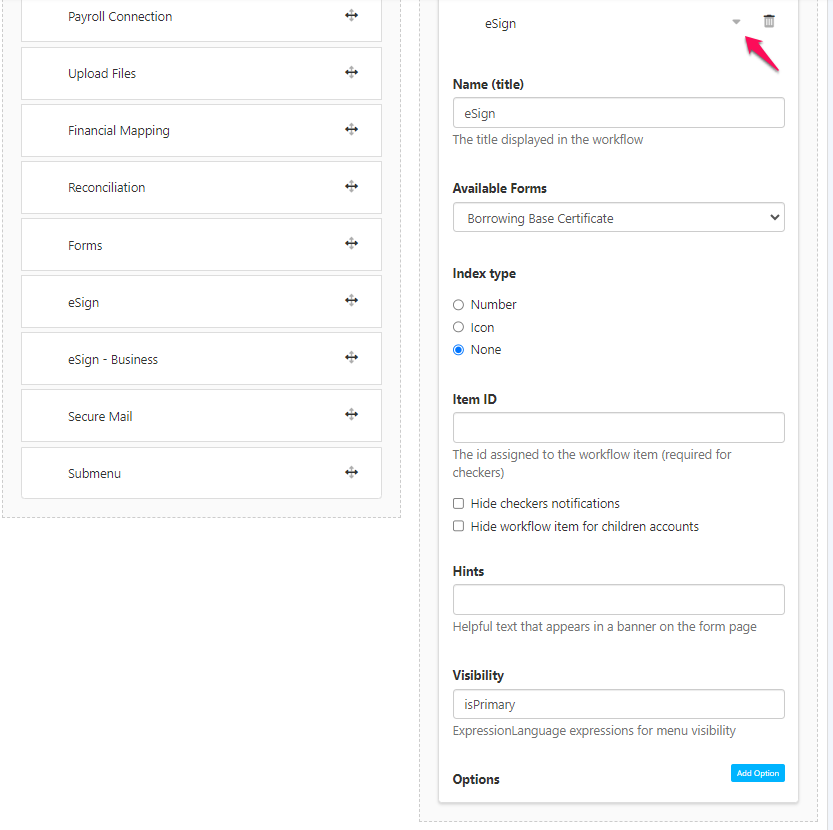
Table of Visibility Options
Financial Institution View | Business View | Visibility Field Value |
|---|---|---|
Visible | Hidden |
|
Hidden | Visible |
|
Visible | Visible | Leave field blank |
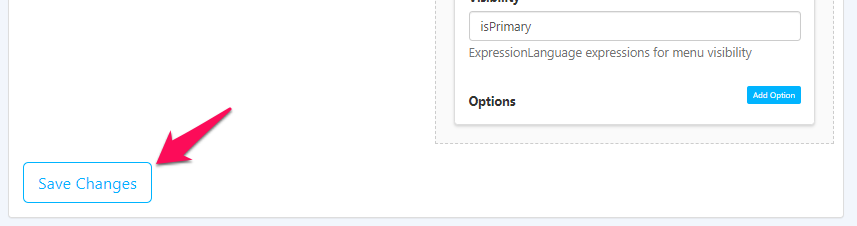
Please select the “Save” button at the bottom left of the screen to save your changes.
You have successfully set up eSign! Your new workflow options will be available to view from the both the business portal and through your portfolio.