Fetching Data from A Sandbox Account
Once you have connected to an accounting integration, you can start fetching data. Please note that if you have connected to the sandbox accounting application, the data will be a bit limited.
Prerequisites
Getting started guide. Please be sure to follow the initial guide to make both a developer and business sandbox account.
Connected to an accounting integration. If you do not have an accounting integration to connect to, you may connect to the sandbox accounting application but please ensure you connect with your business sandbox account. Alternatively, you could connect to a Quickbooks sandbox accounting application.
This guide will proceed with the assumption that that the sandbox accounting application was connected to. You may use this guide even if you connected to a different integration, the data retrieved is what will change.
Portal
As the financial institution, you are able to retrieve financial data from your business client as an Excel file. We have created a thorough guide on viewing company insights but the tutorial below will be specific to the sandbox.
Step 1: Visit your portfolio
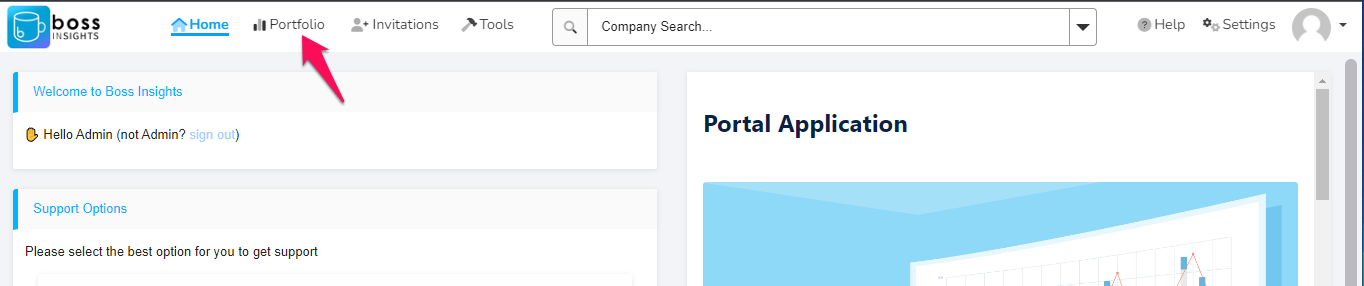
After logging into your portal with your sandbox developer account, please click the “Portfolio” tab from the top navigation menu.
Step 2: Click on the business name
On the Portfolio page, you will see a list of the businesses in your portfolio. If you have followed our Getting Started guide on the sandbox, you will only have one business listed here. Please select the business name, this is a link that will let you view their business portal. Please note that this perspective is different than signing in to the business account and viewing the portal that way.

Step 3: View the dashboard
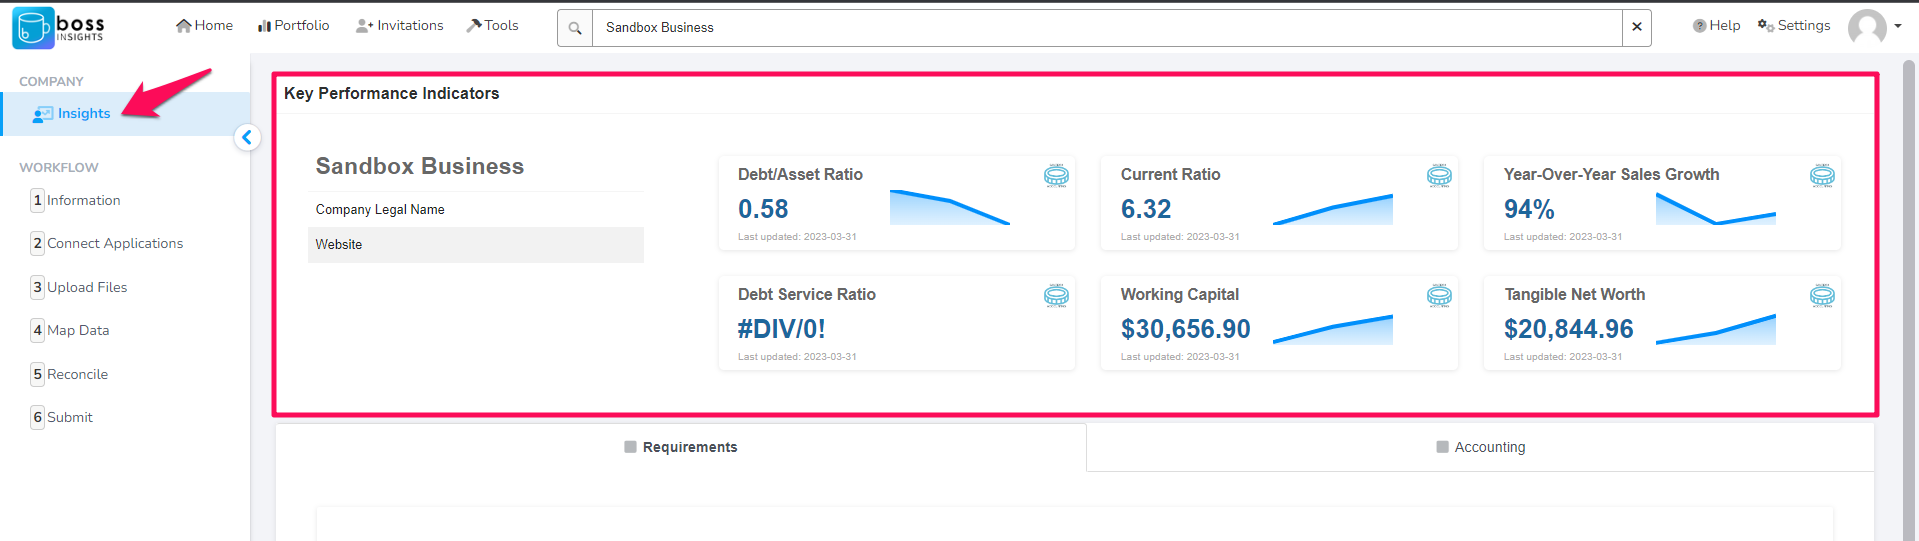
After you are redirected to a view of the business portal, please select the “Insights” item from the left navigation menu. This will take you the dashboard.
On the dashboard, you will be able to see some KPIs at the top of the page.
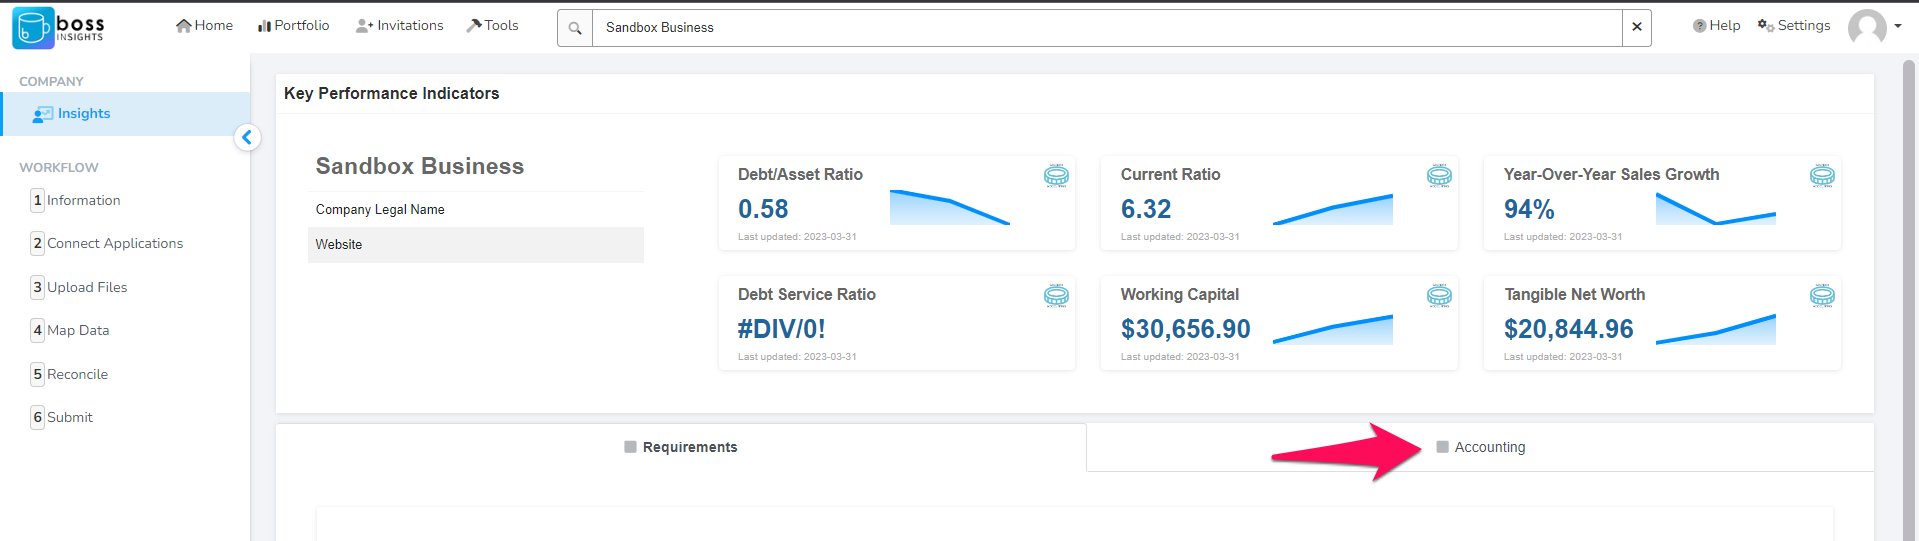
If you select the “Accounting” tab from the dashboard page, you will see available accounting data presented visually, these individual component are called “widgets”.
We offer a widget catalog where you can explore the different widgets that can be added to the portal or embedded into your own product.
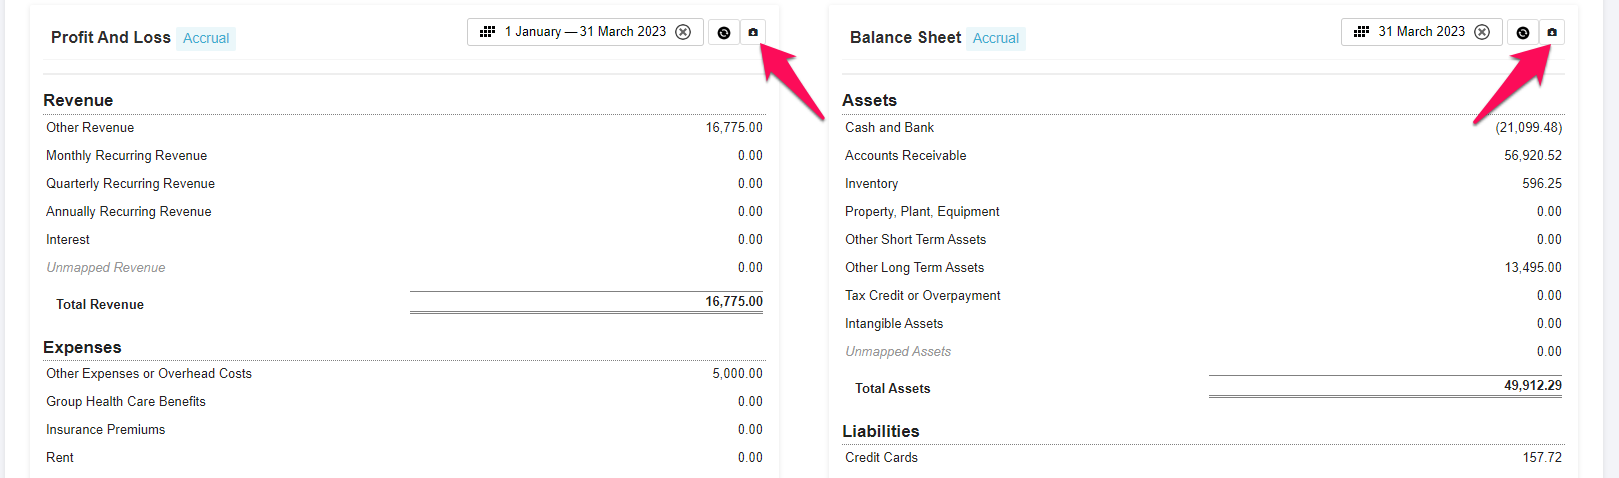
Here is an example of four different widgets.
Step 4: Download financials
While you can view the data through the dashboard. You are able to download financials reports from some widgets. The accounting tab will have a “Profit And Loss” widget and a “Balance Sheet” widget. You can click the download icon on either of them to download an Excel sheet of the data.
You may then open the downloaded reports in Excel for analysis.
API (Postman)
There are a few requirements for using the API to fetch data. We have put together an API Postman Guide that covers all the requirements and gives an example of making a request to the Accounting Transactions endpoint. As a sandbox user, you are not limited and can make a request to any endpoint found within the main API collection provided in the guide.
Please note that the sandbox accounting application is limited in data. It provides a static dataset which may have empty data for some endpoints. A few endpoints that will confidently have data include: accounting_transaction, balance_sheets, profit_and_loss.
Requirements
Account key of business customer
Your username, password, subdomain, and domain
Postman application
Postman Collection
API (Browser)
If you would not like to use Postman, you may also make requests to our API through your browser.
Additional Prerequisites:
Make a user for yourself on the business account. You will need these new user credentials to log in to the browser UI.
How to make a new user on a business account
Step 1: Find your accounts list
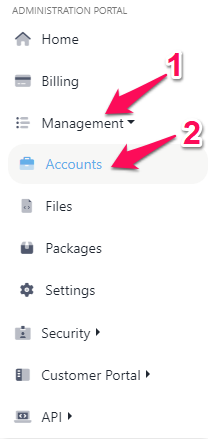
Start with logging in to your administration portal. Once you have logged in, please select Management > Accounts from the left navigation menu.
Step 2: Impersonate the business account
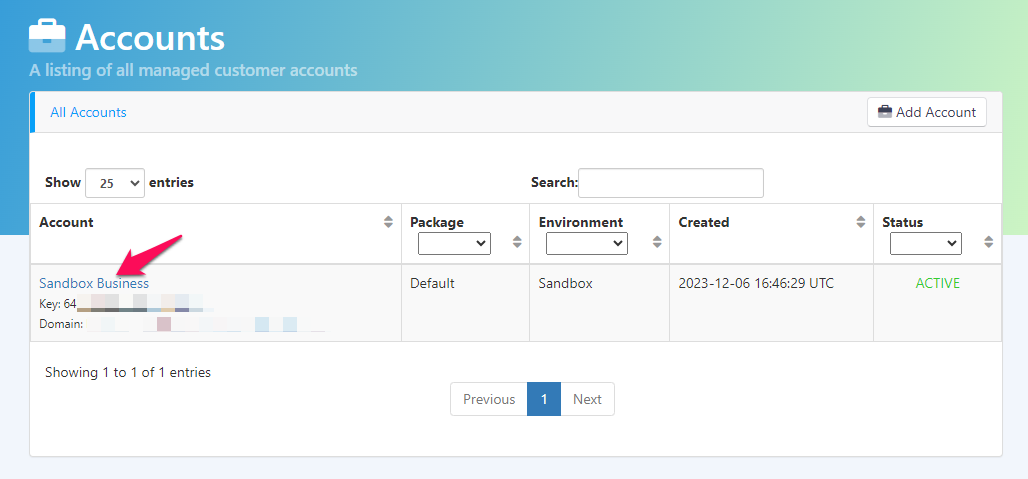
Next, please click the name of the business account you will be impersonating. This will lead to a configuration page. If you forgot your business account’s domain, you will see it listed here.
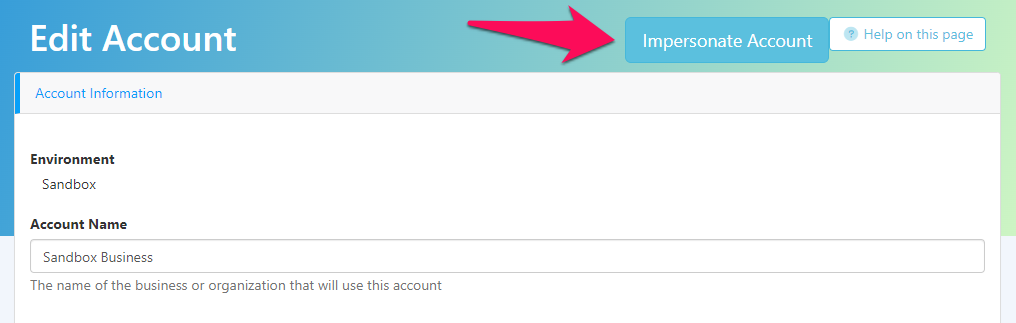
From this configuration page, please select the blue “Impersonate Account” button found in the top right. This will allow you to be a temporary user on the business account.
Step 3: Find the users list
Once you are impersonating the account, you will see a limited admin portal through the perspective of the business. Please select Security > Users from the left navigation menu. This will take you to a list of users.
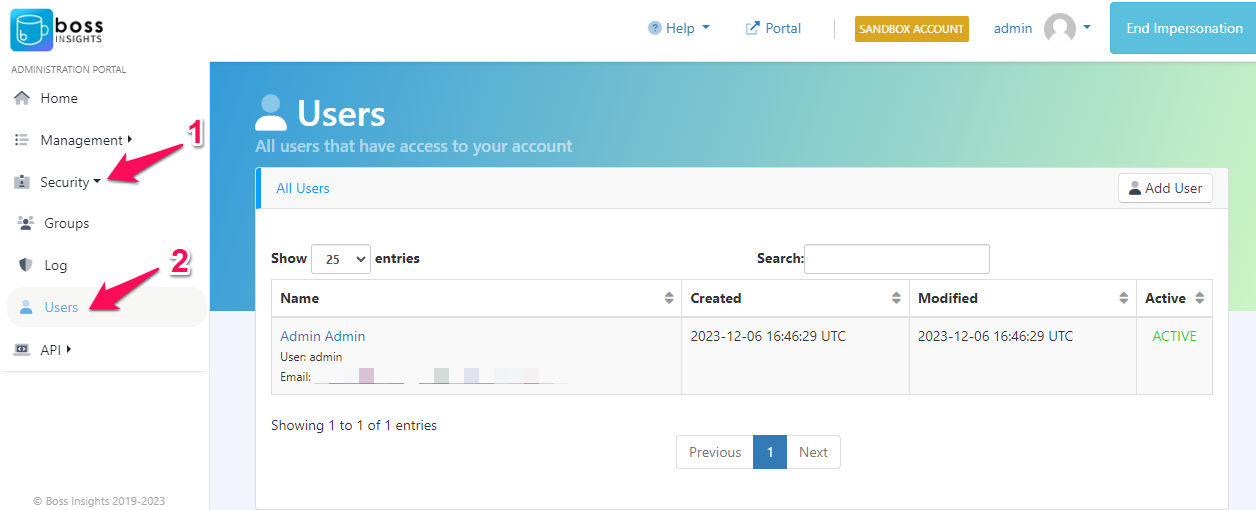
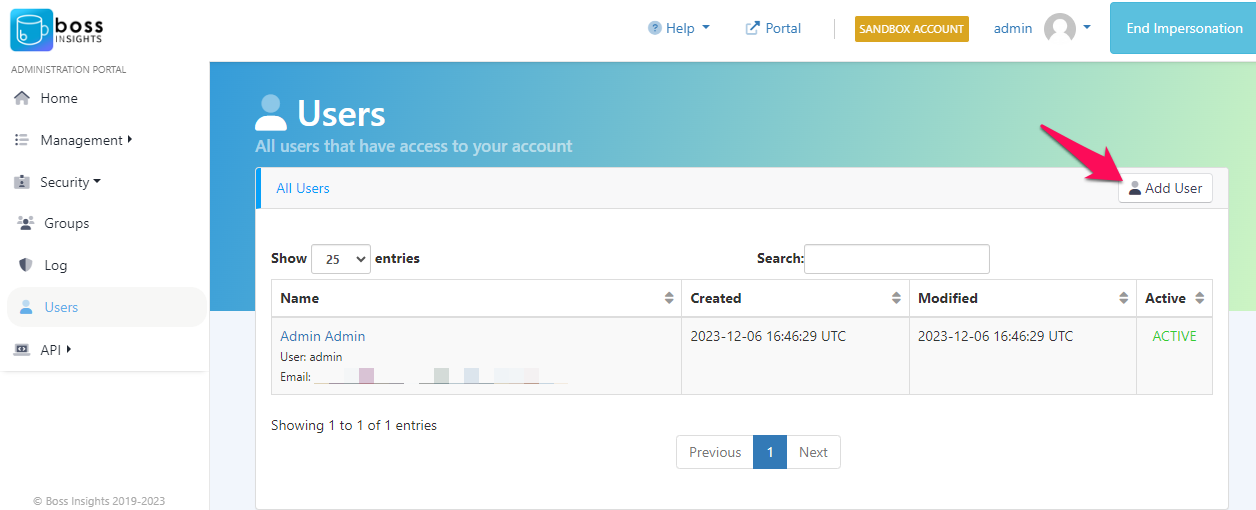
Step 4: Create new user
Next, select the “Add User” button.
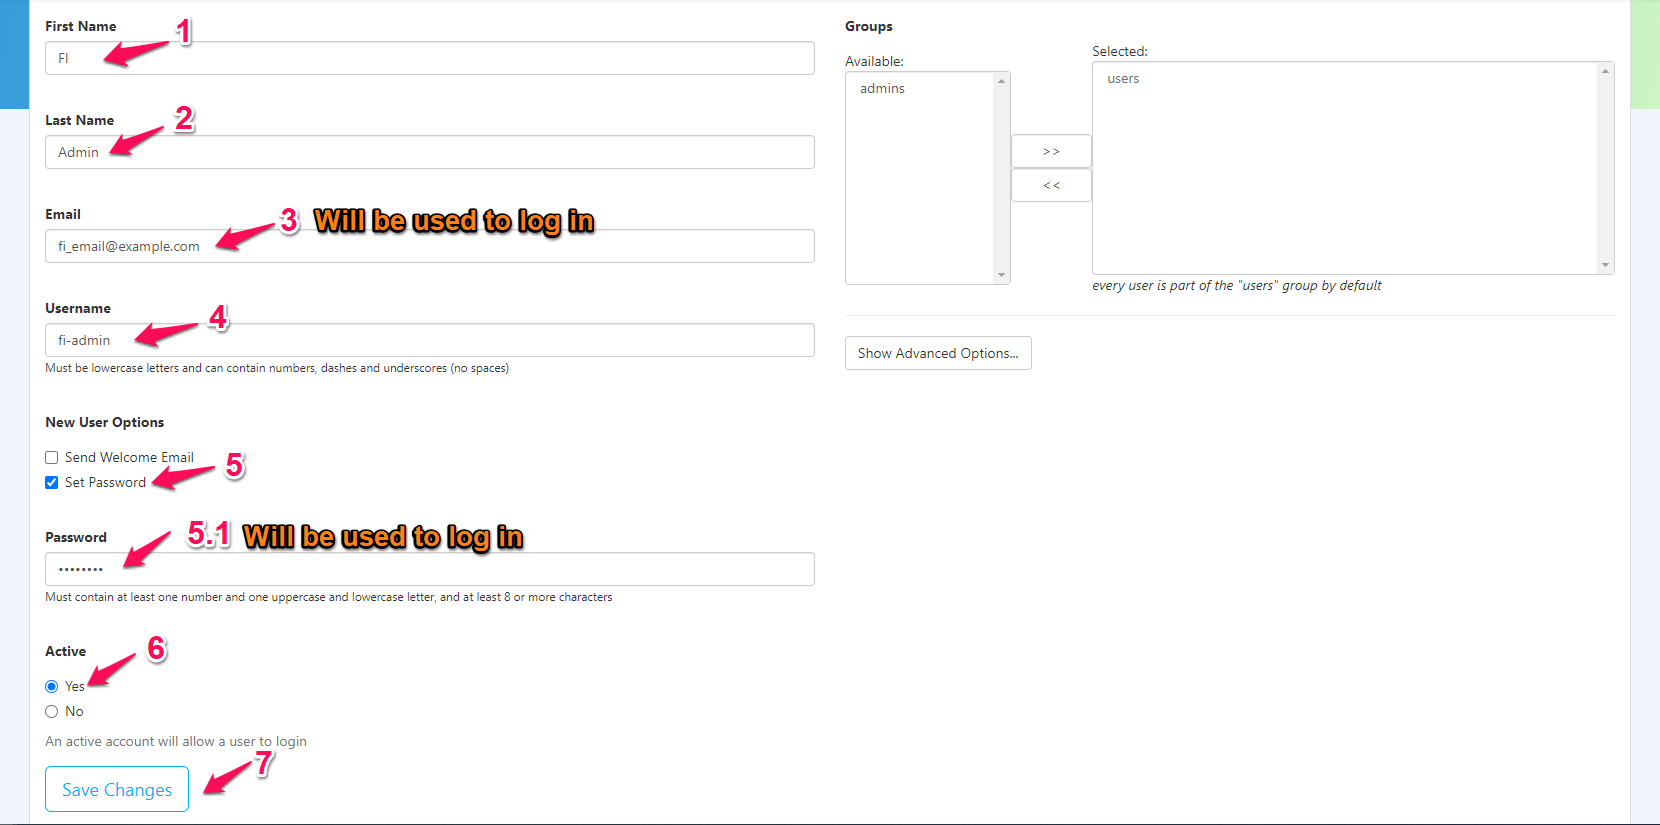
Please fill in the fields with your user information. Please ensure to check “Set Password” under “New User Option”. Please also ensure that you keep note of the email and password, as this is what you will use to authenticate into to the Browser API UI.
When you are complete, be sure to select “Save Changes” button in the bottom left.
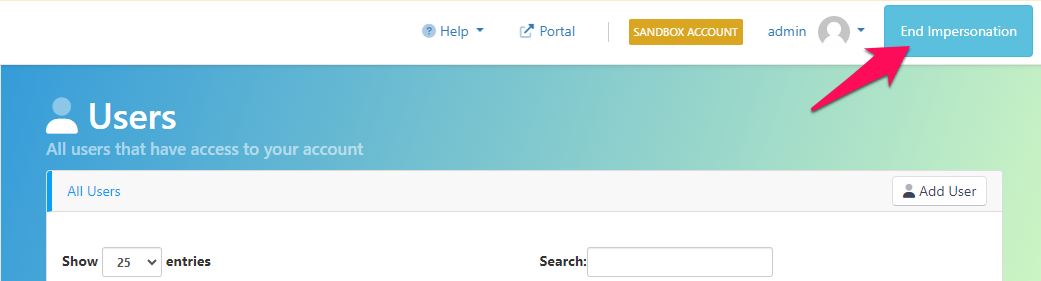
Step 5: End Impersonation
Once you have created the account, please select the “End Impersonation” button in the top right to return back to your accounts list on the financial institution’s administration portal.
With your new credentials, you are ready to access the API via the browser.
Accessing the Browser UI for API
You can access the data using “/api/” after your sandbox business URL. For example:
https://{{sandboxBusiness}}.myintranetapps.com/api/Once you reach the page, you will be prompted to log in. Please enter your new user credentials as shown in the additional prerequisites section above.
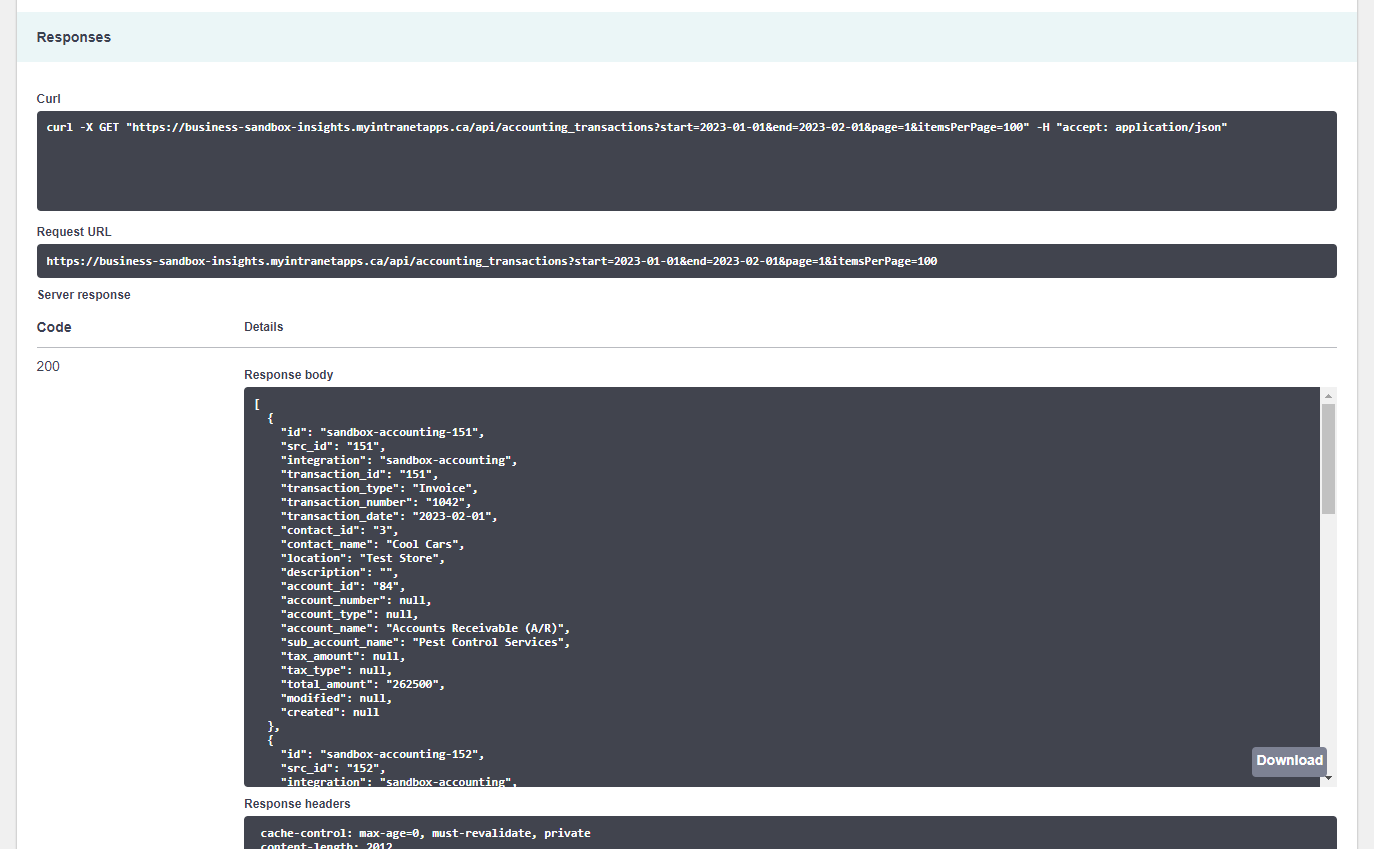
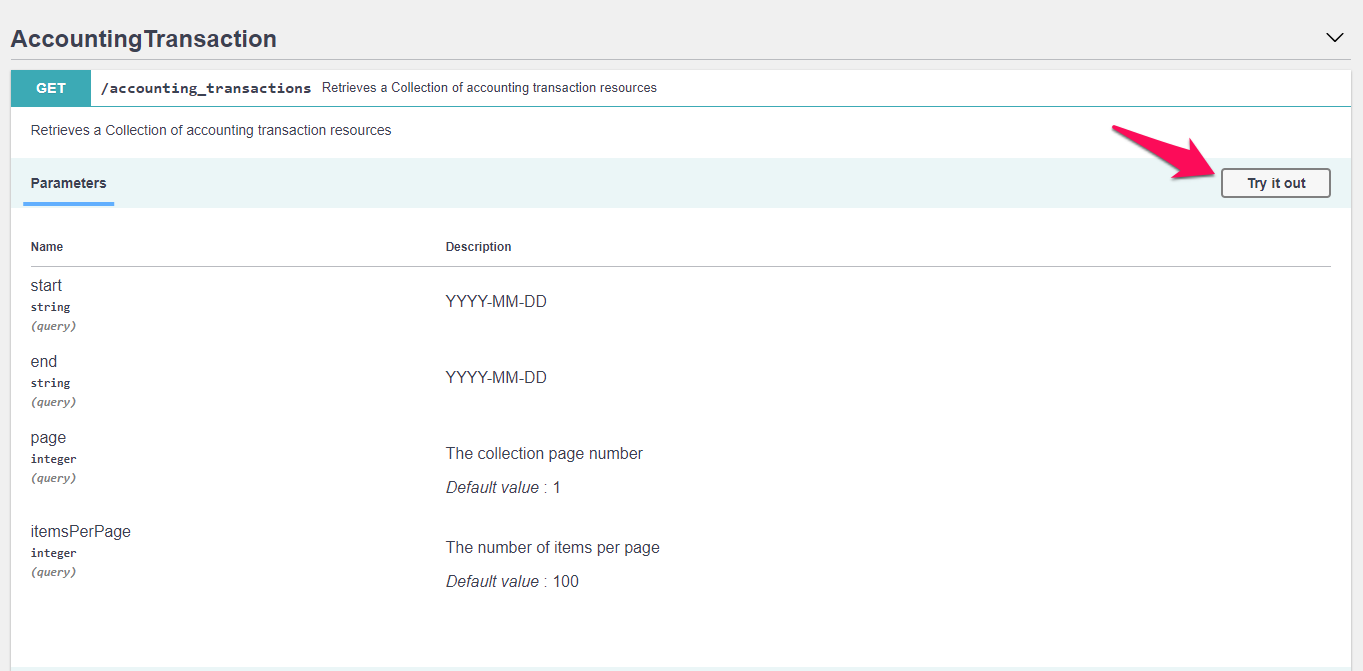
Once you have authenticated, you will see a list of endpoint. You may select any but in this example, we will show the accounting transactions endpoint. Select the endpoint and then select the “Try it out” button.
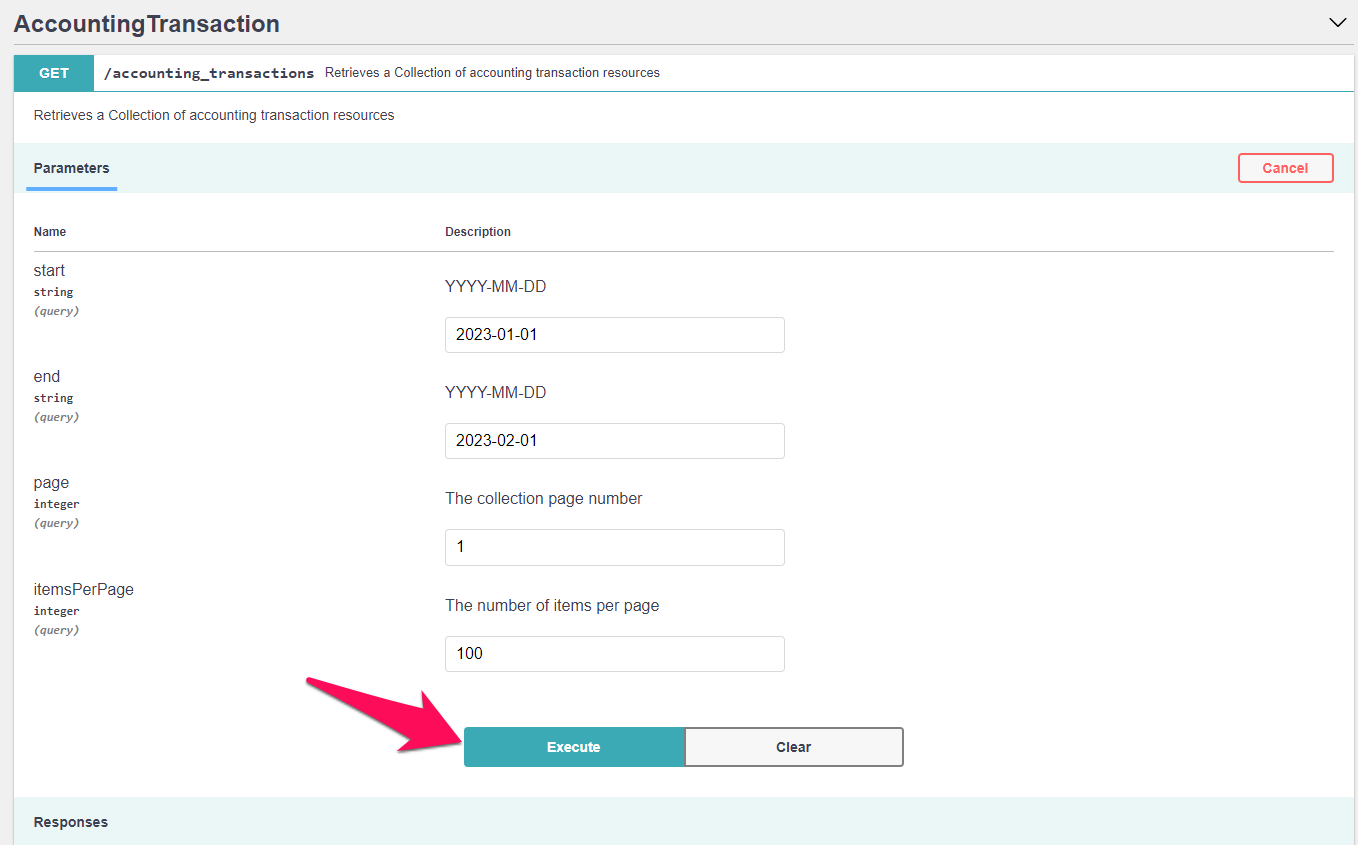
Next, fill in the necessary parameters and then select the blue “Execute button”.
If you scroll down you will see a “Responses” section. Here, you will see a 200 code and a response body if the request was successful. You may also download the response by selecting the grey “Download” button.