Adding Customers
If you want customers to sign themselves up without being invited see: Adding Customers | Opening-the-Join-Link-to-the-Public/Turning-Off-Invitations
Add a customer
To add a single customer to the platform select “Invitations” from the top navigation and then click the “Invite Account” button (shaped like a person with plus symbol), you will then be prompted to fill out some customer data fields. The only required fields are “Email” (so we can allow the customer with this email address to join the platform) and “Owner” (which corresponds to the relationship manager (or loan officer) responsible for this customer).

After they have been added they will receive an invitation email with a link to allow them to sign in. You also can notify the customer to begin using the platform at https://lender.myintranetapps.com/join.php (where “lender” should be your subdomain)
How to import a set of customers
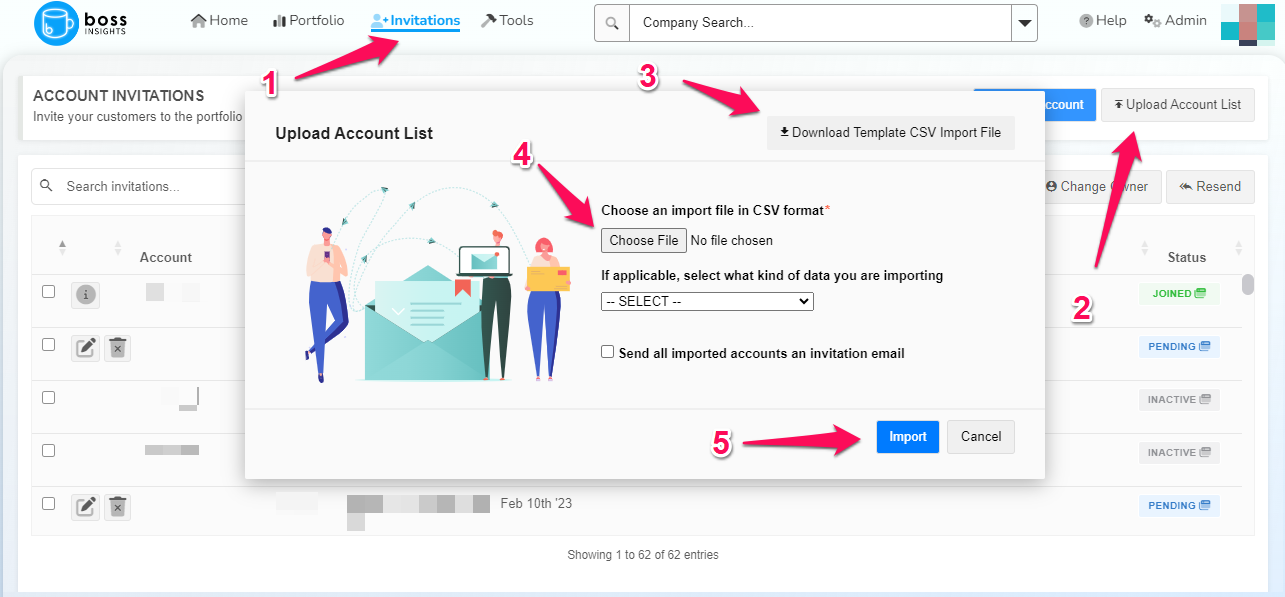
Select “Invitations” from the top navigation and then choose the “Upload Account List” icon in the top banner. A window will open that allows you to download an import template which you can fill with customer information. Please fill out the template before proceeding. Click the “Browse” button to select your import template file and choose the blue import button. The newly imported customers will be displayed in the invitation list and their `Status` will show as pending until they have been invited and joined the platform.
Inviting customers to the platform
After customers have been added to the platform, they should be notified (via email) that they need to go to https://lender.myintranetapps.com/join.php (where “lender” should be your subdomain) to complete the signup process in order to begin using the tool.
If there are multiple customers added with the same email, the customer will be prompted to select their Business Legal Name when signing up.
The customer sign up process:
By clicking on the above link, the customer will be prompted to provide their email address, business name and set up their password and subdomain (this is where the customer will log in to access their account in the future).
After filling out the information and clicking ‘Create Account,’ the customer will be prompted to check their email for a confirmation.
customers will be prompted to click the link in their email to finish confirming the sign up process.
Once the customer has verified their email, they will be able to sign in through the account url displayed on the confirmation page with the default username “admin” OR their email address and password they signed up with.
The customer will now be able to access the system in full.
For the sign up process to accept the customers email address they must have been previously added by the lender to the Pending Portfolio invitation list (either by manually adding, importing from CSV or integration with Core/CRM).
See all customers
Click on "Invitations" from the top navigation menu and a list of all customers invited and joined will be shown. The Status column indicates PENDING if they have been invited but have not yet started the application/sign up process, and will show JOINED if they have successfully followed the invitation onboarding process and signed in to the platform. If you see INACTIVE , it means that the account is inactive. You may also click these status buttons to see the invitation history.
Edit an Invitation
You can edit the data on an invited customer before they join the platform (status: PENDING ).
To edit a pending portfolio invitation, navigate to the “Invitations” page and click on the pencil icon for the invitation you would like to edit. A pop up will appear where the lender can update information regarding the invitation they selected. The send button will be visible after scrolling to the bottom of the pop up, click “Send” to commit your changes.
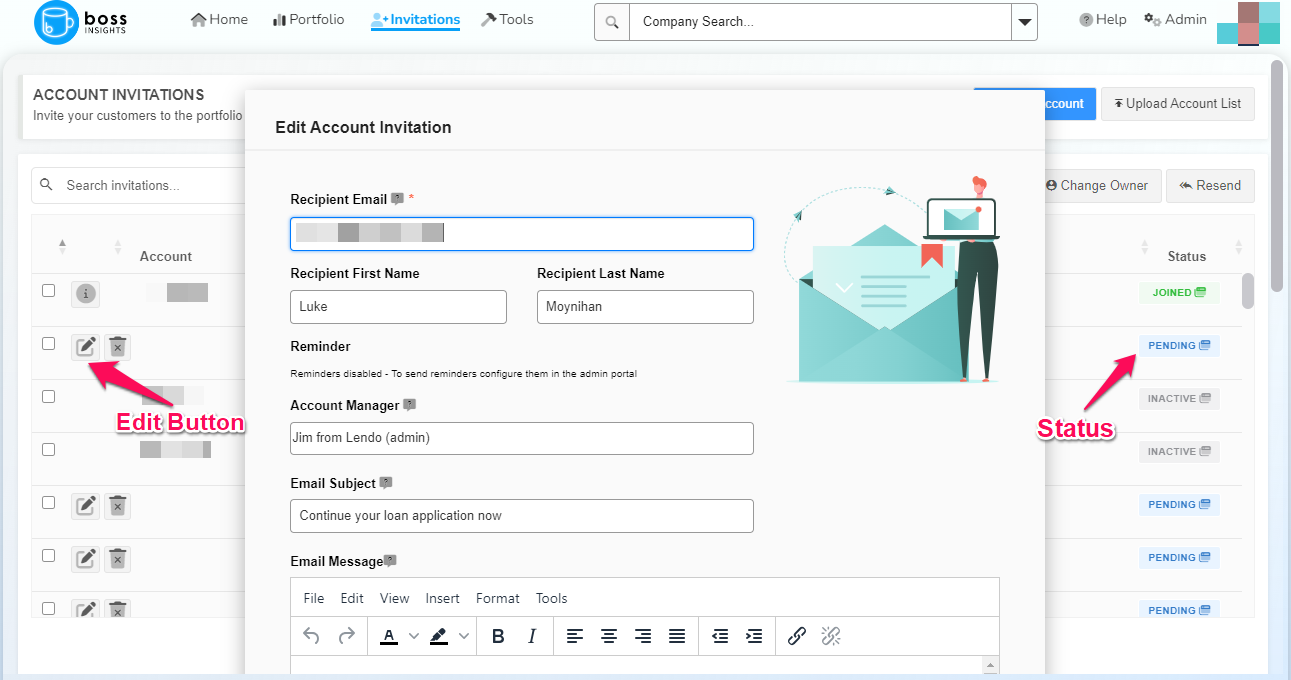
Once the customer has joined the system, their portfolio cannot be edited. You can check the status of a particular portfolio by looking under the “Status” column in invitation list.
Removing an invitation
From the Invitations page a “Remove” button is displayed beside each invitation (looks like a trash can), this button can be used if the customer has not yet joined the platform. Once the customer has joined the platform and created an account and you wish to revoke their access you will need to Remove their account instead.
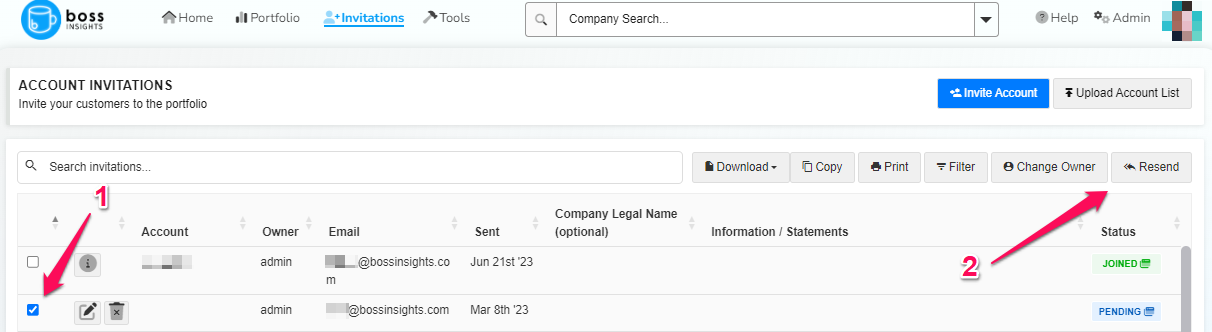
Resend Existing Invitation
If you have already sent out an invitation and the customer has not yet joined, you may send out the same invitation again. To edit the invitation before sending, see “Edit an Invitation” above.
To resend an identical invitation, click the checkbox next to each customer you would like to re-invite and then click the “Resend” button in the top right.
Troubleshooting invitation email delivery
If you suspect an invitation email is not being received for technical reasons you can access the Communication Log in the administration portal to troubleshoot whether the email bounced or otherwise.
Troubleshooting sign-up errors
Email is not on our list
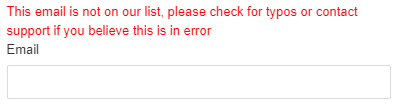
This error will appear in case your customer is not using the same email address as what you used to invite them. This error may also appear if you have not successfully invited them, but you have sent them the join link beforehand.
Checkpoint 1: Verify in your Invitation list if the email address is already there. If the email address is already there, please ask your customer to use the same email address to sign up.
Checkpoint 2: If the email address is not in your Invitation lisy, this means you have not invited the customer. If you have not been informed that Invitations are turned off for your portal, then please go back to https://docs.bossinsights.com/data-platform/Adding-Borrowers.56328219.html#AddingBorrowers-Addaborrower and invite the user.
Opening the Join Link to the Public/Turning Off Invitations
Financial Institutions may opt to open the join link to the public - which means that anyone with the link will be able to join your portal as your customer, and you do not need to invite them to the platform beforehand. This is a useful option if you don’t want your team members to go through the invitation process for each customer or in bulk, and you would like to hand-off the signup process directly to your customers.
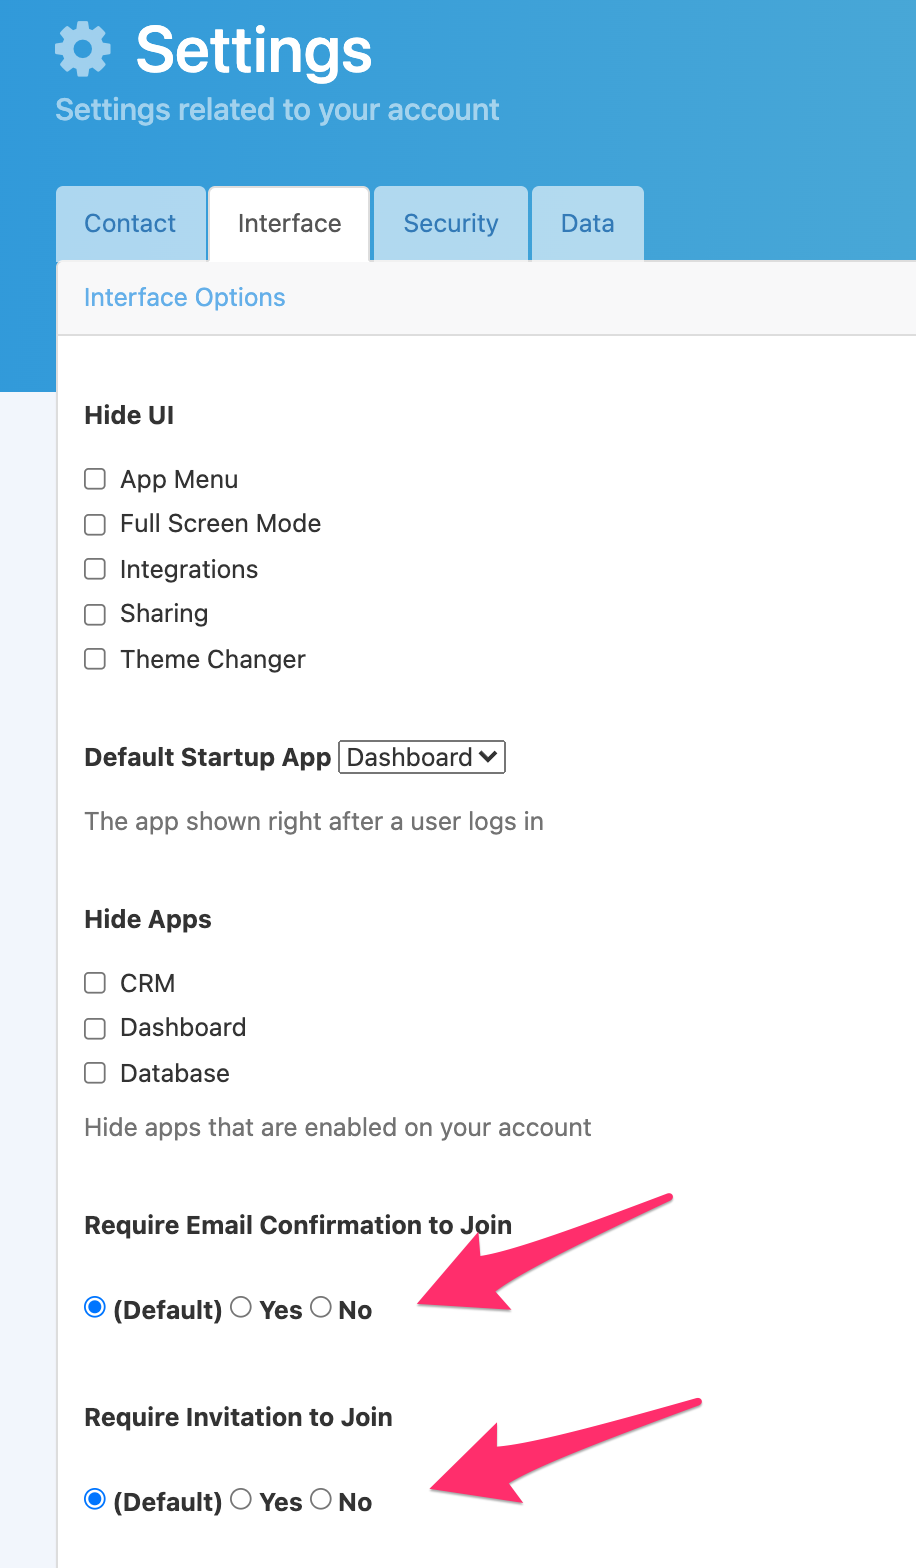
You can modify the joining workflow by going to Settings and selecting the Interface tab. From there choosing to modify the following:
Require Email Confirmation to Join - When set to Yes this will require your customer to click a link sent to their email to confirm they have entered the correct email (Useful when sending further emails such as password resets)
Require Invitation to Join - When set to Yes this will prevent a customer joining your portfolio unless they have been explicitly invited, either one at a time or via CSV upload or API.
By opening the link to everyone, you can provide a single link that your team members can direct your customers to. This is usually in the format: <financialinstitution>.myintranetapps.com/join.php, where “financialinstitution” is the address of your production portal.
The Invitation Workflow was created so that Financial Institutions can control which customers can access their portal. By opening the link to the public, you recognise that your portfolio list may include spam or unapproved users.